

Introduction
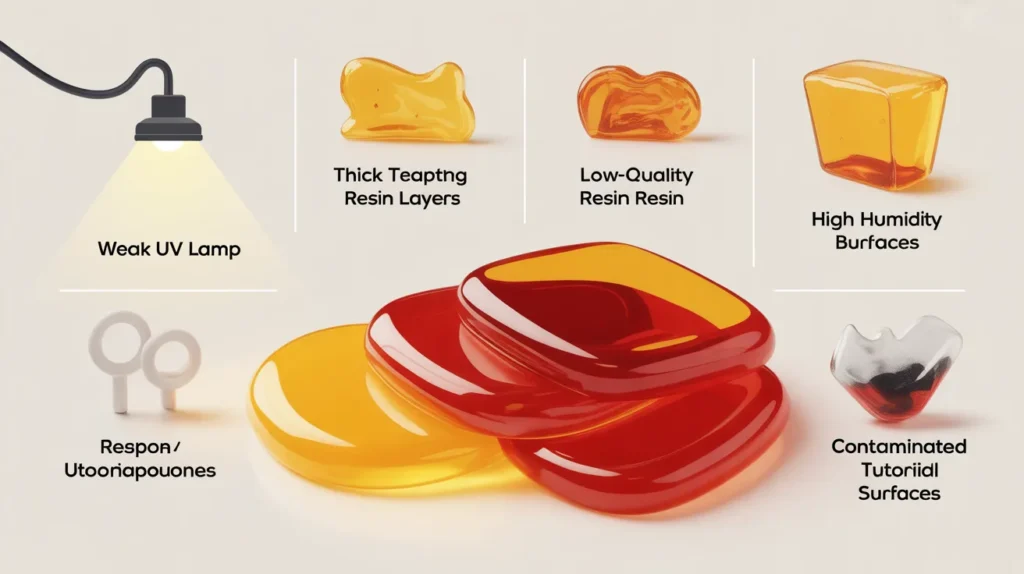
If you’re asking why my UV resin is sticky, you’re not alone. Sticky or tacky UV resin is a common problem caused by weak UV light, thick resin layers, low-quality resin, or improper curing. In this guide, you’ll learn why my UV resin is sticky, how to fix it step by step, and the best tips to prevent sticky resin in future jewelry and craft projects.
Table of Contents
Quick Fixes for Sticky UV Resin
| Problem | Why It Happens | Easy Fix |
|---|---|---|
| Weak UV lamp | Lamp does not provide enough curing power | Use a 36W–48W UV lamp |
| Wrong UV wavelength | Resin needs 365–405nm UV light | Use a compatible UV resin lamp |
| Not enough curing time | Resin did not fully harden | Cure for a few more minutes |
| Thick resin layers | UV light cannot reach deep inside | Apply thin layers and cure separately |
| Low-quality or expired resin | Old resin may not cure properly | Use fresh high-quality UV resin |
| Dust or oil contamination | Dirty surfaces affect curing | Clean molds and tools before use |
| High humidity or cold temperature | Environment slows curing process | Work in a warm, dry room |
| Too much pigment or glitter | Additives can block UV light | Use resin-safe pigments in small amounts |
What Is UV Resin and How Does It Cure?
UV resin is a type of liquid resin that hardens when exposed to ultraviolet (UV) light. It is widely used in crafts, jewelry making, coatings, and small decorative projects because it cures much faster than traditional epoxy resin. Instead of waiting many hours to harden, this material can solidify within a few minutes under the right UV light.
The curing process happens because of special chemicals inside the resin called photoinitiators. When UV light hits the resin, these chemicals react and start a chemical process called polymerization. This reaction changes the liquid resin into a solid plastic-like material.
For proper curing, the resin needs the correct UV wavelength, usually between 365 nm and 405 nm, which is commonly produced by UV lamps or nail lamps. The strength of the lamp, often measured in watts, also affects how quickly and effectively the resin cures. A stronger and properly designed UV lamp can help the material harden more evenly.
Another important factor is the thickness of the resin layer. UV light must pass through the resin to cure it completely. If the layer is too thick, the light may not reach the bottom properly, which can cause uneven curing. Temperature, cleanliness of the surface, and the quality of the resin also play a role in the curing process. When the correct light, thin layers, and good-quality resin are used, the result is usually a smooth and fully hardened finish.
The Most Common Reasons UV Resin Becomes Sticky
Sometimes resin projects look fully cured but the surface still feels tacky or soft. This usually happens when the curing process is incomplete or something interferes with the reaction. Understanding the common causes can help you fix the problem and improve future projects.
Weak or Incorrect UV Lamp
UV resin needs the correct light intensity and wavelength to cure properly. If the lamp is too weak or not designed for resin curing, the chemical reaction may not finish. This often leaves the surface slightly sticky.
Not Enough Curing Time
Even though UV resin cures quickly, it still requires enough exposure to light. Removing the piece too early can stop the curing process before it fully hardens.
Resin Layer Is Too Thick
UV light must pass through the resin to cure it completely. When the layer is too thick, the light cannot reach the bottom layers effectively. As a result, the top may harden while the inside remains soft.
Low-Quality or Expired Resin
The quality of the resin plays a major role in the final result. Old or low-grade resin may lose its ability to cure properly. Expired resin can also cause uneven hardening or tacky surfaces.
Dust, Oil, or Contamination
If the mold, tools, or working surface are not clean, small amounts of dust, oil, or fingerprints can affect the curing process. Contamination may prevent the resin from hardening evenly.
High Humidity or Low Temperature
Environmental conditions can also affect resin curing. Very humid or cold environments may slow down the reaction and leave the surface slightly sticky.
Incompatible Pigments or Additives
Some colorants, glitters, or powders are not designed for UV resin. These additives can block UV light or interfere with the curing reaction, leading to soft or tacky results. Understanding these common causes can help you identify what went wrong and make simple adjustments to achieve a smooth and fully cured resin surface.
Weak UV Light or Wrong UV Lamp
The strength and type of UV light play an important role in the curing process. If the lamp is too weak or not designed for resin curing, the material may not harden completely. This often results in a surface that feels soft or tacky.
Most UV resins are designed to cure under a wavelength between 365 nm and 405 nm. If the lamp produces light outside this range, the photoinitiators inside the resin may not activate properly. Because of this, the chemical reaction needed to harden the resin will not finish. Another factor is lamp wattage. Low-power lamps may take much longer to cure resin, and sometimes they cannot provide enough intensity to fully harden the surface. A stronger lamp allows the light to penetrate the resin more effectively and complete the curing reaction.
The distance between the lamp and the resin piece also matters. If the lamp is too far away, the light intensity becomes weaker before reaching the surface. Keeping the resin close to the light source helps improve curing results. Using a reliable UV lamp made specifically for resin projects can make a big difference. When the correct wavelength, proper wattage, and good positioning are used, the resin is more likely to cure evenly and produce a smooth, solid finish.
Resin Layer Is Too Thick
One of the most common problems during curing happens when the resin layer is poured too thick. UV light must pass through the material in order to harden it completely. If the layer is very thick, the light may only cure the top surface while the deeper parts remain soft.
This happens because UV light has limited penetration. When too much resin is applied at once, the light cannot reach the bottom layers effectively. As a result, the surface may look solid, but the inside can still be uncured.
A better approach is to work in thin layers. Pour a small amount of resin, cure it under the UV lamp, and then add another layer if more thickness is needed. This method allows the light to reach every layer and ensures the entire piece cures properly. Thin layering also improves the overall quality of the final result. It reduces bubbles, helps the resin cure evenly, and creates a smoother and more durable finish. Taking a little extra time to cure resin step by step can prevent many common curing issues.
Poor Quality or Expired UV Resin
The quality of the resin you use has a direct impact on how well it cures. High-quality UV resin is formulated with the right balance of ingredients so it can harden quickly and evenly under UV light. When the product is low quality, the curing reaction may not work as effectively, which can lead to a soft or tacky surface.
Another important factor is shelf life. Like many craft materials, UV resin does not last forever. Over time, the chemical components inside the resin can start to break down. When this happens, the resin may become thicker, cloudy, or slower to cure. You can often recognize old or damaged resin by a few signs. It may have a strong unusual smell, a yellow tint, or a thicker consistency than normal. These changes usually mean the resin is no longer performing as it should.
To avoid these problems, it is best to buy resin from reputable brands and check the expiration date before using it. Storing the bottle in a cool, dark place and keeping it tightly closed can also help maintain its quality. Using fresh, reliable resin greatly improves the chances of getting a smooth and fully hardened finish.
Environmental Factors (Temperature & Humidity)
The environment where you work can also affect how well resin cures. Temperature and humidity both play an important role in the curing process. If the conditions are not suitable, the resin may take longer to harden or may not cure evenly.
Temperature is one of the key factors. Resin generally cures best in a warm room. If the workspace is too cold, the chemical reaction slows down, which can prevent the material from hardening properly. A room temperature between 20°C and 25°C (68°F to 77°F) is usually ideal for most resin projects.
Humidity can also cause problems during curing. When the air contains too much moisture, it may interfere with the surface of the resin. High humidity can sometimes lead to a cloudy appearance or leave the surface slightly tacky. Proper airflow and a stable workspace can improve curing results. Working in a clean, dry, and moderately warm environment helps the resin harden more consistently. Controlling these conditions can make a noticeable difference in the quality of the final finish.
How to Fix Sticky UV Resin (Step-by-Step Solutions)
If your resin project feels tacky after curing, there are several simple ways to fix the problem. In many cases, the issue can be corrected without starting the project again. The following steps can help you harden the surface and improve the final result.
Cure the Resin Again Under UV Light
Sometimes the resin simply needs more exposure to UV light. Place the piece back under the lamp and allow it to cure for a few additional minutes. Turning the piece and curing it from different angles can also help ensure that all areas receive enough light.
Apply a Thin Top Coat
If the surface still feels slightly sticky, applying a thin layer of fresh UV resin on top can help. Spread a very small amount evenly over the surface and cure it again under the lamp. This new layer often seals the piece and creates a smooth, hard finish.
Clean the Surface With Alcohol
In some cases, the sticky feeling comes from a thin residue on the surface. Gently wiping the piece with isopropyl alcohol and a soft cloth can remove this layer and make the surface smoother.
Use a Clear Sealer or Protective Coating
A clear spray sealer or protective coating can also solve minor tackiness. These products create a hard protective layer on top of the resin and improve the overall appearance of the project.
Check Your Equipment and Materials
If the problem happens often, it may be time to review the tools and materials you are using. A stronger UV lamp, better-quality resin, and thinner layers can help prevent curing issues in future projects.
Tips to Prevent Sticky UV Resin in the Future
Preventing tacky surfaces starts with proper preparation and careful curing. By following a few simple tips, you can ensure your resin projects harden smoothly and consistently every time.
Use High-Quality Resin
Invest in resin from reputable brands. Good-quality products are formulated to cure fully and reliably, reducing the chances of a soft or sticky surface.
Work in Thin Layers
Pouring resin in thin layers allows UV light to penetrate evenly. This ensures that each layer cures completely and prevents uncured spots from forming.
Choose the Right UV Lamp
Use a UV lamp with the correct wavelength (typically 365–405 nm) and sufficient wattage. Position the resin close enough to the light source for consistent exposure on all surfaces.
Maintain a Clean Workspace
Dust, fingerprints, and oil can interfere with curing. Make sure molds, tools, and hands are clean before handling resin.
Control Temperature and Humidity
Work in a moderately warm and dry environment. Ideal room temperatures help the curing reaction proceed efficiently, while low humidity prevents surface issues.
Follow Recommended Curing Times
Always allow enough time for the resin to harden fully. Rushing the process is a common cause of tacky results.
Avoid Incompatible Additives
Use pigments, glitters, and other additives that are specifically designed for UV resin. Incompatible materials can block UV light or disrupt the curing process.
By applying these preventive measures, you can achieve smooth, hard, and professional-looking results for every project. Careful preparation and attention to detail make sticky resin a rare occurrence.
Final Thoughts
Dealing with sticky resin can be frustrating, especially when you’ve spent time on a craft or jewelry project. Understanding why my uv resin is sticky is the first step to preventing and fixing the problem. Most issues occur due to insufficient curing, incorrect lamp type, thick layers, poor-quality resin, or environmental factors like humidity and temperature.
By using a proper UV lamp, working in thin layers, choosing high-quality resin, and maintaining an ideal workspace, you can avoid tacky surfaces and achieve smooth, fully hardened results. If the surface does become sticky, simple solutions like additional curing, applying a thin top coat, or cleaning with alcohol can often save the piece.
Following these tips not only improves the finish of your projects but also helps you gain confidence in resin crafting. With the right tools, techniques, and environment, tacky surfaces become a thing of the past, allowing you to enjoy flawless results every time.
FAQs
Why is my resin sticky even after curing?
A sticky resin surface usually happens when the resin doesn’t cure completely. This can be caused by weak UV light, short curing time, thick resin layers, or low-quality resin. Environmental factors like humidity and temperature can also affect the curing process.
How long should I cure UV resin?
Curing time depends on the thickness of the layer and the strength of your UV lamp. Thin layers usually cure within 2–5 minutes under a strong lamp. Thicker layers may require multiple thin pours or longer exposure to ensure the resin hardens evenly.
Can I fix resin that didn’t cure properly?
Yes! You can often save partially cured resin by exposing it to additional UV light, applying a thin top coat, or gently cleaning the sticky surface with isopropyl alcohol. Using these methods ensures a smooth, fully hardened finish.
Does resin quality affect curing?
Absolutely. Poor-quality or expired resin may not cure properly, leaving the surface tacky or uneven. High-quality resin is formulated to react efficiently under UV light and provides better overall results.
How do environmental factors impact resin curing?
High humidity, low temperatures, and poor airflow can slow down the curing process. Working in a clean, dry, and moderately warm environment ensures consistent hardening and prevents sticky surfaces.
Can additives like pigments or glitter cause sticky resin?
Yes. Some pigments, dyes, or glitters are not compatible with UV resin and may block light or interfere with curing. Always use additives specifically designed for UV resin to ensure proper hardening.