
1. Introduction
If you’re working with UV resin and notice a milky, hazy, or frosted look instead of a crystal-clear finish, you’re likely asking why is my UV resin cloudy even though you followed the instructions. This is a common issue faced by beginners and experienced makers alike, especially in jewelry and small craft projects where clarity matters most.
In simple terms, UV resin turns cloudy when it doesn’t cure or settle properly. Problems like incomplete curing, trapped moisture, air bubbles, or an unsuitable curing environment can prevent the resin from achieving a transparent finish. Sometimes the resin feels hard to the touch but is still not fully cured internally, which affects how light passes through it.
The good news is that cloudy UV resin is usually preventable and in many cases, fixable. By understanding what causes cloudiness and how UV resin should behave during curing, you can consistently achieve clear, professional-looking results. This guide will break down the exact reasons cloudiness happens and show you how to avoid it in future projects.
Table of Contents
2. What Clear UV Resin Should Look Like (Clear vs Cloudy Resin)
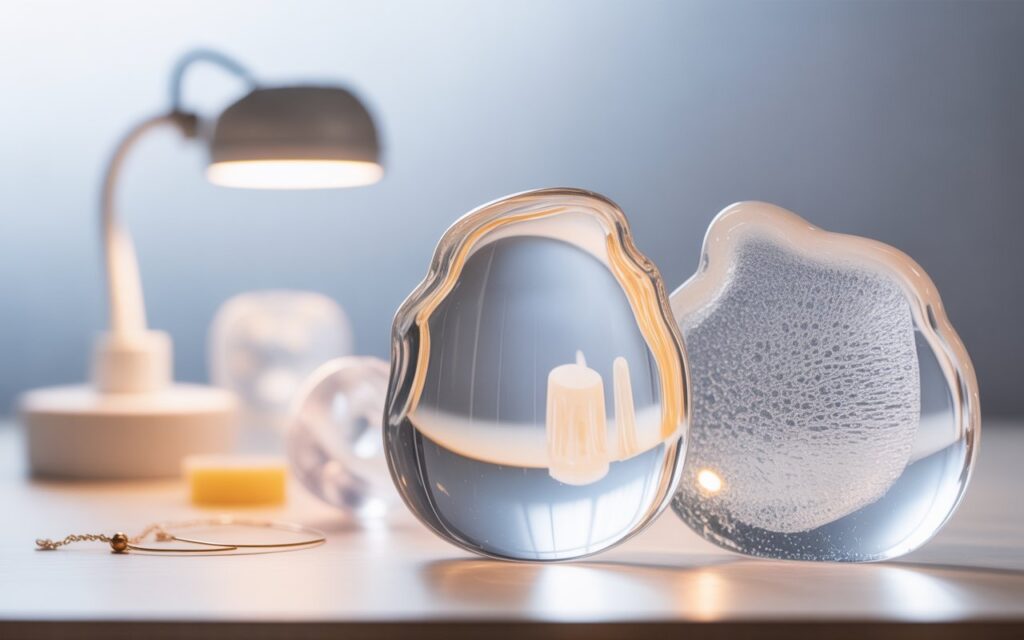
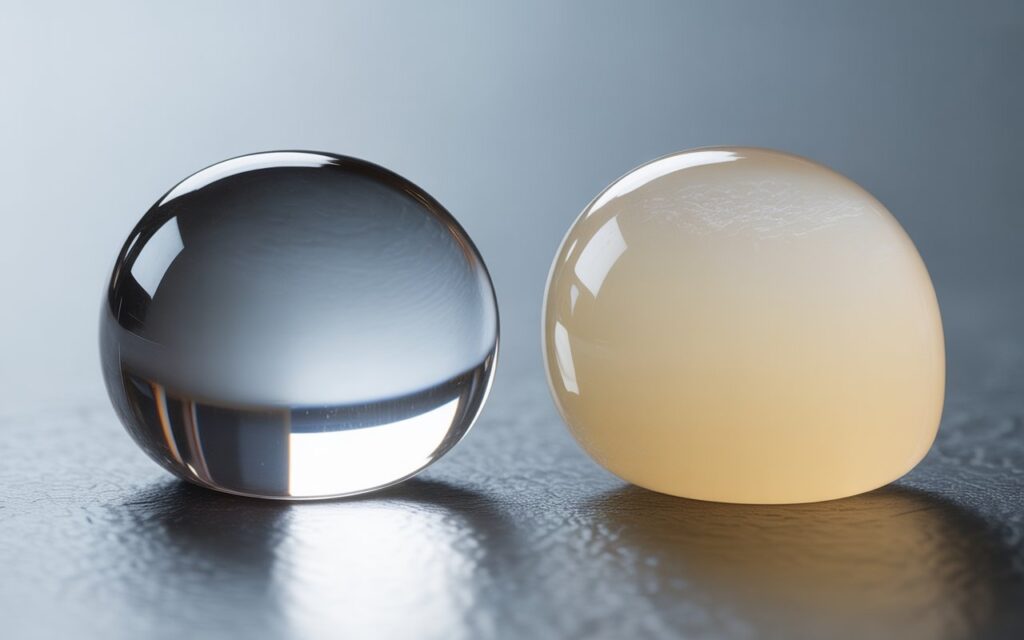
Properly cured UV resin should have a glass-like, transparent appearance with no haze, milkiness, or foggy patches. Light should pass through it cleanly, allowing colors, inclusions, and details underneath to appear sharp and vibrant. A smooth surface and consistent clarity are key signs of a high-quality, transparent resin finish.
In contrast, cloudy resin looks dull or frosted, even if it feels hard on the surface. You may notice a white cast, uneven clarity, or tiny suspended particles that scatter light. This visual difference is the easiest way to tell whether the resin has cured correctly or if something went wrong during the process.
Another important distinction between clear and cloudy resin is depth. Clear resin remains transparent even in thicker areas, while cloudy resin often becomes more opaque as layers build up. This usually points to internal curing or environmental issues rather than surface damage.
Understanding this clear vs cloudy resin difference helps you spot problems early. When UV resin looks truly clear, it means the curing process, environment, and application method are working together as they should.
3. Common Reasons Why UV Resin Turns Cloudy
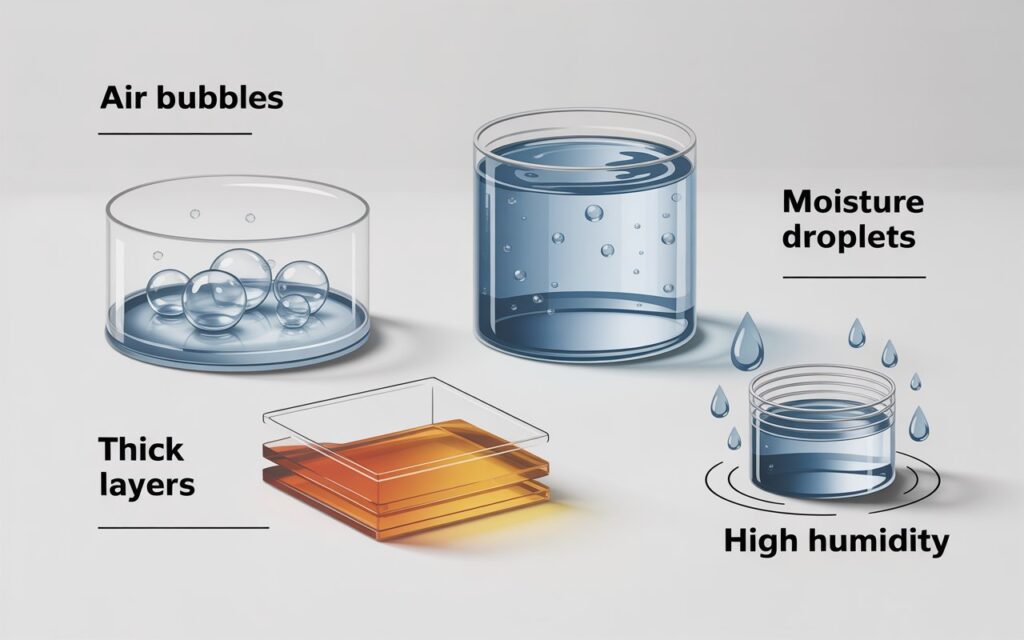
Cloudiness in UV resin usually happens when one or more steps in the curing process are off. Even small mistakes can affect how light passes through the resin, resulting in a hazy or milky appearance. Below are the most common reasons this problem occurs.
One major cause is incomplete curing. When resin does not receive enough UV light or is applied in layers that are too thick, it may harden on the surface while remaining partially uncured inside. This internal softness scatters light and reduces clarity.
Moisture contamination
Is another frequent issue. Water from humid air, wet molds, or damp additives can react with the resin during curing, creating a cloudy or foggy finish. UV resin is especially sensitive to moisture compared to other resin types.
High humidity and poor ventilation
can also interfere with curing. Excess moisture in the air slows the chemical reaction, leading to uneven clarity, especially in warm or rainy conditions.
Air bubbles trapped inside the resin
contribute to cloudiness as well. Tiny bubbles may not be visible at first, but once cured, they disrupt transparency and give the piece a dull look.
Finally, overexposure to strong UV light or excessive heat can cause micro-fogging in the resin. While proper curing is essential, too much heat buildup can alter the resin structure and reduce its clear finish. Identifying which of these factors applies to your project is the first step toward achieving consistently clear results.
4. Undercured UV Resin
Undercuring is the most common reason UV resin loses its clear, glass-like appearance. This happens when the resin does not receive enough UV light to fully harden all the way through. While the surface may feel dry and solid, the inside can remain soft or partially liquid, which affects how light passes through the piece.
What undercured UV resin looks like is often misleading. At first glance, it may appear set, but closer inspection reveals a dull or slightly milky finish. In some cases, the resin looks clear on top but cloudy underneath, especially in thicker areas. You might also notice uneven clarity, soft spots, or a tacky feel when pressed.
Undercuring usually occurs when layers are poured too thick, the UV lamp is too weak, or the curing time is too short. Distance from the light source also matters—resin placed too far from the lamp may not cure evenly.
Because the resin hasn’t fully polymerized, light scatters instead of passing through cleanly, resulting in a hazy appearance. Ensuring thin layers, proper lamp strength, and adequate curing time is essential for achieving a consistently transparent finish.
5. Overcuring UV Resin and Its Effect on Clarity
While proper curing is essential for a clear finish, too much UV exposure can also affect resin clarity. Overcuring happens when the resin is exposed to intense UV light for longer than necessary, causing excessive heat buildup during the curing process.
When UV resin overheats, it can develop a slightly foggy or frosted appearance. This is due to microscopic stress within the resin structure, which disrupts how light travels through it. In some cases, overcuring may also lead to surface dullness or a yellow tint, especially with lower-quality resin or high-powered lamps.
Overcuring is more likely when thin pieces are cured repeatedly without rest time or when the UV lamp is placed too close to the surface. Continuous exposure without allowing the resin to cool can reduce the smooth, glass-like finish makers aim for.
To maintain clarity, UV resin should be cured in controlled intervals using the correct lamp strength and distance. Balanced exposure allows the resin to harden fully without overheating, preserving a clean and transparent appearance.
6. Moisture in Resin: How Water Ruins Transparency
Moisture is one of the biggest enemies of UV resin clarity. Even a small amount of water can interfere with the curing reaction and prevent the resin from setting properly. When moisture becomes trapped inside the resin, it creates a cloudy or foggy appearance that cannot be fixed by additional curing alone.
Water can enter the resin in several ways. Using wet molds or tools, working in a humid environment, or adding decorations that haven’t been fully dried can all introduce moisture. UV resin reacts poorly with water, and this reaction causes light to scatter instead of passing through cleanly.
Resin affected by moisture often looks uneven or milky, especially in thicker sections. In some cases, the surface may cure while the inside remains hazy, giving the piece a dull and unprofessional finish.
To protect transparency, always ensure molds, tools, and add-ins are completely dry before use. Working in a low-humidity environment and storing resin with the lid tightly sealed also helps maintain a clear, high-quality result.
7. Humidity Effects on Resin Curing
High humidity can significantly interfere with how UV resin cures and is a common reason for reduced clarity. When there is excess moisture in the air, it can settle on the resin surface during application or curing, disrupting the chemical reaction needed for a smooth, transparent finish.
In humid conditions, resin may cure unevenly. The surface can harden quickly while the inside remains soft or hazy, leading to a dull or foggy look once fully set. This issue is more noticeable in warm or rainy weather, especially in poorly ventilated rooms.
Humidity can also cause condensation on molds or tools, introducing invisible moisture that affects the final result. Even if the resin appears clear at first, cloudiness may develop as it cures under damp conditions.
To achieve optimal results, cure resin in a dry, well-controlled environment. Using a dehumidifier, air conditioner, or curing resin in an enclosed, dry space helps ensure consistent curing and better transparency.
8. UV Resin Bubbles and Cloudiness Explained
Air bubbles play a major role in reducing resin clarity. When air becomes trapped during mixing, pouring, or spreading, it remains suspended inside the resin as it cures. These tiny pockets of air interrupt the way light travels through the piece, creating a cloudy or dull appearance.
Small bubbles are often difficult to see before curing, especially in clear resin. Once hardened, however, they reflect and scatter light, making the surface look less transparent. This is especially noticeable in thicker areas or when multiple layers are applied too quickly.
Bubbles can form for several reasons, including aggressive stirring, pouring resin too fast, or using cold resin straight from storage. Silicone molds with fine details can also trap air if the resin isn’t guided into the corners properly.
To reduce bubble-related cloudiness, allow the resin to rest briefly after pouring so air can rise to the surface. Using gentle heat, such as a warm room or controlled heat tool, can help bubbles escape before curing. Proper handling ensures a clearer and more professional finish.
9. Why Is My Resin Not Transparent After Curing?
Resin that appears dull or hazy after hardening usually indicates issues during the curing process or environmental factors affecting clarity. Even when the surface feels solid, internal cloudiness can result from incomplete chemical reactions, moisture, or trapped air.
Several common factors cause this problem: uneven curing due to insufficient UV exposure, high humidity, or overly thick layers. Moisture in molds, tools, or decorative items can also create a milky finish, while tiny air bubbles disrupt light passage, making the piece appear opaque.
Another reason is the resin itself. Some formulations are more sensitive to temperature, humidity, or layer thickness. Overcuring or undercuring can both reduce transparency, while improper storage before use may introduce condensation or degrade clarity.
By checking curing time, layer thickness, and environmental conditions, you can diagnose why the resin is not fully clear and take steps to achieve a smooth, glass-like finish in future projects.
10. How to Fix Cloudy UV Resin (Step-by-Step)
If your resin piece has turned hazy or dull, there are several ways to restore clarity. Addressing the problem quickly can save your project and improve the final finish. Follow these steps to fix resin cloudiness effectively:
Step 1: Assess the Problem
Examine the resin to determine the cause of cloudiness. Check for air bubbles, moisture, uneven curing, or layer thickness issues. Identifying the source will guide the best solution.
Step 2: Re-Cure Under Proper UV Light
If the resin is undercured, place it under a UV lamp for additional time. Ensure the light is at the correct distance and intensity, and cure in thin layers if possible. Avoid overexposure, as too much heat can cause fogging.
Step 3: Remove Surface Imperfections
Lightly sand any cloudy areas with fine-grit sandpaper to remove minor surface haze. Clean the piece thoroughly to remove dust before proceeding.
Step 4: Apply a Clear Topcoat
After sanding, apply a thin, fresh layer of resin over the surface. This helps fill micro-bubbles and smooth out uneven areas. Cure the topcoat under a UV lamp for a uniform, glossy finish.
Step 5: Minimize Moisture Exposure
Ensure molds, tools, and decorative elements are dry before use. If humidity caused the cloudiness, work in a controlled, low-humidity environment to prevent recurrence.
Step 6: Use Gentle Heat for Bubble Removal
For minor internal bubbles, a small heat source like a heat gun or torch can help release trapped air before curing. Use low heat to avoid damaging the resin.
By carefully following these steps, you can restore transparency and achieve a smooth, glass-like finish. Consistent handling and curing practices will help prevent cloudiness in future projects.
11. How to Prevent Cloudy UV Resin in Future Projects
Achieving consistently clear resin starts with careful preparation and proper curing techniques. Following best practices can prevent haze and ensure a smooth, transparent finish every time.
1. Control Layer Thickness
Pour resin in thin, even layers rather than thick amounts. Thick layers may cure unevenly, leading to internal cloudiness or soft spots.
2. Use Proper UV Exposure
Ensure each layer receives adequate light from a UV lamp of sufficient strength. Maintain the correct distance and curing time to avoid undercuring or overcuring.
3. Work in a Low-Humidity Environment
High humidity introduces moisture that can fog the resin. Use a controlled workspace or a dehumidifier to maintain optimal conditions.
4. Keep Tools and Molds Dry
Always check that molds, stirring sticks, and any decorative items are completely dry before adding resin. Even small amounts of water can affect clarity.
5. Minimize Air Bubbles
Stir resin gently to avoid creating bubbles, and pour slowly to prevent trapping air. For extra caution, allow resin to sit briefly after pouring so bubbles rise to the surface.
6. Store Resin Properly
Keep resin tightly sealed in a cool, dry place to avoid condensation or contamination that could affect future projects.
7. Avoid Excess Heat
Do not place resin too close to intense UV light or heat sources. Controlled curing ensures a smooth, glass-like appearance without micro-fogging.
By consistently following these steps, you can prevent cloudiness and achieve professional, transparent results in all your resin projects.
12. Best Practices for Achieving a Transparent Resin Finish
Getting a perfectly clear resin finish requires attention to detail and consistent techniques. Following these best practices will help ensure a smooth, glass-like result every time.
1. Use High-Quality Resin
Start with a reputable UV resin known for its clarity and stability. Lower-quality formulas may yellow or develop cloudiness over time.
2. Work in Controlled Conditions
Maintain a clean, dry, and low-humidity workspace. Temperature and moisture directly affect how the resin cures and its final transparency.
3. Pour Thin, Even Layers
Apply resin in thin coats to ensure uniform curing. Thick layers increase the risk of undercured spots, trapped bubbles, and internal haze.
4. Avoid Aggressive Mixing
Stir gently to combine resin and additives. Vigorous mixing introduces air, which leads to bubbles and reduces clarity.
5. Proper Curing Technique
Use a UV lamp of appropriate strength, positioned at the correct distance. Allow each layer to fully cure before adding the next, and avoid prolonged exposure that can cause micro-fogging.
6. Eliminate Bubbles
After pouring, let the resin settle for a few minutes. Small bubbles can be removed using a gentle heat source, like a heat gun or warm air, before the resin hardens.
7. Keep Everything Dry
Ensure molds, tools, and decorative elements are free of moisture. Even slight dampness can result in a cloudy finish.
8. Apply a Clear Topcoat
For an extra-glossy, professional look, add a thin clear coat over the cured resin. This smooths any surface imperfections and enhances transparency.
Following these practices consistently will help you achieve a high-quality, transparent finish that looks professional and lasts.
13. Final Thoughts: Getting Crystal-Clear UV Resin Every Time
Understanding why is my UV resin cloudy is the first step toward achieving a crystal-clear finish. Most clarity issues stem from undercuring, moisture, air bubbles, or environmental factors like high humidity. By identifying these problems, you can prevent them and ensure a smooth, transparent result every time.
Consistently working in a dry, well-ventilated space, pouring thin layers, and using the correct UV light exposure are essential. Gentle mixing, dry tools, and proper resin storage further help maintain clarity. For minor imperfections, sanding and adding a clear topcoat can restore a flawless, glass-like appearance.
Ultimately, achieving clear resin requires patience and careful handling. By following these best practices and addressing potential issues early, you can consistently create professional-quality pieces with perfect transparency and shine. Understanding why is my UV resin cloudy will help you avoid mistakes and enjoy reliable, clear results in every project.
14. FAQs
1. Why is my resin cloudy?
Resin turns cloudy when it doesn’t cure properly, contains moisture, or traps air bubbles. Environmental factors like humidity or using thick layers can also reduce transparency.
2. Why is my resin cloudy after curing?
Cloudiness after curing usually indicates undercured resin, moisture contamination, or trapped bubbles. Even if the surface feels hard, internal areas may not be fully set.
3. How to fix cloudy UV resin?
You can restore clarity by re-curing under a proper UV lamp, lightly sanding the surface, and applying a thin clear topcoat. Gentle heat can help release trapped air bubbles before curing.
4. Can humidity make UV resin cloudy?
Yes, high humidity introduces moisture that interferes with curing, often resulting in a hazy or milky finish. Working in a dry environment prevents this problem.
5. Does thick UV resin cause cloudiness?
Thicker layers can cure unevenly, leaving undercured areas that appear cloudy. Pouring thin, even layers ensures full curing and better transparency.
6. Why does UV resin look milky?
A milky appearance occurs when resin is undercured, contains moisture, or has trapped air bubbles. Poor environmental conditions and overmixing can also contribute.
7. Why is my UV resin not clear?
Resin may lack clarity due to undercuring, humidity, trapped bubbles, or using a weak UV light source. Ensuring proper curing and working conditions helps achieve transparency.
8. Do bubbles make UV resin cloudy?
Yes, air bubbles scatter light inside the resin, causing a dull or frosted appearance. Pouring slowly, stirring gently, and using heat can minimize bubbles.
9. How long to cure UV resin properly?
Curing time depends on resin thickness and lamp strength. Thin layers may take a few minutes, while thicker layers require longer exposure. Always follow the manufacturer’s recommendations.
10. Does a weak UV lamp cause cloudy resin?
Yes, insufficient light prevents resin from fully hardening, leading to undercured, cloudy areas. Using a UV lamp with adequate intensity and correct distance is essential.