
1. Introduction
If you work with UV resin for jewelry, crafts, or small DIY projects, choosing the right curing light is very important. Many beginners often ask the same question: what UV light is best for curing resin? The type of UV light you use can affect how quickly the resin cures and how clear and strong the final piece becomes.
UV resin hardens when it is exposed to ultraviolet light at the correct wavelength. A good UV resin curing lamp can cure thin layers of resin in just a few minutes, while a weak or incompatible lamp may leave the surface sticky or uneven. This is why understanding the right UV light for resin curing is essential for achieving professional-looking results.
There are many options available today, including UV LED lamps, traditional UV lamps, and even nail lamps that some crafters use for resin projects. These lights also vary in wattage, curing speed, and coverage area. Because of these differences, not every lamp will work equally well for every type of resin project.
In this guide, we will answer the common question what UV light is best for curing resin and explain the most important factors to consider before choosing a lamp. By the end of this article, you will understand which UV resin curing light works best for jewelry making, small molds, and other creative resin crafts.
2. UV Wavelength Compatibility
One of the most important factors in resin curing is the UV wavelength produced by the lamp. UV resin is designed to react to a specific range of ultraviolet light, and using the correct wavelength helps the resin harden properly and evenly.
Most UV resins used for jewelry and craft projects cure best within the 365nm to 405nm wavelength range. These wavelengths activate the photoinitiators inside the resin, which start the chemical reaction that turns liquid resin into a solid material.
A 365nm UV light is known for deeper penetration, which can help cure thicker layers more effectively. However, many modern resins are formulated to work best with 405nm UV LED lamps because they cure faster and are commonly used in affordable curing lights. This is why many resin crafters prefer LED lamps that operate around 395–405nm.
Compatibility between the resin and the curing lamp is important. If the wavelength does not match the resin formula, the piece may cure slowly or remain soft and sticky on the surface. Checking the recommended wavelength on the resin manufacturer’s label can help avoid this problem. For most beginner and intermediate projects, a 405nm LED curing lamp provides reliable performance, quick curing time, and consistent results for small resin molds and jewelry pieces.
3. Lamp Wattage and Power
The wattage of a UV lamp plays a big role in how quickly and effectively resin cures. Wattage refers to the amount of power the lamp uses to produce ultraviolet light. In simple terms, a higher wattage lamp usually provides stronger light, which can help the resin harden faster.
Many curing lamps on the market range from 6 watts to 48 watts or more. Small lamps around 6W–12W are often portable and affordable, but they may take longer to cure resin. These lower-power lamps can work well for very small jewelry pieces or thin resin layers.
Mid-range lamps, typically 24W–36W, are more powerful and are commonly used by resin crafters. They provide faster curing times and better light coverage, which helps ensure the resin hardens evenly. This range is often a good choice for beginners who want reliable performance without buying professional equipment. High-power lamps around 48W or higher are designed for quicker curing and larger projects. They can cure multiple pieces at once and are helpful when working with thicker layers of resin. However, it is still important to cure resin in thin layers to avoid bubbles or uneven hardening.
Choosing the right wattage depends on the type of projects you plan to make. For most resin jewelry and craft work, a 24W to 48W UV LED lamp provides a good balance of power, curing speed, and consistent results.
4. Curing Time Performance
Curing time is an important factor when working with UV resin. It refers to how long the resin needs to stay under ultraviolet light before it becomes fully hard. The curing speed depends on several factors, including the strength of the lamp, the thickness of the resin layer, and the type of resin being used.
Most UV resins cure quickly compared to traditional epoxy resin. Thin layers can usually harden within 1 to 3 minutes under a strong LED curing lamp. However, thicker layers may require multiple curing cycles to ensure the resin becomes solid all the way through.
Lamp power also affects curing time. Higher wattage lamps generally produce stronger light, which can reduce the amount of time needed for each layer. On the other hand, smaller lamps may require longer exposure to achieve the same result. Another factor that influences curing speed is light coverage. If the lamp does not distribute light evenly across the project, some areas may cure faster while others remain soft. Rotating the piece or curing it from different angles can help ensure consistent hardening.
For best results, many resin artists cure their projects in thin layers instead of pouring a thick layer at once. This approach allows the light to penetrate the resin more effectively and helps prevent issues such as bubbles, soft spots, or uneven surfaces.
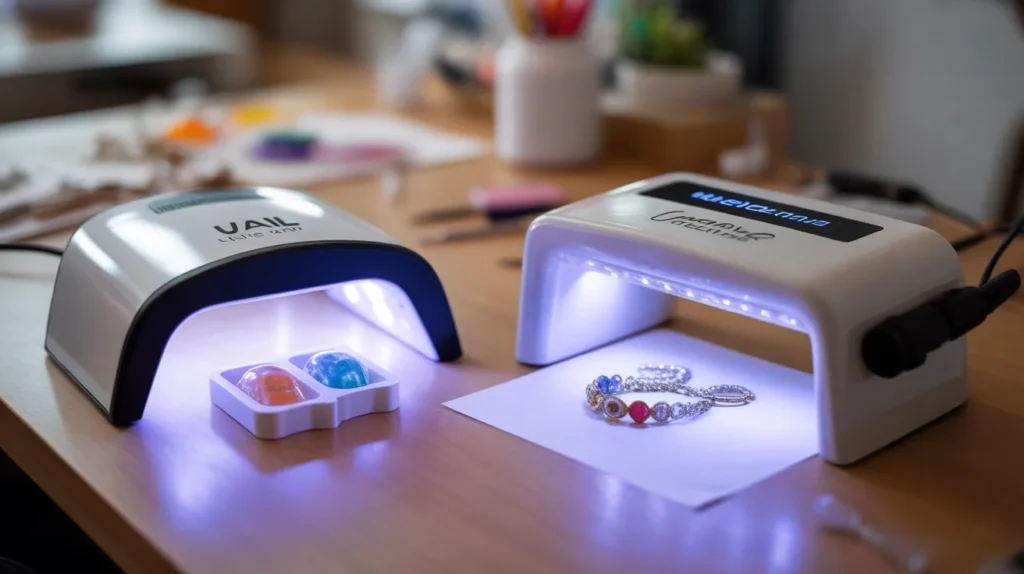
5. Lamp Type: Nail Lamp vs Resin Lamp
When choosing a curing light, many beginners wonder whether a nail lamp can be used instead of a lamp designed specifically for resin projects. Both types produce ultraviolet or LED light, but they are built for slightly different purposes.
UV nail lamps are commonly used for curing gel nail polish. These lamps are widely available, affordable, and often come with useful features such as timers and automatic sensors. Because they usually operate within the 365nm–405nm wavelength range, many of them can also cure UV resin effectively. For small jewelry pieces or thin resin layers, a nail lamp can work quite well.
On the other hand, resin curing lamps are designed specifically for craft projects. They often provide better light coverage for molds and larger pieces. Some models also have a more open design, making it easier to place resin items underneath without space limitations. Another difference is light distribution. Nail lamps are shaped to fit hands during manicures, which means the light may be focused in certain areas. Resin lamps are sometimes built with wider coverage to ensure the entire surface of the project receives even light.
For beginners, a good-quality nail lamp can be a practical and budget-friendly option. However, for larger molds or more detailed resin work, a lamp designed specifically for crafting may offer more consistent curing results.
6. Size and Workspace Coverage
The size of the curing lamp and the area it can cover are important when working with resin projects. Different lamps are designed for different workspace needs, so choosing the right size can make the curing process easier and more efficient.
Small lamps are compact and portable, which makes them convenient for quick projects and limited workspaces. They are often used for small resin jewelry pieces, charms, or tiny molds. However, their curing area is usually limited, meaning you may only be able to cure one small piece at a time.
Medium-sized lamps provide a larger workspace and can cover several items at once. This type of lamp is popular among resin crafters because it offers a good balance between size and convenience. With better light distribution, it becomes easier to cure multiple jewelry pieces or slightly larger molds without constantly repositioning them. Larger curing lamps are designed for bigger molds or multiple resin items. These lamps often have wider openings and more LEDs, which help spread light evenly across the entire surface. This improves consistency and reduces the chance of certain areas curing slower than others.
Good workspace coverage is important because uneven light exposure can lead to partially cured spots or sticky surfaces. When the lamp provides even light across the whole project, the resin can harden more uniformly, resulting in smoother and stronger finished pieces.
7. LED vs Traditional UV Lamps
When selecting a curing lamp, it is helpful to understand the difference between LED lamps and traditional UV lamps. Both types produce ultraviolet light that hardens resin, but they work in slightly different ways and offer different advantages.
LED curing lamps have become very popular in recent years. They use light-emitting diodes to produce a focused wavelength that activates the curing process quickly. One of the biggest benefits of LED lamps is faster curing time. They also use less energy, produce less heat, and usually last longer than traditional UV bulbs. Because of these advantages, many modern resin crafters prefer LED lamps for everyday projects.
In contrast, traditional UV lamps use fluorescent-style bulbs to produce a wider range of ultraviolet wavelengths. These lamps were commonly used before LED technology became widely available. While they can still cure resin effectively, they often require longer curing times and the bulbs may need to be replaced after extended use. Another difference is durability. LED lamps typically have a longer lifespan, which means they can work for thousands of hours before the light output begins to weaken. Traditional UV bulbs tend to wear out faster and may gradually lose their effectiveness over time.
For most crafting projects, LED lamps are considered the more convenient option because they offer quick curing, energy efficiency, and long-lasting performance. However, traditional UV lamps can still work well, especially for users who already have one available in their workspace.
8. Safety Features
Safety is an important factor when working with ultraviolet curing lamps. While these devices are designed for craft use, they still produce light that should be handled with care. Choosing a lamp with proper safety features can make the curing process safer and more comfortable during regular use.
One useful feature is an automatic timer. Many lamps include preset timers such as 30, 60, or 120 seconds. This allows users to control how long the resin stays under the light without having to watch the clock constantly. Timers also help prevent overexposure and make the curing process more consistent. Another helpful feature is an auto sensor. Lamps with this function turn on automatically when an object is placed inside and switch off when it is removed. This not only saves energy but also reduces unnecessary exposure to ultraviolet light.
Protective housing and light shielding are also important. A well-designed lamp directs the light toward the workspace instead of letting it spread outward. This helps reduce direct exposure to the eyes and surrounding area.
Heat control is another safety consideration. Some curing lamps are built to produce minimal heat, which helps prevent discomfort when working for long periods. Lower heat output also protects delicate molds and materials from damage. Using a lamp with these safety features can make resin crafting more convenient and reduce potential risks while curing projects.
9. Price and Value for Money
When choosing a UV curing lamp, it’s important to consider both price and the value it provides. Lamps are available at a wide range of prices, from budget-friendly models to high-end professional units. Understanding what you need for your projects can help you make a smart purchase without overspending.
Budget lamps are often compact and suitable for small resin crafts or beginners. They are affordable and provide enough power to cure thin layers, but they may have limitations, such as smaller workspace coverage, lower wattage, or slower curing times. These lamps are a good starting point for casual projects or hobbyists.
Mid-range lamps offer better performance and durability. They typically have higher wattage, larger curing areas, and additional features like timers and auto sensors. These lamps provide faster curing, more even light distribution, and greater flexibility for a variety of resin projects. For many crafters, mid-range lamps offer the best balance of price and functionality.
High-end professional lamps are designed for frequent use, larger molds, or multiple simultaneous projects. They often feature very high wattage, wide coverage, and advanced safety features. While the initial investment is higher, they provide long-term value for serious hobbyists or small business owners who need reliable and consistent results.
Ultimately, the best choice depends on your project size, frequency of use, and budget. A well-chosen lamp can save time, prevent curing issues, and provide long-lasting performance, making it a worthwhile investment for any resin crafter.
10. Best UV Lights for Resin (Top Picks)
Here are some of the top-rated UV lamps for resin projects, selected based on performance, reliability, and ease of use.
1. Suzzam Double-Sided UV Lamp
- Best for: Small jewelry and craft pieces
- Why it stands out: Dual-sided LEDs cure resin evenly without flipping pieces, with adjustable timer settings and good workspace coverage.
2. HeyClear 36W Double-Sided Lamp
- Best for: Frequent use and slightly larger molds
- Why it stands out: Provides strong light output and wide coverage, curing both sides simultaneously for faster results.
3. KISREL 36W Detachable Lamp
- Best for: Detailed projects needing flexibility
- Why it stands out: Detachable magnetic panels allow single-side or double-side curing, with multiple timer settings for precise control.
4. SUNLU Resin Curing Box
- Best for: Multiple items or hands-off curing
- Why it stands out: Enclosed design with a built-in turntable ensures even curing for several pieces at once, with automatic timers.
5. DARKBEAM Portable UV Lights
- Best for: Small projects, spot curing, or travel
- Why it stands out: Compact, USB-rechargeable, and adjustable, perfect for quick touch-ups or outdoor use.
Quick Tip: For best results, choose a lamp with even light coverage, adjustable timers, and appropriate power for your project size. This ensures faster, uniform curing and stronger finished pieces.
11. How to Choose the Best UV Light for Your Resin Projects
Choosing the right lamp for resin work can make a big difference in the quality and efficiency of your projects. With so many options available, it helps to focus on a few key factors to find a light that meets your needs.
1. Consider the Wavelength
Check the resin’s recommended curing range. Most resins work well with 365nm to 405nm light. Matching the lamp to the resin ensures faster curing and prevents sticky or uneven surfaces.
2. Look at Wattage and Power
Higher wattage lamps provide stronger light, which reduces curing time and ensures even hardening. For small jewelry pieces, a 24W lamp is often sufficient, while larger molds may benefit from 36W or higher.
3. Evaluate Workspace Coverage
Make sure the lamp can cover the size of your molds or multiple pieces at once. Smaller lamps are fine for tiny charms, but larger lamps or double-sided units are better for bigger projects or multiple items.
4. Decide on Lamp Type
Nail lamps can work for thin layers or small projects, while lamps designed specifically for resin often offer better coverage and faster curing for thicker layers. Consider your typical project size before choosing.
5. Check Safety Features
Timers, automatic sensors, and protective shielding reduce risks and make curing more convenient. A lamp with controlled heat output prevents discomfort and protects delicate molds.
6. Balance Price and Value
Determine how often you’ll use the lamp and the size of your projects. A mid-range lamp usually provides the best combination of performance, durability, and affordability, while high-end lamps are suitable for frequent, large-scale use.
7. Read Reviews and Recommendations
Look for feedback from other crafters about reliability, curing speed, and ease of use. This can help you avoid low-quality lamps and choose one that consistently produces solid, clear results. By keeping these factors in mind, you can select a lamp that suits your project needs, improves efficiency, and ensures beautiful, fully cured resin pieces every time.
12. FAQs
1. What wavelength works best for curing UV resin?
Most resins cure well between 365nm and 405nm, which activates the resin’s photoinitiators for smooth and even hardening.
2. Can a nail lamp be used for resin projects?
Yes, LED nail lamps can cure thin layers or small pieces, though lamps designed for resin offer better coverage for larger molds.
3. How does wattage affect curing speed?
Higher wattage lamps produce stronger UV light, which reduces curing time and helps resin harden evenly across the piece.
4. Should I cure resin in one thick layer or multiple thin layers?
It’s better to cure thin layers sequentially. This prevents bubbles, soft spots, and uneven surfaces in jewelry or craft projects.
5. Are LED lamps better than traditional UV bulbs?
LED lamps cure faster, use less energy, produce less heat, and generally last longer, making them ideal for frequent crafting.
6. What size lamp do I need for multiple resin pieces?
Choose a lamp with wider coverage or dual-sided LEDs to cure several items at once and avoid uneven hardening.
7. How can I make resin curing safer?
Look for lamps with timers, auto sensors, and protective shielding to reduce eye exposure and prevent over-curing.
8. Can low-power lamps cure thick resin layers?
Low-power lamps may struggle with thicker layers, often leaving the surface sticky. Multiple curing cycles or higher wattage lamps work better.
9. How long does resin usually take to cure under a strong lamp?
Thin layers often cure in 1–3 minutes, while thicker molds may need repeated exposure for full hardness.
10. Is it worth investing in a higher-end resin lamp?
Yes, high-quality lamps offer faster curing, even light distribution, and durability, making them a good investment for frequent or larger projects.
13. Conclusion
Choosing the right lamp is essential for achieving professional-looking resin projects, and many crafters often ask, what UV light is best for curing resin. The ideal lamp depends on factors such as wavelength, wattage, coverage, and project size. Matching the lamp’s wavelength to your resin ensures proper hardening, while sufficient wattage and even light distribution speed up curing and prevent sticky or uneven surfaces.
Both nail lamps and dedicated resin lamps can work well, but lamps designed specifically for resin provide more consistent results, especially for larger or thicker pieces. Safety features, adjustable timers, and proper coverage also play a key role in creating a smooth and efficient crafting experience.
Ultimately, understanding your project needs and comparing features like power, size, and curing time will help you select the best lamp for your resin projects. By making an informed choice, you can enjoy faster curing, clearer results, and beautiful, durable resin creations every time.