
1. Introduction
Resin jewelry has become very popular because it is easy to make, affordable, and allows you to create unique designs at home. One of the most important tools in this process is a UV lamp, which helps the resin harden quickly and gives a smooth, glossy finish.
If you are a beginner, learning how to use UV lamp for resin jewelry is essential to get clean and professional results. Without proper curing, the resin can remain sticky, uneven, or weak. That’s why understanding the correct method and tools makes a big difference.
In this guide, you will learn the basics of using a UV lamp, the proper curing process, and simple tips to avoid common mistakes. Whether you are just starting or want to improve your skills, this article will help you achieve better and faster results.
2. What is a UV Lamp for Resin Jewelry Making?
A UV lamp is a device that emits ultraviolet light to harden liquid resin into a solid form. It plays a key role in the UV resin curing process, allowing the material to set within minutes instead of hours or days.
When UV light hits the resin, it triggers a chemical reaction that turns the liquid into a hard, durable surface. This method is fast, efficient, and ideal for small projects like jewelry pieces. Unlike natural sunlight, which can be slow and inconsistent, a UV lamp provides controlled and even light. This helps ensure better results, especially when you need precision and a smooth finish.
These lamps are commonly available in different sizes and power levels, making them suitable for both beginners and experienced users. They are simple to use and designed to make resin crafting quicker and more reliable.
3. Types of UV Lamps (Quick Comparison)
Choosing the right lamp can improve results and make the curing process faster and more consistent. Below is a simple comparison of the main types based on key features:
1. Wattage (Power Level)
Wattage affects how quickly the resin hardens.
- Low watt (6W–12W): Slower curing, best for very small pieces
- Medium watt (24W–36W): Balanced performance for beginners
- High watt (48W–72W): Fast curing, ideal for detailed or multiple pieces
2. UV vs LED UV Lamps
- UV Lamps: Use traditional bulbs, take more time, and may need replacement
- LED UV Lamps: Cure faster, last longer, and are more energy efficient
LED options are more popular for beginners and regular use
3. Size and Capacity
- Small lamps: Good for rings, earrings, and tiny molds
- Large lamps: Better for bigger molds or curing multiple items at once
4. Timer Settings
Most lamps come with built-in timers (30s, 60s, 90s).
This helps control the UV resin curing process and prevents over or under curing.
5. Portability
- Compact lamps: Lightweight and easy to carry
- Full-size lamps: More stable and powerful but less portable
6. Price and Durability
- Budget lamps: Affordable but may have lower power
- Premium lamps: Strong build, better performance, and longer lifespan
- A mid-range LED lamp with timer settings is usually the best choice for consistent and smooth results.
4. How to Use UV Lamp for Resin Jewelry (Step-by-Step)
Using a UV lamp correctly is important to get a smooth, hard, and professional finish. Follow these simple steps for the best results:
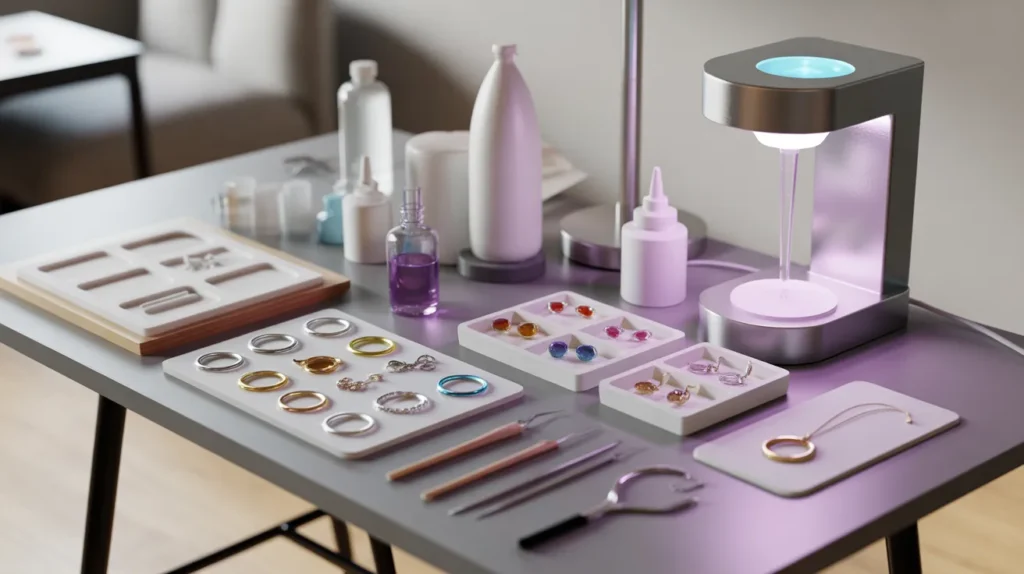
Step 1: Prepare Your Materials
Start by gathering everything you need, including resin, molds, pigments, and tools. Make sure your mold is clean and dry to avoid bubbles or dust in the final piece.
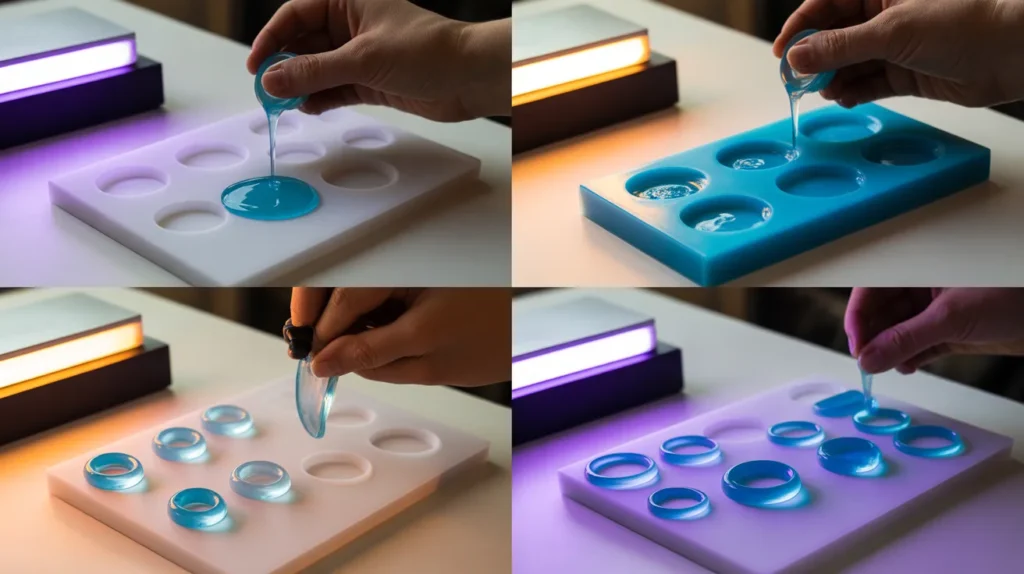
Step 2: Pour the Resin in Thin Layers
Carefully pour a small amount of resin into the mold. Avoid thick layers, as they do not cure evenly. Working in layers helps achieve better clarity and strength.
Step 3: Place Under the Lamp
Put the mold directly under the lamp. Make sure the light reaches all areas of the resin surface for even curing.
Step 4: Set the Timer
Turn on the lamp and select the appropriate time (usually 30–60 seconds per layer). This step is part of learning how to cure resin with UV light properly.
Step 5: Check and Repeat if Needed
After the first cycle, gently touch the surface. If it feels soft or sticky, cure it again for a few more seconds.
Step 6: Flip and Cure the Back
For thicker or enclosed designs, remove the piece from the mold, flip it, and cure the back side to ensure it hardens completely. By following these steps, you can achieve a clean, glossy finish and avoid common curing problems.
5. UV Resin Curing Process Explained
The curing process is the step where liquid resin turns into a hard and solid material. This happens when the resin is exposed to ultraviolet light, which starts a chemical reaction inside it. As a result, the surface becomes firm, glossy, and durable.
During the UV resin curing process, light activates special compounds in the resin called photoinitiators. These compounds react quickly and cause the resin to harden within seconds or minutes, depending on the thickness and lamp power.
How Long Does It Take?
Curing time can vary based on a few factors:
- Thin layers: Usually cure in 30–60 seconds
- Thicker layers: May take longer or need multiple rounds
- Lamp wattage: Higher power lamps cure faster
Signs of Properly Cured Resin
To ensure curing UV resin properly, check for these signs:
- The surface feels hard and dry
- No sticky or soft spots
- A clear and shiny finish
Why Proper Curing Matters
If the resin is not cured correctly, it can remain soft, lose its shine, or even get damaged over time. Proper curing ensures strength, durability, and a professional look in every piece.
6. Common Mistakes to Avoid
Avoiding simple mistakes can save time and help you get better results. Here are some common problems beginners face and how to prevent them:
1. Pouring Thick Layers
Applying too much resin at once can lead to uneven curing. The top may harden while the inside stays soft. Always work in thin layers for better results.
2. Using a Low-Power Lamp
A weak lamp may not provide enough light to cure the resin fully. This can leave the surface sticky or soft. Choose a lamp with suitable wattage for consistent curing.
3. Not Curing in Layers
Trying to cure everything in one go often causes problems. Layer-by-layer curing ensures each part hardens properly and reduces the risk of defects.
4. Ignoring Sticky Surfaces
If the surface feels tacky after curing, it means it needs more time under the lamp. Do not leave it as it is—cure it again until it becomes fully dry.
5. Poor Placement Under the Lamp
If the resin is not placed directly under the light, some areas may not cure evenly. Always position your piece so the light reaches all sides.
6. Skipping Backside Curing
For thicker or detailed designs, the back side may remain soft. Removing the piece and curing the other side helps achieve a complete finish. By avoiding these mistakes, you can improve the quality of your work and get smoother, stronger results every time.
7. Tips for Best Results
Getting a smooth and professional finish depends on small but important details. Follow these simple tips to improve your results:
1. Work in Thin Layers
Applying thin layers helps the resin cure evenly and reduces the chances of soft spots or bubbles. It also gives better clarity and strength.
2. Keep the Lamp Close
Place your piece close to the light source so it receives strong and even exposure. This improves the overall curing quality.
3. Use a Good Quality Lamp
A reliable UV lamp for resin jewelry making ensures faster and more consistent results. It also reduces common issues like stickiness or uneven curing.
4. Clean Molds Before Use
Dust or dirt inside the mold can affect the final finish. Always clean and dry your molds before pouring resin.
5. Avoid Air Bubbles
Mix and pour slowly to prevent bubbles. If bubbles appear, remove them before curing for a clear and smooth surface.
6. Check Between Layers
After each curing round, check the surface. This helps you fix small issues early and maintain quality throughout the process.
7. Be Patient
Rushing the process can lead to poor results. Take your time with each layer to achieve a strong and glossy finish. By following these tips, you can create cleaner, stronger, and more professional-looking pieces with ease.
8. Safety Tips
Working with UV resin and a curing lamp is safe when handled properly, but it’s important to follow a few basic precautions to protect yourself and your workspace.
1. Avoid Direct Eye Exposure
Do not look directly at the UV light while it is on. It can be harmful to your eyes. Always keep your face away from the lamp during use.
2. Protect Your Skin
Try to avoid direct contact with uncured resin. Wearing disposable gloves can help prevent skin irritation or allergic reactions.
3. Work in a Ventilated Area
Even though resin is used in small amounts, it can release mild fumes. Make sure you work in a well-ventilated space or near an open window.
4. Keep Children and Pets Away
Resin materials and UV light equipment should be kept out of reach of children and pets for safety reasons.
5. Handle Equipment Carefully
Do not touch the lamp while it is hot or running for long periods. Turn it off after use and let it cool down before storing.
6. Clean Spills Immediately
If resin spills, clean it quickly before curing. Once hardened, it becomes much harder to remove. By following these simple safety steps, you can enjoy your crafting process while staying protected and maintaining a clean working environment.
9. FAQs
1. How long does UV resin take to cure?
It usually takes 30 seconds to 2 minutes per layer, depending on the lamp power and resin thickness.
2. Can I cure resin without UV light?
Yes, but only sunlight works as an alternative. However, it is slow and not reliable compared to a UV lamp.
3. Why is my resin sticky after curing?
This happens when the resin is under-cured. It may need more time under the lamp or a stronger light source.
4. What is the best lamp for beginners?
A 24W to 48W LED UV lamp with a timer is best for beginners because it is fast, easy to use, and reliable.
5. Can I cure thick resin layers at once?
No, thick layers often do not cure properly. It is better to apply and cure thin layers one by one.
6. Do all UV lamps work with resin?
Most UV and LED UV lamps work, but it is best to use a lamp designed specifically for resin or nail curing.
7. Why is my resin not hardening evenly?
Uneven curing usually happens due to poor light exposure or placing the piece too far from the lamp.
8. How do I know resin is fully cured?
The surface should feel hard, dry, and not sticky. It should also have a clear, glossy finish.
10. Conclusion
Learning how to use UV lamp for resin jewelry is simple once you understand the correct steps and curing process. With proper layering, correct timing, and a good-quality lamp, you can create strong and beautiful jewelry pieces at home. By avoiding common mistakes and following safe working practices, you will get smoother finishes and more professional results. Keep practicing, and your resin projects will improve over time.