
1. Introduction
If you’re learning how to use resin tape for jewelry, the first step is understanding what resin tape actually is and why it’s considered an essential tool in resin crafting.
What Is Resin Tape?
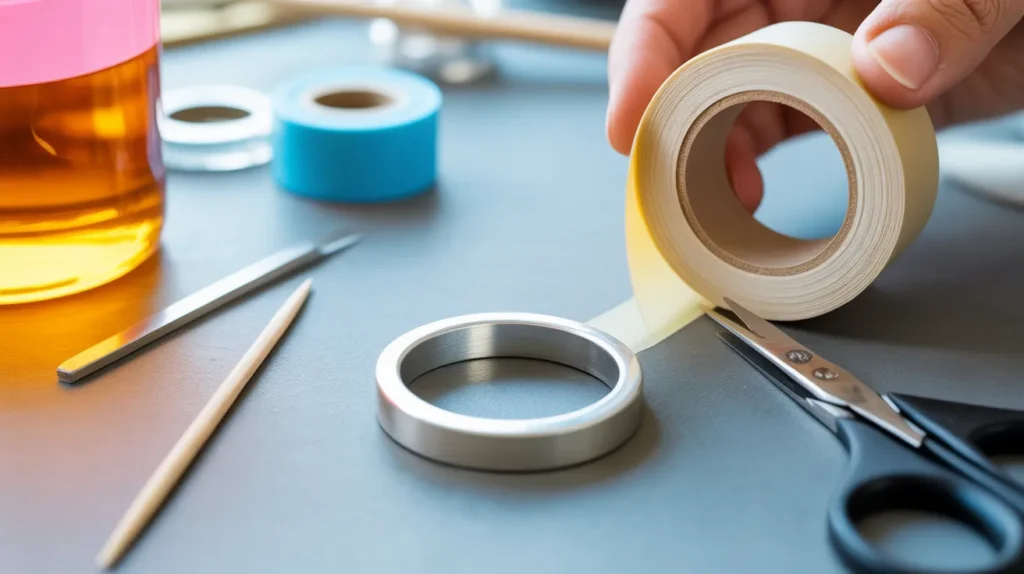
Resin tape is a strong, smooth, non-stick adhesive tape designed specifically for resin projects. It is commonly used to:
- Seal the back of open bezel settings
- Prevent resin leaks from molds
- Create clean, flat backs on pendants and charms
- Form temporary barriers (also called resin dams)
Unlike regular household tape, resin tape is made to resist sticking to cured resin. This means once your resin hardens, the tape peels away easily without damaging the surface.
2. Types of Resin Tape Used in Jewelry Making (Complete Comparison Guide)
Choosing the right tape for your resin jewelry projects makes a big difference in the quality of your finished pieces. Not all tapes perform the same, and knowing which one to use for your specific application can help you avoid leaks, messy edges, and extra sanding later on.
Here’s a clear comparison of the most commonly used tapes in jewelry resin work:
1. Epoxy Resin Tape
Best for: Traditional two-part epoxy resin projects
Epoxy resin tape is designed with high adhesion and water-resistant properties. It sticks well to metal bezels, silicone molds, and other surfaces used in jewelry crafting.
Pros:
- Excellent seal against thick epoxy resins
- Strong adhesive prevents leaks
- Easy to cut and shape around bezels
Cons:
- Slightly thicker than other tapes
- Some adhesive residue may remain if left on too long
Best use: Bezel backs, custom mold edges, layered designs
2. UV Resin Tape
Best for: UV cure resin projects
UV resin tape works particularly well with fast-curing UV resins. Its smooth surface promotes a clean release after the resin cures under UV light.
Pros:
- Leaves a smoother back surface
- Minimal residue after removal
- Ideal for quick projects
Cons:
- Not as strong as epoxy resin tape for heavy pours
- Can lift if edges are not sealed properly
Best use: Small pendants, charms, and quick single-layer pours
3. Clear Acrylic Tape
Best for: General purpose sealing and temporary dams
Clear acrylic tape is often used when a transparent, non-textured backing is desired. It sticks well to most surfaces and is easy to work with.
Pros:
- Very clear surface, good for photos
- Less texture means less finishing later
- Simple to cut and apply
Cons:
- Not designed specifically for resin, so it may not hold under heavy pours
- Adhesive can weaken with moisture or heat
Best use: Lightweight designs and small bezels
4. Double-Sided Adhesive Tape
Best for: Securing molds or backing pieces before resin pours
Double-sided tape creates a firm hold between two surfaces, making it ideal for securing backing cards or decorative elements.
Pros:
- Strong bonding between surfaces
- Good for multi-layered designs
- Helps hold pieces firmly in place
Cons:
- May be tricky to remove cleanly
- Not designed to act as a seal against liquid
Best use: Decorative backing, attaching inclusions before resin pour
5. Heat-Resistant Craft Tape
Best for: Projects involving heat tools like torches or heat guns
Heat-resistant tape holds up better if you need to use a blowtorch or heat gun to pop bubbles after pouring. It doesn’t warp or lose adhesion from moderate heating.
Pros:
- Stable under heat
- Great for bubble removal stages
- Less likely to warp
Cons:
- Usually more expensive
- Not always necessary for simple pours
Best use: Layered work, bubble elimination processes, heat-intensive tasks
Quick Comparison at a Glance
| Tape Type | Best For | Strength | Easy Removal | Heat Stability |
| Epoxy Resin Tape | Heavy pours, layered work | ⭐⭐⭐⭐ | ⭐⭐⭐ | ⭐⭐⭐⭐ |
| UV Resin Tape | Fast projects, smooth backs | ⭐⭐⭐ | ⭐⭐⭐⭐ | ⭐⭐ |
| Clear Acrylic Tape | Quick, clean visual finish | ⭐⭐ | ⭐⭐⭐ | ⭐⭐ |
| Double-Sided Adhesive Tape | Securing pieces and backings | ⭐⭐⭐ | ⭐⭐ | ⭐⭐ |
| Heat-Resistant Tape | Heat tool use and bubble removal | ⭐⭐⭐⭐ | ⭐⭐⭐ | ⭐⭐⭐⭐ |
Choosing the Right Tape for Your Project
The best tape depends on your tools, resin type, and jewelry design. If you’re working with thick pours and deep bezels, tapes with stronger adhesion and better leak resistance are ideal. For quick UV resin pendants, lighter tapes with smooth surfaces work perfectly. Understanding each type helps you prepare your workspace, reduce mistakes, and achieve clean, professional results every time.
3. Essential Tools & Supplies You Need Before Using Resin Tape
Before starting any resin jewelry project, having the right tools and supplies ready will make the process smoother and more professional. Proper preparation reduces leaks, prevents bubbles, and helps you achieve clean edges with minimal finishing work.
1. Resin (Epoxy or UV)
Your project will determine the type of resin you use:
- Epoxy resin (two-part resin): Ideal for deeper pours and larger pieces. It requires mixing and has a longer curing time.
- UV resin: Cures quickly under a UV lamp and works well for small pendants and thin layers.
Always measure and mix epoxy resin accurately to avoid sticky or soft results.
2. Silicone Molds or Open Bezels
You’ll need a structure to hold the liquid resin:
- Silicone molds for shaped charms, earrings, and pendants
- Metal open bezels for custom jewelry designs
- Frames and settings for layered artwork
Make sure molds and bezels are clean, dry, and free from dust before sealing.
3. High-Quality Resin Tape
Choose a strong adhesive tape designed for resin work. It should:
- Stick firmly to metal and silicone
- Create a tight seal to prevent leaks
- Peel off cleanly after curing
The right tape helps create smooth backs and sharp edges with less sanding required.
4. Scissors or Precision Craft Knife
Clean cuts matter. Use:
- Sharp scissors for straight edges
- A craft knife for detailed trimming around bezels
Neatly cut tape improves sealing and reduces the chance of gaps.
5. Mixing Tools
For epoxy resin projects, you’ll need:
- Silicone or plastic mixing cups
- Wooden stir sticks or reusable silicone stirrers
- Measuring tools for accurate ratios
Mix slowly and thoroughly to reduce air bubbles.
6. Bubble Removal Tools
Air bubbles are common in resin projects. To eliminate them, you can use:
- A heat gun
- A small butane torch
- A toothpick or needle for popping small bubbles
Use heat tools carefully and avoid overheating the resin.
7. Level Work Surface
A flat and stable surface is essential. If your workspace isn’t level, resin may pool unevenly, causing thick edges on one side.
You can use:
- A small level tool
- Adjustable table legs
- Protective silicone mats underneath your project
8. Protective Gear
Safety should never be ignored. Always have:
- Nitrile gloves
- Protective apron
- Respirator mask (especially for epoxy resin)
- Safety glasses if using heat tools
Working in a well-ventilated area is highly recommended.
Final Preparation Checklist
Before you begin:
✔️ Workspace is clean and level
✔️ Molds or bezels are dust-free
✔️ Tape is cut and ready
✔️ Resin is properly measured
✔️ Tools are within reach
Having everything prepared in advance saves time and helps you work confidently. With the right supplies in place, you’re ready to move on to preparing your mold and applying the tape properly for a clean, leak-free finish.
4. How to Prepare Your Mold or Bezel Before Applying Resin Tape
Proper preparation is the key to preventing leaks, uneven edges, and surface imperfections. Before sealing anything, you need to make sure your mold or bezel is clean, dry, and ready for resin. Skipping this step can lead to messy spills and extra finishing work later.
Here’s how to prepare correctly:
1. Clean the Surface Thoroughly
Dust, oil, and fingerprints can prevent tape from sticking properly. Even tiny particles can create small gaps where liquid resin can escape.
- Wipe metal bezels with rubbing alcohol and a lint-free cloth.
- Wash silicone molds with mild soap and water if needed.
- Let everything dry completely before moving forward.
A clean surface ensures stronger adhesion and a tighter seal.
2. Make Sure the Surface Is Completely Dry
Moisture is one of the biggest causes of adhesion problems. If the mold or bezel is damp, the tape may lift or peel during curing.
After cleaning:
- Allow pieces to air dry fully
- Avoid touching the sealing area with bare fingers
- Work in a low-humidity environment if possible
Dry surfaces help create a secure, leak-resistant barrier.
3. Inspect for Damage or Warping
Check your mold or bezel carefully before sealing.
Look for:
- Bent metal frames
- Cracks in silicone molds
- Uneven edges
If a bezel is slightly bent, gently straighten it before applying tape. Warped edges can create tiny gaps that cause resin to leak.
4. Level Your Work Surface
Even if your mold is perfectly sealed, resin can still shift if your table is uneven.
Use:
- A small level tool
- A flat silicone mat
- A stable, vibration-free surface
Leveling ensures the resin cures evenly and prevents thick or thin spots.
5. Test Fit Before Sealing
Before pressing the tape firmly into place, position it loosely to make sure it fully covers the base of the bezel or mold.
Check that:
- All edges are fully covered
- There are no visible gaps
- The tape extends slightly beyond the edges for a better grip
A quick test fit helps avoid mistakes and wasted materials.
6. Press and Secure Edges Carefully
Once positioned, press the tape down firmly along the edges. Use your fingers or a flat tool to smooth out air pockets.
Focus on:
- Corners and curves
- Thin metal edges
- Any raised sections
Strong edge pressure improves adhesion and reduces the chance of resin slipping underneath.
Final Preparation Checklist
Before pouring resin, confirm:
✔️ Mold or bezel is clean
✔️ Surface is fully dry
✔️ Edges are straight and undamaged
✔️ Workspace is level
✔️ Tape is securely pressed without gaps
Taking a few extra minutes to prepare properly can save hours of fixing leaks or sanding rough edges later. Good preparation leads to cleaner results, smoother finishes, and more professional-looking jewelry pieces.
5. Step-by-Step: How to Use Resin Tape for Jewelry (Beginner Friendly Guide)
Applying tape correctly is what keeps liquid resin contained and gives your jewelry a clean, professional finish. Follow these simple steps to create a tight seal, prevent leaks, and achieve smooth edges.
Step 1: Measure and Cut the Tape
Start by measuring the base of your mold or open bezel.
- Cut a piece slightly larger than the area you need to seal.
- Make sure there is extra tape around the edges for a secure grip.
- Use sharp scissors or a craft knife for clean, straight cuts.
A properly sized piece ensures full coverage and better adhesion.
Step 2: Position the Tape Carefully
Place the sticky side against the back of the bezel or mold.
- Align it evenly before pressing down fully.
- Ensure the entire opening is covered.
- Avoid wrinkles or folds during placement.
Take your time here once firmly pressed, repositioning can weaken the seal.
Step 3: Press and Seal the Edges Firmly
This is the most important step for preventing leaks.
- Use your fingers to press along all edges.
- Pay special attention to corners and curves.
- Smooth out any air bubbles trapped underneath.
For extra security, run a flat tool along the edges to reinforce adhesion.
Step 4: Pour the Resin Slowly
Once sealed, place the mold or bezel on a level surface.
- Pour resin slowly and in small amounts.
- Avoid overfilling, especially near the edges.
- Check closely for any signs of leakage.
If you notice resin creeping toward the edge, stop pouring and inspect the seal.
Step 5: Remove Air Bubbles
After pouring:
- Use a toothpick to pop small bubbles.
- Lightly pass a heat gun or torch over the surface if needed.
Be careful not to overheat, as excessive heat can weaken adhesion.
Step 6: Allow Proper Curing Time
Let the resin cure fully according to the manufacturer’s instructions.
- Epoxy resin typically takes 24–48 hours.
- UV resin cures in minutes under a UV lamp.
Do not remove the tape too early. Premature removal can distort the edges or cause surface imperfections.
Step 7: Remove the Tape Cleanly
Once fully cured:
- Gently peel the tape away from one corner.
- Pull slowly and steadily to avoid chipping edges.
- If slight residue remains, clean it with rubbing alcohol.
You should now have a smooth, flat back with sharp, clean edges.
Pro Tip for Beginners
If you’re new to resin jewelry, practice on a small piece first. This helps you understand how much pressure to apply and how tightly the edges need to be sealed.
Following these steps carefully will help you create leak-free pieces with minimal sanding and polishing. With a little practice, the process becomes quick, simple, and highly effective.
6. How to Use Resin Tape for Open Bezel Jewelry (Advanced Technique)
Working with open bezel jewelry requires extra precision because the resin has no bottom support. Proper sealing ensures that the liquid resin stays contained, creating smooth, professional results. This advanced technique focuses on preventing leaks while maintaining clean edges and a polished finish.
Step 1: Create a Temporary Backing
For open bezels, it’s essential to form a temporary base that supports the resin:
- Cut a piece of tape slightly larger than the bezel opening.
- Place it over the back of the bezel, sticky side down.
- Press firmly to ensure no gaps exist between the tape and metal edges.
This temporary backing acts as a barrier to prevent resin from dripping through the frame.
Step 2: Secure the Tape Around Curves and Corners
Open bezels often have curved or irregular edges. Proper sealing is crucial in these areas:
- Use a small, flat tool or your fingers to press tape into corners.
- Smooth out wrinkles or air pockets that could cause leaks.
- Ensure the tape fully overlaps the edges without creating bulges.
A tight seal at corners prevents messy overflow and keeps edges sharp.
Step 3: Prepare the Surface for Pouring
Before adding resin:
- Make sure the bezel is level on a stable work surface.
- Check that the tape is fully pressed down and adheres firmly.
- Avoid touching the exposed resin area to keep it clean and dust-free.
A properly prepared surface reduces the need for sanding and polishing later.
Step 4: Pour Resin Slowly and Carefully
When pouring into open bezels:
- Add resin in small amounts to control flow.
- Pour near the center and allow it to spread naturally to the edges.
- Watch for any seepage under the tape; stop and press edges if needed.
Slow pouring prevents bubbles and minimizes the chance of resin spilling over the sides.
Step 5: Remove Air Bubbles
Air bubbles are more noticeable in open bezel jewelry. Use these techniques:
- A toothpick or needle to gently pop surface bubbles.
- A handheld heat gun or small torch, briefly applied, to eliminate trapped air.
Be cautious with heat tools to avoid loosening the tape or overheating the resin.
Step 6: Allow Full Curing Before Removing Tape
Timing is critical:
- Let the resin cure completely according to the type used (epoxy or UV).
- Removing tape too early can warp edges or distort the shape.
Once cured, the temporary backing provides a solid, flat base for your piece.
Step 7: Remove Tape Without Damaging the Jewelry
To achieve a clean finish:
- Peel the tape slowly from one corner.
- Use minimal force to avoid bending the bezel.
- Clean any residual adhesive with rubbing alcohol if needed.
After removal, the edges should be smooth, the resin fully contained, and the piece ready for finishing touches.
Pro Tip for Advanced Users
For layered or multi-colored designs, apply multiple layers of resin, allowing each to cure before adding the next. Reapply fresh tape if needed to maintain a strong seal between layers. This technique helps create complex designs without risking leaks or uneven edges.
This method ensures professional-looking open bezel jewelry, with sharp edges, smooth surfaces, and a solid backing, making your creations both beautiful and durable.
7. Common Mistakes When Using Resin Tape (And How to Fix Them)
Even experienced jewelry makers can run into problems when working with resin tape. Knowing the most common mistakes—and how to fix them can save you time, materials, and frustration. Here’s a guide to help you avoid these pitfalls and achieve professional results every time.
1. Using Low-Quality Tape
Mistake: Cheap or generic tape may not stick well or create a proper seal, causing resin to leak.
Fix: Always use tape designed specifically for resin projects. High-quality tape adheres firmly to metal, silicone, and other surfaces while peeling off cleanly after curing.
2. Not Pressing Edges Firmly
Mistake: Leaving air pockets or loose edges allows resin to seep underneath.
Fix: Press tape down along all edges, especially corners and curves. Use a flat tool or your fingers to smooth out air bubbles and ensure a tight seal.
3. Overfilling the Mold or Bezel
Mistake: Pouring too much resin at once can overflow the tape barrier, creating messy edges.
Fix: Pour in small amounts and allow the resin to spread naturally. You can always add more after the first layer levels.
4. Removing Tape Too Early
Mistake: Peeling the tape before the resin is fully cured can distort edges and leave sticky residue.
Fix: Wait until the resin has completely hardened according to the manufacturer’s instructions. For epoxy, this is usually 24–48 hours; for UV resin, it’s a few minutes under a UV lamp.
5. Ignoring Surface Preparation
Mistake: Applying tape on dusty, oily, or damp surfaces reduces adhesion and leads to leaks.
Fix: Clean molds and bezels thoroughly with rubbing alcohol or soap and water, then ensure the surface is completely dry before sealing.
6. Working in High Humidity or Extreme Temperatures
Mistake: Humid or very hot environments can affect tape adhesion and resin curing, causing bubbles or leaks.
Fix: Work in a well-ventilated, temperature-controlled space. Avoid direct sunlight or areas with fluctuating humidity.
7. Using the Same Tape for Multiple Projects
Mistake: Reusing tape that has lost adhesion can result in leaks and uneven edges.
Fix: Always use fresh tape for each project to maintain a strong, reliable seal.
Final Tips for Smooth Results
- Take your time with each step—rushing increases errors.
- Keep tools and workspace organized to prevent accidents.
- Test your technique on small or practice pieces if trying a new tape or design.
By recognizing these common mistakes and applying the fixes, you’ll save frustration and consistently create clean, professional jewelry pieces with sharp edges and smooth resin surfaces.
8. Pro Tips to Prevent Resin Leaks, Sticky Edges & Bubbles
Creating flawless resin jewelry requires attention to detail and a few professional tricks. Even with the right tape and molds, beginners often encounter leaks, sticky edges, or trapped air bubbles. These tips will help you achieve smooth, professional results every time.
1. Use a Double-Layer Seal for Extra Security
For deep molds or open bezels, one layer of tape might not be enough.
- Apply a second strip of tape over the first to reinforce edges.
- Press firmly to remove air pockets between layers.
This method creates a stronger barrier and reduces the risk of resin seeping out during pouring.
2. Level Your Workspace
Even a slight tilt can cause resin to pool unevenly, creating thin edges or overflow.
- Use a small bubble level to check your table before starting.
- Place silicone mats or non-slip pads under your mold for extra stability.
A level surface ensures even curing and consistent thickness across your piece.
3. Pour Resin Slowly and in Layers
Pouring too quickly increases the chance of leaks and bubbles.
- Start with a small amount of resin in the center of the mold or bezel.
- Let it spread naturally toward the edges.
- For layered designs, allow each layer to cure before adding the next.
Slow, controlled pouring reduces stress on the tape and prevents overflow.
4. Eliminate Bubbles Immediately
Air bubbles can ruin a clear, professional look.
- Gently tap or shake the mold to bring bubbles to the surface.
- Use a toothpick or needle to pop stubborn bubbles.
- Apply a brief, gentle heat from a small torch or heat gun to release trapped air.
Be careful not to overheat, which can loosen tape adhesion or scorch resin.
5. Choose High-Quality Tape
The tape you use makes a huge difference in preventing leaks and sticky edges.
- Opt for tape specifically made for resin work.
- Check that it adheres firmly to metal, silicone, and plastic surfaces.
- Avoid reusing tape that has lost its stickiness.
High-quality tape ensures a tight seal and smooth edges every time.
6. Maintain Proper Temperature and Humidity
Environmental factors affect both resin curing and tape adhesion.
- Work in a room with moderate temperature (around 70–75°F or 21–24°C).
- Avoid humid areas, which can cause adhesive to lift and bubbles to form.
- Keep the resin and molds at room temperature before pouring.
Stable conditions help resin flow evenly and cure cleanly.
7. Inspect and Press Edges Before Pouring
Even minor gaps can lead to leaks:
- Run your fingers or a flat tool along every edge of the tape.
- Look closely at corners and curves to ensure the seal is complete.
Taking a few extra minutes here can save hours of cleanup later.
Pro Tip Summary
- Double-layer tape for deep molds
- Keep the workspace level
- Pour resin slowly in layers
- Pop bubbles with heat or tools
- Use high-quality tape
- Maintain consistent temperature and low humidity
- Press edges firmly before pouring
By following these professional tips, you’ll minimize leaks, prevent sticky edges, and reduce bubbles, resulting in clean, polished jewelry pieces every time.
9. How to Remove Resin Tape Without Damaging Your Jewelry
Removing tape after resin has cured might seem simple, but doing it incorrectly can ruin the edges, leave sticky residue, or even crack delicate pieces. With the right technique, you can peel tape cleanly and maintain a smooth, professional finish.
Step 1: Ensure the Resin Is Fully Cured
Removing tape too early is one of the most common mistakes.
- Epoxy resin usually needs 24–48 hours to harden completely.
- UV resin cures in minutes under a UV lamp, but make sure it’s fully set.
Handling resin before it’s completely cured can distort edges or leave fingerprints.
Step 2: Loosen the Tape Gently
Start peeling from one corner or edge:
- Lift the tape slowly using your fingers or a precision tool like a craft knife.
- Avoid yanking or pulling sharply, as this can tear the tape or damage delicate resin edges.
- Work gradually across the length of the tape rather than pulling the whole strip at once.
This controlled approach prevents chips and maintains the shape of your jewelry.
Step 3: Remove Any Residual Adhesive
Even high-quality tape can leave a thin sticky film:
- Lightly dab the affected area with rubbing alcohol on a lint-free cloth.
- Alternatively, use a small cotton swab to target tiny spots.
- Avoid abrasive cleaners that could scratch the resin surface.
Cleaning residue carefully ensures a smooth, glossy finish.
Step 4: Inspect and Smooth Edges
After tape removal, check all edges for rough spots or minor imperfections:
- Light sanding with very fine grit sandpaper can help smooth minor roughness.
- Use a polishing cloth to restore shine if needed.
This step gives your piece a professional, finished look without changing its shape.
Step 5: Store and Handle Finished Jewelry Properly
Even after careful tape removal, resin jewelry can be delicate:
- Handle pieces by the edges rather than flat surfaces.
- Store in a dust-free box or pouch to prevent scratches.
- Avoid extreme temperatures that could warp resin or affect adhesive residues left behind.
Pro Tip
For intricate bezels or multi-layered designs, peel the tape in small sections instead of all at once. This technique reduces stress on the resin and helps maintain perfectly smooth edges.
Following these steps will allow you to remove tape cleanly and safely, leaving your resin jewelry with sharp, polished edges and a flawless surface. Proper tape removal is just as important as careful sealing and pouring when it comes to professional-quality results.
10. Best Resin Tape for Jewelry (Buying Guide & What to Look For)
When selecting tape for resin work, choosing the right type can make a big difference in how clean and professional your finished pieces look. Good tape should create a strong seal, resist heat, peel off cleanly, and help prevent leaks or sticky edges.Here’s a breakdown of what to consider when choosing tape and the features that matter most:
Key Features to Look For
Strong Adhesive Strength
A tape with good adhesion prevents liquid resin from seeping underneath. Look for products that cling well to metal, silicone, and other crafting materials.
Heat & UV Resistance
Resin pours can heat up slightly while curing, especially deeper pours. Heat-resistant tape won’t curl, warp, or lose tack under these conditions. UV resistance also helps when using UV-cure resins or exposed in bright conditions.
Clean Removal Without Residue
The best tapes peel off smoothly without leaving sticky residue behind. This keeps your jewelry backs smooth and reduces cleaning time after curing.
Ease of Application
Simple peel-and-stick tapes that are easy to cut, position, and reposition help beginners and pros alike work more efficiently.
Appropriate Width & Length
Wide tape covers more surface and provides a stronger seal, while a longer roll means you’ll have enough for many projects.
Recommended Tape Options for Jewelry Projects
Here are several commonly used tape types with qualities that make them suitable for crafting tasks like sealing open bezels or protecting edges during resin pours:
Seamless Sticky Paper Tape
This type offers a smooth, traceless finish and is easy to apply. It’s designed for craft use and leaves little or no visible adhesive when removed.
Great for: Beginners, small bezels, light pours
Pros: Smooth finish, removable without visible lines
Cons: May not hold under heavy stress
UV Resin Adhesive Tape
Often made from PET film with a silicone backing, this tape is flexible and sticks reliably to bezels and molds without bonding to cured resin.
Great for: Open-frame pendants and UV resin work
Pros: Easy to peel off, doesn’t leave residue
Cons: Limited structural support for very thick pours
Heat-Resistant Resin Tape
These tapes are designed to withstand higher temperatures and won’t warp or curl during curing. This makes them especially useful for deeper pours or projects that involve tools like heat guns.
Great for: Larger projects, heat-assisted bubble removal
Pros: Stable under heat, strong adhesion
Cons: Slightly more expensive
PET Film Seamless Tape
Durable and flexible, this tape adheres well while remaining easy to cut to precise sizes. It’s useful when a smooth surface is important and helps keep resin contained.
Great for: Multiple projects, detailed work
Pros: Flexible, versatile
Cons: Some brands may vary in performance
Pro Tips Before You Buy
Match tape to your resin type: Some tapes perform better with UV resin, others with two-part resin.
Don’t use generic household tape: Tapes like regular packing tape often leave sticky residue and may not peel cleanly.
Check reviews and specs: Heat resistance, no residue, and ease of removal are recurring positive traits in quality tapes.
11. FAQs
Creating resin jewelry can raise a lot of questions, especially when it comes to sealing, pouring, and finishing. Here are answers to the most common concerns, presented clearly and concisely for easy understanding.
1. Can I use regular tape instead of specialized crafting tape?
Regular household tape often does not stick well to metal or silicone and can leave sticky residue. Crafting tapes are designed to prevent leaks and peel off cleanly after resin cures.
2. How long should resin cure before removing the tape?
Curing times vary by resin type:
- Epoxy resin: 24–48 hours for a complete hardening
- UV resin: A few minutes under a UV lamp
Removing tape too early can cause edges to warp or resin to stick.
3. Does resin stick to packing or masking tape?
Yes, resin can bond to ordinary packing or masking tape, which may make removal messy and leave residue. Using a smooth, traceless craft tape ensures a clean finish.
4. Can I reuse the tape for multiple projects?
It’s not recommended. Adhesive weakens after the first use, which can compromise the seal and increase the risk of leaks or uneven edges.
5. How do I prevent air bubbles in my resin?
- Pour slowly in thin layers
- Tap or shake molds gently after pouring
- Use a toothpick or needle to pop bubbles
- Apply gentle heat from a small torch or heat gun to release trapped air
These methods help achieve a smooth, professional finish.
6. What tape is best for open bezels?
Flexible, smooth-backed craft tape works best for open-frame jewelry. It forms a temporary barrier at the back, preventing resin from dripping while still allowing clean removal.
7. How can I avoid sticky or uneven edges?
- Press tape firmly along all edges before pouring
- Ensure molds and bezels are clean and dry
- Pour resin slowly and avoid overfilling
- Allow full curing before tape removal
12. Final Verdict:
If you want professional, leak-free results, learning how to use resin tape for jewelry is a must. It prevents spills, creates smooth edges, and saves hours of finishing work. Whether you’re a beginner or an experienced crafter, investing in quality tape ensures cleaner, polished pieces every time. In short, resin tape is a small tool with a big impact on your jewelry-making projects.