
1. Introduction:
If you’ve ever worked with epoxy, you know how frustrating resin leaks can be. A small gap along the edge of your mold or wood slab can quickly turn into a sticky mess. That’s why learning how to use epoxy resin tape the right way is essential for clean, professional-looking results.
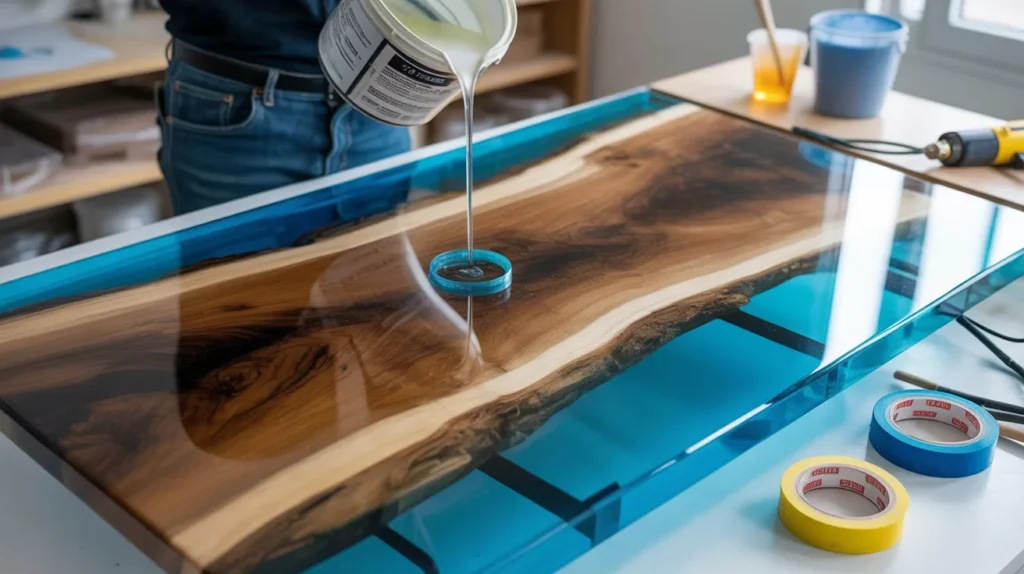
Epoxy resin tape is designed to create a temporary barrier that holds liquid resin in place while it cures. Whether you’re making a river table, sealing live-edge wood, or working on a DIY resin craft, proper tape application prevents overflow, reduces waste, and saves you hours of cleanup.
Many beginners assume any tape will work but that’s where problems start. Regular masking or packing tape often fails under deep pours or high temperatures during the curing process. Using the correct resin dam tape and applying it properly ensures strong adhesion, tight sealing edges, and reliable resin leak prevention.
In this guide, you’ll learn how to use epoxy resin tape step by step, including surface preparation, sealing techniques, and common mistakes to avoid. By the end, you’ll have the confidence to create smooth edges, controlled pours, and flawless epoxy projects without unwanted spills.
2. What Is Epoxy Resin Tape?
Epoxy resin tape is a strong sealing tape used to stop liquid resin from leaking during a pour. It creates a temporary barrier along edges, gaps, and molds until the resin fully cures.
This tape is specially designed for resin projects. It has:
Strong adhesive to stick firmly to wood, melamine, plastic, and metal
Leak-proof surface to prevent resin seepage
Non-stick backing so cured resin doesn’t bond permanently
Heat resistance to handle the curing process
It is often called resin dam tape, resin barrier tape, or mold sealing tape. It is commonly used for:
River tables
Live edge wood projects
Deep pour epoxy projects
DIY resin molds
Sealing cracks and edges
Unlike regular masking or packing tape, this type is made specifically for resin leak prevention and clean edge formation. Standard tape may lift, wrinkle, or allow resin to escape during curing. In simple terms, it acts as a temporary wall that keeps your resin contained and your project clean.
3. When Do You Need Epoxy Resin Tape?
You need resin sealing tape anytime you are working with liquid epoxy that could leak, spread, or overflow before curing. It helps create a tight barrier and keeps your project clean and controlled.
Here are the most common situations where it is essential:
1. River Tables
When pouring epoxy between two wood slabs, small gaps can cause major leaks. A strong sealing tape creates a secure dam and prevents resin from escaping during deep pours.
2. Live Edge Wood Projects
Natural wood edges often have cracks and uneven surfaces. Tape seals these gaps and stops resin from flowing underneath the slab.
3. Deep Pour Epoxy Projects
Large or thick pours generate heat during curing. Regular tape may fail under pressure, but proper resin barrier tape holds firmly in place.
4. DIY Resin Molds
If you are building a temporary mold using melamine boards or plastic sheets, tape seals the joints and corners to prevent seepage.
5. Repairing Cracks and Voids
When filling knots, holes, or surface cracks in wood, sealing tape keeps the resin exactly where you want it.
6. Preventing Resin Leaks on Edges
If your project does not have built-in mold walls, tape acts as a temporary edge guard to contain the liquid until it hardens. In short, you need it whenever resin containment and leak prevention are important. Using it at the right time saves material, reduces mess, and ensures clean, professional results.
4. Tools & Materials You Need Before Using Epoxy Resin Tape
Before starting your resin project, make sure you have the right tools and materials ready. Proper preparation helps prevent leaks, uneven curing, and surface defects.
Here’s what you’ll need:
1. Epoxy Resin Kit
Choose a high-quality resin and hardener suitable for your project, whether it’s a deep pour, tabletop coating, or craft mold. Always follow the manufacturer’s mixing ratio.
2. Mixing Cups and Stir Sticks
Use graduated measuring cups for accurate ratios. Wooden or silicone stir sticks help mix resin thoroughly and reduce air bubbles.
3. Clean, Level Work Surface
A flat and stable surface is essential. An uneven table can cause resin to flow to one side, leading to pooling or overflow.
4. Clamps (If Working with Wood)
Clamps keep boards or mold walls firmly in place. This is especially important for river tables and slab projects.
5. Heat Gun or Torch
A heat gun or small torch helps remove surface bubbles after pouring. Use it carefully to avoid overheating.
6. Protective Gear
Wear nitrile gloves, safety glasses, and work in a well-ventilated area. A respirator mask is recommended for larger projects.
7. Melamine Boards or Mold Walls
If you are creating a temporary mold, melamine boards are commonly used because resin does not stick strongly to their smooth surface.
8. Cleaning Supplies
Keep paper towels, isopropyl alcohol, and a scraper nearby for quick cleanup of small spills. Having these tools prepared before you start ensures a smooth workflow, better sealing, and professional-looking results.
5. Step-by-Step Guide: How to Use Epoxy Resin Tape (Beginner-Friendly)
Applying resin sealing tape correctly is the key to preventing leaks and getting clean edges. Follow these simple steps for best results.
Step 1: Prepare the Surface
Start with a clean and dry surface. Remove dust, oil, and moisture from wood, boards, or molds. Even small debris can prevent proper adhesion and cause gaps. Make sure your workspace is level. If the surface tilts, liquid resin can push against one side and weaken the seal.
Step 2: Measure and Cut the Tape
Cut pieces slightly longer than the area you need to seal. This allows you to overlap corners and joints for a stronger barrier. Avoid stretching the tape while cutting or applying. Stretching can cause lifting later.
Step 3: Apply Firmly Along the Edges
Press the tape tightly along the edges, gaps, or mold walls. Use steady pressure to ensure full contact with the surface. Pay close attention to corners. These areas are most likely to leak. Overlap sections slightly to create a continuous seal.
Step 4: Reinforce Critical Areas
For deep pours or large projects, apply a second layer along the bottom edge or corners. Extra reinforcement helps prevent resin seepage during curing. Check all seams carefully before pouring.
Step 5: Pour Slowly and Monitor
Pour the epoxy slowly to reduce pressure on the barrier. Watch for any early signs of leakage. If you notice a weak spot, seal it immediately.
Step 6: Allow Proper Curing Time
Let the resin cure fully according to the manufacturer’s instructions. Do not remove the tape too early, as this can damage the edges.
Step 7: Remove Carefully
Once fully cured but slightly firm (not rock-hard), gently peel away the tape. Pull at a low angle for cleaner edges. If needed, lightly sand minor imperfections.
6. Common Mistakes When Using Epoxy Resin Tape
Even a small mistake can lead to resin leaks, uneven edges, or wasted material. Avoid these common errors to get clean and professional results.
1. Using the Wrong Type of Tape
Regular masking or packing tape is not designed for resin projects. It can lift, wrinkle, or allow seepage during curing. Always use tape made specifically for resin containment.
2. Applying It on a Dirty Surface
Dust, oil, or moisture reduces adhesion. If the surface is not clean and dry, gaps can form and resin may leak underneath.
3. Not Pressing Firmly Enough
Light application can leave tiny air pockets. These weak points often become leak spots during deep pours. Press down firmly along the entire edge.
4. Ignoring Corners and Seams
Corners are the most common leak areas. Failing to overlap or reinforce these sections can result in resin overflow.
5. Skipping Reinforcement for Deep Pours
Thick pours generate heat and pressure. A single thin layer may not hold. Adding extra support along the base helps prevent failure.
6. Pouring Too Quickly
Fast pouring increases pressure against the barrier. Slow, controlled pouring reduces stress and lowers the risk of leaks.
7. Removing the Tape Too Early
If you peel it off before the resin has properly set, the edges may chip or deform. Always wait until the resin reaches the recommended curing stage. Avoiding these mistakes will improve resin leak prevention, reduce cleanup time, and help you achieve sharp, smooth edges on every project.
7. Pro Tips for Perfect Resin Edges
Clean, sharp edges make any epoxy project look professional. Use these expert tips to improve edge quality and prevent leaks or uneven finishes.
1. Seal the Wood First
Porous wood can absorb resin and create air bubbles along the edges. Apply a thin seal coat before your main pour. This improves adhesion and reduces seepage.
2. Double-Layer the Bottom Edge
For deep pours or large slabs, apply an extra strip along the base. This adds strength where pressure is highest during curing.
3. Press and Smooth Firmly
After applying the tape, run a plastic scraper or your thumb along the surface. This removes air pockets and ensures a tight seal.
4. Reinforce All Corners
Corners are weak points. Slightly overlap each section and press firmly to create a continuous barrier. Small gaps here can cause major leaks.
5. Control Room Temperature
Ideal working temperature is usually between 70–75°F (21–24°C). If it’s too cold, adhesion weakens. If it’s too hot, resin flows faster and increases pressure on the edges.
6. Pour in Stages for Deep Projects
Instead of one heavy pour, consider multiple thinner layers. This reduces heat buildup and stress on the containment barrier.
7. Remove at the Right Time
Peel the tape off when the resin is firm but slightly flexible. This helps create cleaner lines and reduces edge chipping.
8. Best Types of Epoxy Resin Tape for Different Projects
Choosing the right tape for your resin project makes a big difference in results. Different types are better suited for certain surfaces, pours, and project sizes. Here’s a simple guide to help you pick the best option.
1. Polyethylene Resin Tape
Best for: River tables, large slabs, and deep pours
Why it works: Flexible and strong, it resists heat and keeps resin contained. Non-stick backing ensures easy removal without damaging edges.
2. Silicone-Coated Tape
Best for: Small crafts, jewelry molds, and DIY resin projects
Why it works: Smooth surface prevents resin from sticking. Easy to shape around curves and intricate designs.
3. Double-Sided Epoxy Tape
Best for: Securing mold walls or small temporary forms
Why it works: Holds walls firmly in place while creating a tight seal along the base. Ideal for angled or uneven surfaces.
4. High-Temperature Resistant Tape
Best for: Deep pours or projects in warmer environments
Why it works: Maintains adhesion and strength even when resin generates heat during curing, preventing leaks and edge failure.
5. Masking Tape for Light Pours
Best for: Thin coatings, tabletops, and shallow molds
Why it works: Works for simple applications where resin flow is minimal. Make sure it’s high-quality to avoid lifting or seepage.
Selecting the right tape based on project type ensures proper sealing, prevents resin leaks, and helps you achieve clean, professional edges. Using the wrong tape can lead to messy spills and uneven finishes, so it’s worth investing in high-quality, purpose-made options.
9. How to Remove Epoxy Resin Tape Without Damaging Your Project
Removing resin sealing tape carefully is just as important as applying it. The right technique ensures clean edges without chipping, tearing, or leaving residue behind.
1. Wait for the Right Stage
Do not remove the tape immediately after pouring. Wait until the resin has cured enough to hold its shape but is still slightly flexible. This prevents the edges from breaking or pulling off with the tape.
2. Peel Slowly at a Low Angle
Lift one corner gently and pull the tape back at a shallow angle rather than straight up. A slow, controlled motion reduces stress on the cured resin edges.
3. Use a Utility Tool if Needed
For stubborn corners, carefully use a plastic scraper or craft knife to lift the edge without scratching the surface. Avoid metal tools that could damage your project.
4. Remove Residue Carefully
If small bits of adhesive remain, lightly rub them with a soft cloth and isopropyl alcohol. Avoid scraping hard, which can leave marks.
5. Sand Minor Imperfections
If the edge is slightly uneven after tape removal, use fine-grit sandpaper (400–600 grit) to smooth it. Always sand lightly to preserve the glossy finish.
Following these steps helps maintain crisp, professional edges while preventing damage. Proper removal ensures your project looks clean, polished, and leak-free every time.
10. Epoxy Resin Tape vs Other Resin Containment Methods
When working with liquid resin, keeping it contained is essential for clean results. While specialized tape is one option, there are several other methods available. Understanding the differences can help you choose the best solution for your project.
1. Silicone Caulking
Pros: Forms a flexible, leak-proof barrier; ideal for irregular shapes and deep pours.
Cons: Requires curing before pouring resin; removal can be messy and time-consuming.
2. Hot Glue Barriers
Pros: Quick to apply; adheres to most surfaces; good for small DIY projects.
Cons: May melt under high temperatures during deep pours; uneven application can cause leaks.
3. Melamine Boards or Mold Walls
Pros: Creates strong, reusable mold walls; resin doesn’t stick strongly to smooth surfaces.
Cons: Needs precise alignment and sealing at corners; gaps can still occur if not reinforced.
4. Plastic Sheeting or Tape Alternatives
Pros: Affordable and easy to use for temporary molds; flexible for curves.
Cons: Less durable; can lift or wrinkle under the pressure of liquid resin.
5. Comparison Summary
Tape provides quick, clean, and easy-to-remove containment with minimal prep.
Silicone caulking is better for irregular shapes or permanent molds.
Hot glue is good for small projects, but less reliable for deep pours.
Boards and mold walls offer structural support but require careful sealing.
For most projects especially river tables, live-edge slabs, and DIY molds a high-quality tape often combines ease of use, leak prevention, and clean edges, making it a preferred choice for professionals and beginners alike.
11. Safety Tips When Working With Epoxy Resin
Working with liquid resin can be safe if proper precautions are taken. Following these tips helps protect your health and ensures a smooth, mess-free project.
1. Wear Protective Gear
Always use nitrile gloves to prevent skin contact. Safety glasses or goggles protect your eyes from splashes, and long sleeves reduce exposure to sensitive areas.
2. Work in a Well-Ventilated Area
Resin fumes can irritate the eyes, nose, and lungs. Open windows, use fans, or work outdoors when possible to keep air circulating. For larger projects, a respirator mask is recommended.
3. Avoid Direct Skin Contact
Epoxy can cause allergic reactions or irritation. If resin touches your skin, wash immediately with soap and warm water. Do not use solvents to remove resin from skin.
4. Keep Your Workspace Clean
Remove clutter, dust, and liquids from your work area. Cover surfaces with disposable paper or plastic sheets to prevent spills from sticking to furniture.
5. Store Materials Safely
Keep resin and hardener containers tightly sealed when not in use. Store them out of reach of children and pets, and away from heat sources or direct sunlight.
6. Handle Tools Carefully
Mixing sticks, scrapers, and heat guns should be used according to instructions. Avoid overheating resin or using sharp tools without caution.
7. Dispose of Waste Properly
Cured resin is non-toxic, but uncured resin and leftover mixtures should be disposed of according to local hazardous waste guidelines. Do not pour it down the drain. By following these safety practices, you can enjoy crafting with resin while minimizing health risks and keeping your workspace clean and safe.
12. FAQs
1. Can I Reuse the Tape?
Most resin-specific tapes are designed for single use. Once they’ve been exposed to resin or stretched, adhesion decreases. Using fresh tape ensures a reliable seal.
2. What Tape Works Best for Deep Pours?
High-quality polyethylene or silicone-coated tape is ideal for thick pours. These types resist heat, stick firmly, and prevent leaks even under pressure.
3. Can I Use Regular Masking or Packing Tape?
Standard masking or packing tape is not recommended. It may lift, wrinkle, or allow resin to seep underneath, especially during deep or long curing projects.
4. Why Is My Resin Leaking Despite Using Tape?
Leaks often occur due to air pockets, unsealed corners, or uneven surfaces. Make sure the surface is clean, press tape firmly, and reinforce edges or overlaps for added strength.
5. When Should I Remove the Tape?
Peel the tape after the resin has cured enough to hold its shape but is still slightly flexible. Removing it too early can damage edges; too late may make peeling harder.
6. Can Tape Be Used on Curved or Irregular Surfaces?
Yes, but flexible or silicone-coated tape works best. Cut and shape pieces carefully to follow curves without stretching, which can weaken adhesion.
13. Conclusion: Is Epoxy Resin Tape Worth It?
When it comes to preventing leaks, creating clean edges, and saving time during resin projects, epoxy resin tape proves to be an essential tool. Whether you are working on a river table, a live-edge slab, or a small DIY mold, the tape provides a reliable barrier that keeps liquid resin contained while it cures.
Using it correctly reduces messy spills, minimizes waste, and helps achieve smooth, professional-looking results. For beginners, it simplifies the process and boosts confidence, while experienced crafters benefit from faster, cleaner pours.
In short, investing in high-quality resin tape is worth it for anyone looking to improve project quality, reduce cleanup, and achieve precise, leak-free results every time. Proper application ensures your resin work looks polished and professional, making it an indispensable part of your toolkit.