
1. Introduction
Are you curious about creating unique, beautiful accessories that reflect your personal style? Learning how to make resin jewelry is a fun and creative way to craft your own earrings, pendants, rings, and bracelets at home. Resin jewelry has become increasingly popular because it allows crafters to combine colors, glitter, dried flowers, and other small elements into custom designs that are both stylish and durable.
In this guide, we will walk you through everything you need to know about making resin jewelry from understanding the different types of resin to step-by-step crafting techniques. Whether you are a complete beginner or have some experience with DIY crafts, this tutorial will give you the knowledge and confidence to start creating your own stunning resin pieces.
By the end of this article, you’ll have a clear understanding of the tools, materials, and methods required, as well as tips to avoid common mistakes. Get ready to turn your creative ideas into beautiful, lasting resin jewelry that you can wear or gift to others!
2. What Is Resin Jewelry?
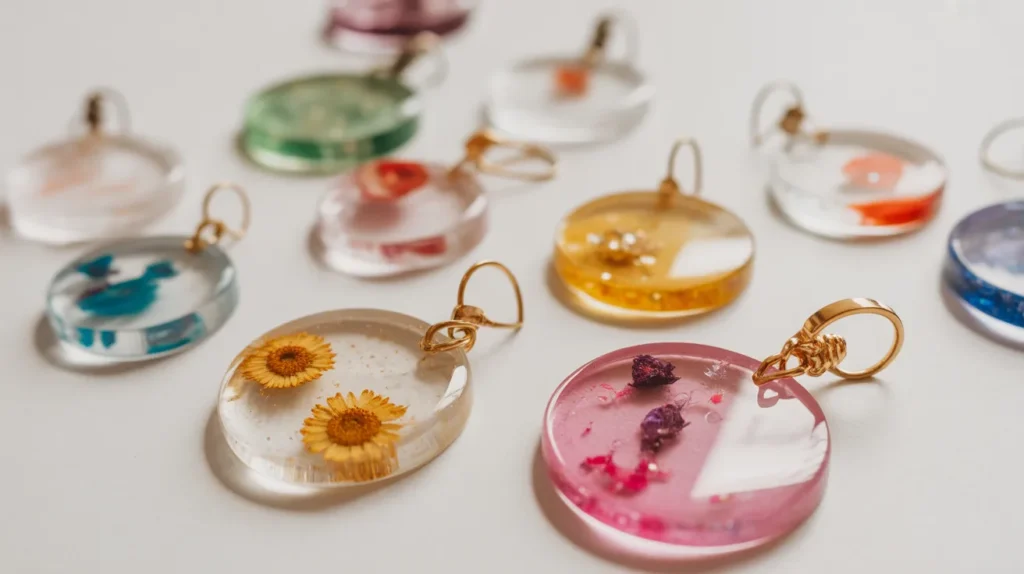
Resin jewelry refers to decorative pieces made using a liquid synthetic material that hardens into a solid, durable form. This material can be poured into molds or shaped by hand to create a wide variety of accessories, such as earrings, necklaces, bracelets, and rings. One of the main appeals is the versatility—it allows for the inclusion of colorful pigments, glitter, dried flowers, tiny beads, or other decorative elements, resulting in truly personalized designs.
There are different types of resin commonly used in crafting. Epoxy resin is a two-part system that requires mixing a resin and a hardener and is known for its clarity and strength. UV resin, on the other hand, hardens quickly when exposed to ultraviolet light and is ideal for small projects or quick creations.
Resin jewelry is not only aesthetically pleasing but also highly durable and lightweight. Its ability to capture intricate designs and patterns makes it a favorite choice for hobbyists and professional crafters alike. Whether creating simple pieces or elaborate art-inspired designs, this type of jewelry offers endless creative possibilities for anyone looking to express their personal style.
3. Tools and Materials Needed
Before starting a resin jewelry project, having the right tools and materials is essential for achieving professional-looking results. Here’s a breakdown of what you’ll need:
1. Resin Types
- Epoxy Resin: A two-part system consisting of resin and hardener. Known for its durability, clarity, and ability to hold inclusions like flowers or glitter.
- UV Resin: Cures quickly under UV light, making it ideal for small projects or when a fast turnaround is needed.
2. Molds and Shapes
- Silicone Molds: Flexible and easy to use, available in various shapes such as circles, hearts, and geometric designs.
- Hand-Shaping Tools: For crafters who prefer to create custom shapes without molds.
3. Mixing and Measuring Supplies
- Measuring Cups: Accurate measurement ensures proper curing, especially for epoxy resin.
- Stir Sticks: For thorough mixing of resin and additives.
4. Decorative Elements
- Pigments & Dyes: Add vibrant colors to your pieces.
- Glitters & Foils: Create sparkle and texture.
- Dried Flowers & Beads: Perfect for adding a unique personal touch.
5. Finishing Tools
- Sandpaper or Buffing Pads: Smooth rough edges and achieve a polished finish.
- Protective Gloves: Essential for safe handling and preventing skin contact.
- Disposable Surface Covers: Protects your workspace from spills and drips.
By gathering these tools and materials in advance, you’ll be prepared to create stunning, durable pieces efficiently and safely. Having everything organized before you start also makes the crafting process more enjoyable and reduces mistakes.
4. Step-by-Step Guide: How to Make Resin Jewelry
Creating resin accessories can be a fun and rewarding process when approached methodically. Here’s a practical step-by-step guide to help you get started:
Step 1: Prepare Your Workspace
- Cover your table with disposable sheets or parchment paper to protect surfaces.
- Ensure the area is well-ventilated, especially when working with epoxy resin.
- Gather all your tools and materials within reach to streamline the process.
Step 2: Mix the Resin
- For epoxy resin, measure equal parts of resin and hardener according to the manufacturer’s instructions.
- Stir slowly and thoroughly for a few minutes, scraping the sides and bottom to ensure even mixing. Avoid whipping too fast to minimize air bubbles.
- For UV resin, pouring directly into molds is possible, as it cures quickly under a UV lamp or sunlight.
Step 3: Add Color and Decorations
- Incorporate pigments, dyes, or mica powders to achieve your desired color.
- Sprinkle glitter, metallic foil, dried flowers, or tiny beads for added design elements.
- Mix gently to evenly distribute decorations without creating excess bubbles.
Step 4: Pour Into Molds
- Slowly pour the prepared resin into your molds or shape it by hand if creating custom pieces.
- Use a toothpick or small tool to adjust decorations and remove trapped air bubbles.
Step 5: Allow Resin to Cure
- For epoxy resin, let the pieces sit undisturbed for the recommended curing time, usually 24–48 hours.
- For UV resin, place the items under a UV lamp or direct sunlight until fully hardened.
Step 6: Finishing Touches
- Remove the cured pieces from the molds carefully.
- Sand edges lightly to smooth any rough areas, and buff for a polished shine.
- Attach jewelry findings, such as earring hooks, necklace chains, or ring bases, to complete your creation.
Following these steps ensures consistent results and allows beginners to confidently craft beautiful, durable pieces. With practice, you can experiment with more intricate designs and customizations, turning your creations into wearable art.
5. Resin Jewelry Design Ideas
Exploring different designs is one of the most enjoyable aspects of crafting resin accessories. Whether you are a beginner or an experienced maker, there are countless creative possibilities to try. Here are some popular ideas:
1. Earrings
- Simple studs or dangling shapes can be made using small molds.
- Add glitter, tiny beads, or dried flowers for a personalized touch.
- Layering colors or creating geometric designs can give a modern, stylish look.
2. Pendants and Necklaces
- Use larger molds or hand-shaped resin pieces to create unique pendants.
- Embed small charms, pressed flowers, or metallic foils for a striking effect.
- Combine multiple resin layers for a dimensional and artistic design.
3. Rings
- Resin rings are lightweight and customizable.
- Use ring molds of different sizes and experiment with bold colors or metallic accents.
- Adding tiny inclusions like glitter or miniature shapes can make each piece one-of-a-kind.
4. Bracelets and Bangles
- Pour resin into circular molds or silicone wrist molds for durable accessories.
- Incorporate beads, pigment swirls, or embedded designs for a trendy finish.
5. Custom Themes
- Seasonal or themed designs, like flowers in spring or snowflakes in winter, can be fun and unique.
- Personalize pieces with initials, tiny photos, or meaningful symbols to create gifts or keepsakes.
By experimenting with these ideas, crafters can develop their own style and make pieces that are truly unique. Starting with simpler designs is ideal for beginners, while advanced techniques like layering, color blending, or embedding intricate objects allow for professional-quality creations.
6. Tips and Tricks for Perfect Resin Jewelry
Creating flawless resin pieces requires more than just pouring liquid into molds. These practical tips and tricks can help you achieve professional-quality results every time:
1. Prevent Bubbles
- Mix resin slowly and steadily to minimize air bubbles.
- After pouring, gently tap the mold or use a toothpick to release trapped air.
- A small heat source, like a heat gun or lighter, can help pop surface bubbles before curing.
2. Work in a Dust-Free Environment
- Keep your workspace clean to avoid dust or debris settling on your pieces.
- Cover molds while resin cures to protect them from particles.
3. Use the Right Measurements
- Accurate ratios of resin and hardener are critical for epoxy resin.
- Even slight deviations can result in sticky or improperly cured pieces.
4. Experiment with Layers
- Pour resin in layers to embed decorations without them floating to the top.
- This technique also allows for creative color blending and depth effects.
5. Finish Smooth Edges
- Once cured, sand rough edges with fine-grit sandpaper for a polished appearance.
- Buffing or applying a thin layer of resin can enhance shine and clarity.
6. Keep Track of Curing Times
- Follow manufacturer guidelines for curing duration.
- Rushing the process can lead to soft, uneven, or cloudy results.
7. Personalize Thoughtfully
- Small inclusions like glitter, dried flowers, or tiny charms can enhance your designs.
- Ensure that all decorative elements are fully embedded and positioned before the resin hardens.
By following these tips, you can reduce common mistakes and elevate the quality of your creations. With practice, your pieces will not only look professional but also be durable and wearable.
7. Common Mistakes and How to Avoid Them
Even experienced crafters can encounter challenges when working with resin. Knowing the most common mistakes and how to prevent them can save time, materials, and frustration.
1. Improper Mixing
- Mistake: Not mixing the resin and hardener thoroughly can result in sticky or soft pieces.
- Solution: Measure accurately and stir slowly for the full recommended time, scraping the sides and bottom of the container.
2. Air Bubbles
- Mistake: Bubbles trapped in the resin can create a cloudy or uneven finish.
- Solution: Mix gently, tap molds lightly, and use a toothpick or heat source to release bubbles before curing.
3. Under- or Over-Curing
- Mistake: Removing pieces too soon or exposing them too long can lead to tacky or brittle results.
- Solution: Follow manufacturer instructions for curing times and environmental conditions. Ensure UV resin receives adequate light exposure.
4. Using the Wrong Mold
- Mistake: Some molds may not be compatible with certain resins, leading to sticking or uneven shapes.
- Solution: Use flexible silicone molds designed for resin and check compatibility before starting.
5. Neglecting Safety
- Mistake: Working without gloves or proper ventilation can cause skin irritation or inhalation of fumes.
- Solution: Wear protective gloves, work in a ventilated area, and avoid direct contact with resin.
6. Overcrowding Decorations
- Mistake: Adding too many elements can cause floating, uneven distribution, or trapped bubbles.
- Solution: Place inclusions carefully and consider layering resin to control placement.
By being mindful of these common issues and applying the suggested solutions, you can consistently produce high-quality, durable, and visually appealing accessories. Prevention is key to making the crafting process smooth and enjoyable.
8. Resin Jewelry Safety Guide
Working with resin can be fun and rewarding, but it’s important to follow safety precautions to protect yourself and your workspace. Here are the key guidelines to ensure a safe crafting experience:
1. Wear Protective Gear
- Always use disposable gloves to prevent skin contact with resin and hardener.
- Consider wearing a mask, especially when sanding cured pieces, to avoid inhaling fine dust or fumes.
- Protective eyewear is recommended if working with larger pours or when using heat tools.
2. Ensure Proper Ventilation
- Work in a well-ventilated area to minimize exposure to fumes from liquid resin.
- Open windows or use a fan to circulate fresh air and reduce the risk of irritation.
3. Handle Chemicals Carefully
- Follow manufacturer instructions for measuring, mixing, and curing.
- Store resin and hardener in a cool, dry place, away from children and pets.
4. Avoid Skin Contact
- Even a small amount of uncured resin can cause irritation or allergic reactions.
- If resin comes in contact with skin, wash immediately with soap and water.
5. Use Heat Tools Safely
- Heat guns or torches are sometimes used to remove bubbles.
- Keep a safe distance from your workpiece to prevent burns or resin scorching.
6. Dispose of Waste Properly
- Do not pour leftover resin down the drain.
- Dispose of used gloves, stir sticks, and resin scraps according to local regulations.
By following these safety practices, you can enjoy crafting with confidence and reduce the risk of accidents or health issues. A safe workspace not only protects you but also ensures better results in your projects.
9. Where to Buy Resin Jewelry Supplies
Once you’re ready to start creating, knowing where to source quality materials makes a big difference. Whether you prefer online shopping or local craft stores, there are plenty of places to find the tools and components you need for your projects.
1. All‑in‑One Craft Kits
Beginner kits are a great way to start, as they include a mix of essential supplies like silicone molds, pigments, and mixing tools in one pack. For example, a complete starter kit with molds and tools can be purchased online and is perfect for those just getting into this craft.
2. Craft Supply Websites
Several online retailers offer a wide range of art and craft materials. You can find epoxy resin, silicone molds, mica powders, pigments, glitters, and other accessories on specialized craft platforms. These sites make it easy to compare different products and choose items that suit your skill level and design preferences.
3. Local Art & Craft Stores
If you prefer seeing materials in person before buying, local craft shops often stock key supplies such as clear casting resin, coloring pigments, and molds. Stores that focus on art and DIY crafts typically have sections dedicated to mixed media and casting materials.
4. Online Marketplaces
Large e‑commerce platforms are convenient options for finding resin materials and tools. You can browse a variety of kits, molds, colorants, and even UV lamps from different brands. Shopping this way allows you to read reviews, compare prices, and select items based on your specific needs.
5. Specialty Pigments and Accessories
In addition to basic supplies, many craft supply stores offer specialized items like mica pigment powders, glitter sets, and decorative fillers. These extras help add color and sparkle to your creations, and are often sold in small convenient packs.
By exploring both online and brick‑and‑mortar options, you can build a well‑rounded collection of materials that supports your creative ideas and helps you produce beautiful pieces with confidence.
10.FAQs
1. What types of resin are best for making jewelry?
Both epoxy resin and UV resin are commonly used. Epoxy resin is durable and ideal for larger projects or layered designs, while UV resin cures quickly under light, making it perfect for small charms and fast creations.
2. Can I use resin without molds?
Yes, resin can be shaped by hand or poured onto a flat surface to create freeform pieces. Using tools like silicone mats or shaping sticks allows for custom designs without standard molds.
3. How do I add color to resin pieces?
You can use resin pigments, mica powders, or alcohol inks to create vibrant colors. Mix thoroughly but gently to avoid air bubbles while achieving an even hue.
4. How long does resin take to cure?
Curing time depends on the type of resin. Epoxy resin usually takes 24–48 hours at room temperature, while UV resin hardens within minutes under UV light.
5. How can I prevent bubbles in my resin jewelry?
Mix slowly and carefully, tap molds gently, and use a toothpick or heat gun to release trapped air. Proper technique ensures a smooth, clear finish.
6. Are resin pieces safe to wear?
Once fully cured, resin is generally non-toxic and safe for accessories. However, always ensure the resin has hardened completely before wearing or gifting your jewelry.
7. Can I reuse resin molds?
Yes, silicone molds can be cleaned and reused multiple times, making them ideal for creating several pieces without losing shape or quality.
8. What are the best tools for beginners in resin crafting?
Starter kits with mixing cups, stir sticks, silicone molds, and gloves are perfect for beginners. These provide everything needed to start crafting without purchasing supplies separately.
9. How do I make my resin jewelry shiny and professional-looking?
After curing, lightly sand rough edges with fine-grit sandpaper, then buff or apply a thin resin layer to achieve a smooth, glossy finish.
10. Where can I buy quality resin supplies?
Supplies can be purchased from online craft stores, specialty resin suppliers, or local art shops. Popular options include complete starter kits, resin pigments, glitter, and silicone molds.
11. Final Verdict:
Learning how to make resin jewelry is definitely worth the effort for anyone interested in crafting unique, personalized accessories. Not only does it allow you to create one-of-a-kind designs, but it also provides a rewarding creative outlet that combines art and skill.
The process is accessible for beginners, especially with starter kits and easy-to-follow techniques, yet it also offers advanced options for those who want to experiment with layering, color blending, and embedded decorations. With the right tools, materials, and safety precautions, your creations can be professional-looking, durable, and even suitable for gifting or selling.
In short, investing your time and effort into making resin pieces offers both artistic satisfaction and practical results. Whether you’re crafting for fun or building a small business, this type of DIY jewelry allows for endless creative possibilities and personal expression.