
1️⃣ Introduction
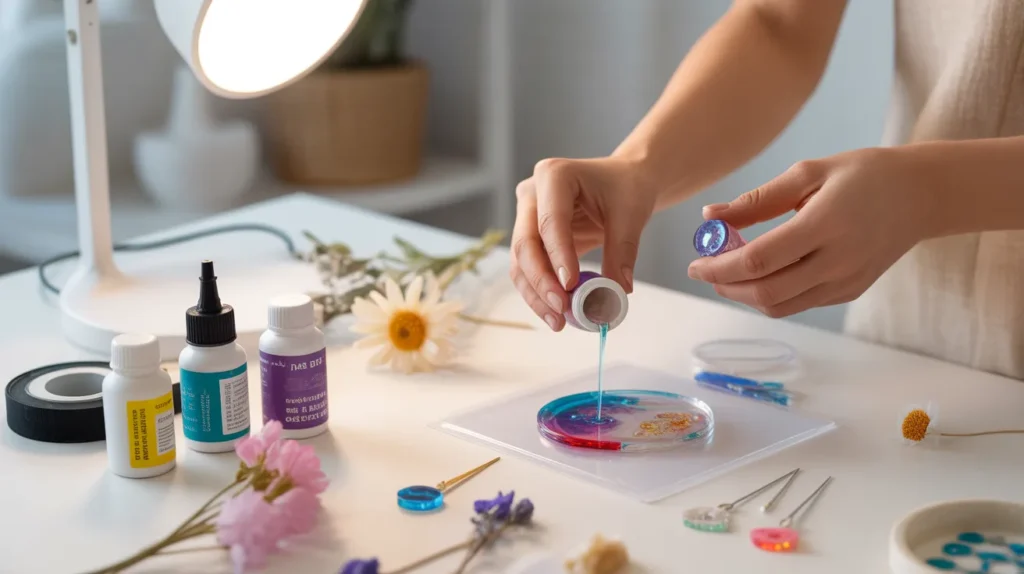
Creating beautiful resin jewelry doesn’t always require silicone molds. In fact, learning how to make resin earrings without molds can save money and give you more creative freedom. With simple tools like resin tape, plastic sheets, or wire frames, you can shape and design custom earrings at home.
This mold-free method is beginner-friendly, affordable, and perfect for DIY jewelry makers or small business starters. Whether you use UV resin or epoxy resin, you can create unique, professional-looking earrings without special equipment.
In this guide, you’ll discover the easiest techniques, essential materials, and practical tips to get started with confidence.
2️⃣ Can You Make Resin Earrings Without Silicone Molds?
Yes, you can absolutely make resin earrings without silicone molds. Molds are helpful, but they are not required to create beautiful and durable resin jewelry. Many DIY creators use alternative methods that are simple, affordable, and beginner-friendly.
Instead of molds, you can use resin tape to build a small border, pour resin onto a plastic sheet for freeform designs, or shape thin wire into frames and fill them with resin. Some crafters even create flat resin sheets first and cut them into earring shapes after curing. These techniques give you more flexibility and allow you to design unique, custom pieces.
Making earrings without molds also reduces startup costs, which is great if you’re testing a new hobby or starting a small jewelry business. It encourages creativity because you’re not limited to preset shapes.
However, this method does require careful handling to prevent resin from spreading or leaking. Proper surface preparation and sealing are important for clean edges and a smooth finish. Overall, silicone molds are optional. With the right technique and patience, you can create professional-looking resin earrings using simple tools and smart methods.
3️⃣ Best Materials Needed
Choosing the right materials makes a big difference in the quality, durability, and finish of your resin earrings. Below is a simple comparison of the most important supplies you’ll need.
1️⃣ Resin Type: UV Resin vs Epoxy Resin
UV Resin
- Cures in minutes under a UV lamp
- Best for thin layers and small designs
- Great for beginners who want fast results
Epoxy Resin
- Takes 24–48 hours to cure
- Better for thicker or layered pieces
- Strong and durable for long-term use
If you want speed, choose UV resin. If you want depth and thickness, epoxy resin is better.
2️⃣ Base Surface Options
Since you’re not using molds, the surface matters.
Plastic Sheet
- Smooth finish
- Easy to peel off after curing
Parchment Paper
- Affordable
- Works well for flat designs
Silicone Mat
- Reusable
- Prevents sticking
A flat, non-stick surface helps control shape and thickness.
3️⃣ Border & Shape Control Materials
To prevent resin from spreading, you need a barrier.
Resin Tape
- Strong seal
- Creates clean edges
Masking Tape
- Budget-friendly
- Good for beginners
Metal Cookie Cutters
- Helps form neat geometric shapes
Proper sealing prevents leaks and keeps the design neat.
4️⃣ Decorative Elements
These materials make your earrings unique:
- Dried flowers
- Glitter
- Gold flakes
- Pigments and alcohol inks
- Small charms
Choose lightweight decorations so the earrings stay comfortable to wear.
5️⃣ Essential Tools
- UV lamp (for UV resin)
- Mixing cups and sticks (for epoxy)
- Toothpicks for detail work
- Heat gun or lighter to remove bubbles
- Sandpaper for smoothing edges
Using quality materials ensures a smooth surface, fewer bubbles, and a professional finish. Selecting the right combination will help you create strong, beautiful, and long-lasting resin earrings.
4️⃣ 5 Easy Methods to Make Resin Earrings Without Molds
You don’t need special equipment to create beautiful resin earrings. Below are five simple and practical methods that work well for beginners and small business creators.
1️⃣ Resin Tape Dam Method
This is one of the easiest techniques. Create your desired shape by placing resin tape on a flat plastic sheet. Press the tape firmly to seal the edges, then pour resin inside the border. Cure it properly and peel off the tape once hardened.
Best for: Clean geometric shapes
Skill level: Beginner-friendly
2️⃣ Freeform Pour on Plastic Sheet
Pour resin directly onto a smooth plastic sheet or silicone mat. Let it naturally spread into an organic shape. You can guide the edges slightly with a toothpick if needed.
Best for: Abstract or irregular designs
Skill level: Very easy
3️⃣ Cookie Cutter Technique
Place a small metal cookie cutter on a flat surface lined with plastic. Pour resin inside the cutter to control the shape. Once cured, gently remove the cutter.
Best for: Consistent shapes like circles, hearts, or stars
Skill level: Easy
4️⃣ Resin Sheet & Cut Method
Pour a thin layer onto a flat surface and let it fully cure. After hardening, cut out shapes using scissors (for thin sheets) or small jewelry cutters. Sand the edges for a smooth finish.
Best for: Batch production and custom designs
Skill level: Moderate
5️⃣ Wire Frame Method
Shape thin jewelry wire into circles, ovals, or custom outlines. Secure the frame on tape and carefully fill the center with resin. Cure in layers if needed for strength.
Best for: Minimalist and modern styles
Skill level: Intermediate
Each method offers different design possibilities. Choose based on your skill level, tools available, and the style you want to create. With practice, you can achieve clean edges, smooth finishes, and professional-looking results.
5️⃣ Comparison of No-Mold Methods
Each no-mold technique has its own advantages. The right choice depends on your budget, skill level, and the style you want to create. Below is a simple comparison to help you decide.
1️⃣ Tape Dam Method
Cost: Low
Difficulty: Easy
Finish Quality: Clean, straight edges
Best For: Beginners and geometric designs
This method is affordable and simple. It gives good shape control, but you must seal the tape properly to prevent leaks.
2️⃣ Freeform Pour Method
Cost: Very Low
Difficulty: Very Easy
Finish Quality: Organic and artistic
Best For: Abstract or creative styles
This technique requires minimal tools. However, edges may not be perfectly symmetrical, which may not suit formal designs.
3️⃣ Cookie Cutter Technique
Cost: Low
Difficulty: Easy
Finish Quality: Neat and consistent
Best For: Repeating specific shapes
It’s great for making multiple pairs with the same design. Just ensure the cutter sits flat to avoid uneven edges.
4️⃣ Resin Sheet & Cut Method
Cost: Medium
Difficulty: Moderate
Finish Quality: Professional after sanding
Best For: Bulk making and custom shapes
This method offers flexibility in design, but cutting and finishing require extra effort and time.
5️⃣ Wire Frame Method
Cost: Medium
Difficulty: Intermediate
Finish Quality: Minimalist and modern
Best For: Lightweight and delicate designs
Wire frames allow creative outlines, but filling them evenly takes patience and careful layering.
Final Comparison Insight
- For beginners: Tape dam or cookie cutter methods are the easiest.
- For creative freedom: Freeform pour works best.
- For business or batch production: Resin sheet cutting offers more control.
- For elegant styles: Wire frames provide a unique look.
Choosing the right method depends on your experience level and the finish you want to achieve.
6️⃣ Common Mistakes to Avoid
Working with resin can be fun and rewarding, but beginners often make simple mistakes that affect the final result. Here are the most common issues and how to avoid them.
1️⃣ Resin Spreading or Leaking
Cause: Tape or barrier not sealed properly
Solution: Press tape firmly, use double layers if needed, and pour slowly.
2️⃣ Sticky or Soft Surface
Cause: Resin not fully cured or uneven UV exposure
Solution: Follow the recommended curing time and ensure UV light reaches all areas evenly.
3️⃣ Air Bubbles
Cause: Pouring too quickly or stirring too vigorously
Solution: Pour slowly, use a toothpick to remove bubbles, or briefly apply a heat gun or lighter over the surface.
4️⃣ Uneven Thickness
Cause: Overfilling or pouring on an uneven surface
Solution: Pour in thin layers, leveling each layer before curing.
5️⃣ Decorations Floating or Sinking
Cause: Incorrect resin viscosity or adding elements too early
Solution: Place small decorations carefully after the resin starts to thicken slightly, or embed them in layers.
By avoiding these mistakes, you’ll achieve smooth, clean, and professional-looking results every time. Taking your time with preparation, pouring, and curing is key to high-quality resin jewelry.
7️⃣ How to Add Earring Hooks & Hardware
Adding the right hooks and hardware is essential to turn your resin pieces into wearable earrings. There are several methods depending on the style and strength you want.
1️⃣ Drill a Small Hole
- Method: Use a tiny drill or hand punch to make a hole in the cured resin piece. Insert a jump ring and attach an earring hook.
- Best For: Professional and durable earrings
- Tip: Sand the edges around the hole to prevent cracking.
2️⃣ Use an Eye Pin
- Method: Insert an eye pin while the resin is still soft or embed it in layers. Once cured, attach the earring hook to the loop.
- Best For: Lightweight designs and dangling earrings
- Tip: Make sure the pin is fully secured in the resin to avoid loosening.
3️⃣ Glue-On Studs or Posts
- Method: Apply strong jewelry adhesive to attach the stud or post to the back of the resin piece.
- Best For: Minimalist earrings or when drilling is not possible
- Tip: Let the glue cure completely for a secure hold.
4️⃣ Clip-On Findings
- Method: Attach clip-on earring backs using glue or small jump rings.
- Best For: Non-pierced earlobes or decorative designs
- Tip: Choose lightweight resin pieces to ensure comfort.
Key Tips for Hardware Attachment
- Always allow resin to fully cure before adding hardware.
- Choose lightweight findings for larger resin pieces to avoid stress and breakage.
- Test the connection for strength before wearing or selling.
By selecting the right attachment method, you can make earrings that are not only stylish but also durable and comfortable to wear.
8️⃣ UV Resin vs Epoxy Resin for Mold-Free Earrings
Choosing the right type of resin can make a big difference in the quality and finish of your earrings. Both UV resin and epoxy resin have their advantages depending on the design and purpose of your jewelry.
1️⃣ UV Resin
- Cure Time: Cures in minutes under a UV lamp
- Best For: Thin layers, small pieces, and fast projects
- Finish: Smooth and glossy without bubbles if applied carefully
- Pros: Quick results, less waiting time, easy for beginners
- Cons: Not ideal for thick layers, can yellow over time if exposed to sunlight
2️⃣ Epoxy Resin
- Cure Time: Typically takes 24–48 hours to fully harden
- Best For: Thicker or layered earrings and more durable designs
- Finish: Strong, clear, and long-lasting; excellent for embedding decorations
- Pros: Great for depth and complex designs, stronger for larger pieces
- Cons: Longer curing time, requires careful mixing and bubble management
Quick Comparison Table
| Feature | UV Resin | Epoxy Resin |
| Cure Time | Minutes | 24–48 hours |
| Layer Thickness | Thin only | Thin to thick |
| Ease of Use | Beginner-friendly | Moderate |
| Durability | Moderate | High |
| Best For | Small earrings | Statement pieces |
Tip for Choosing
Using the right resin ensures your mold-free earrings look professional, last longer, and maintain a polished finish. Pick UV resin if you want quick, small, and glossy earrings. Choose epoxy resin for layered designs, embedding dried flowers, glitter, or heavier decorations.
9️⃣ Cost Comparison
Understanding the costs of materials and tools is important before starting resin earrings. Here’s a breakdown of typical expenses for different approaches.
1️⃣ Beginner Setup
- Resin: $10–$20 for a small UV or epoxy resin kit
- Tools: $5–$15 for basic items like mixing cups, sticks, and a toothpick
- Decorations: $5–$10 for glitter, dried flowers, or pigments
Total: Approximately $20–$45
This setup is perfect for trying out techniques at home without a big investment.
2️⃣ Small Business Starter
- Resin: $30–$50 for larger UV or epoxy kits
- Tools: $20–$40 for a heat gun, UV lamp, sanding tools, and cutting equipment
- Hardware & Decorations: $15–$30 for earring hooks, jump rings, and decorative elements
Total: Around $65–$120
Investing in higher-quality materials ensures professional results and allows you to make multiple pairs for sale.
3️⃣ Bulk or Advanced Production
- Resin: $50–$100 for larger epoxy kits or multiple UV resin bottles
- Tools: $50–$100 for premium lamps, molds, and finishing tools
- Decorations & Hardware: $30–$50 for bulk supplies
Total: $130–$250
This approach is ideal for those producing multiple pairs per week or running a small resin jewelry business.
Cost Tips
- Buy decorations and hardware in bulk to save money.
- UV resin is cheaper for small, quick projects, while epoxy is more cost-effective for larger designs.
- Reusable tools like silicone mats or metal cutters reduce long-term costs.
Being aware of these costs helps plan your budget and ensures your resin earrings are both beautiful and profitable.
🔟 Final Tips to Make Your Earrings Look Professional
Creating high-quality earrings that look polished and durable takes attention to detail. By following a few key tips, you can elevate your designs and make your pieces stand out.
1️⃣ Prepare Your Workspace
A clean, dust-free surface ensures no particles get trapped in the resin. Lay down a silicone mat or parchment paper to protect surfaces and make cleanup easier.
2️⃣ Use the Right Resin
Whether you choose UV resin or epoxy resin, select a type that suits your design. UV resin works well for small, thin pieces, while epoxy resin is better for layered or thicker designs. Choosing the correct resin ensures a smooth, professional finish.
3️⃣ Layer Decorations Carefully
If adding glitter, dried flowers, or pigments, place them in layers and allow each layer to cure. This prevents floating elements and keeps your design crisp and clean.
4️⃣ Control Bubbles
Use a toothpick to gently pop bubbles after pouring resin. A small heat gun or lighter can also help remove air pockets and create a flawless surface.
5️⃣ Sand and Polish Edges
After curing, lightly sand rough edges with fine-grit sandpaper. For extra shine, polish the edges or apply a thin layer of resin as a topcoat.
6️⃣ Attach Hardware Securely
Insert eye pins or drill holes carefully, and make sure hooks or studs are firmly attached. A weak connection can reduce the lifespan of your earrings.
7️⃣ Practice Mold-Free Techniques
Learning how to make resin earrings without molds allows you to create custom shapes and unique designs. Practice different methods like tape dams, freeform pours, or wire frames to find what works best for your style.
8️⃣ Take Your Time
Patience is key. Rushing curing, layering, or finishing steps can result in sticky surfaces, uneven edges, or imperfections. Follow instructions and allow proper drying for professional results.
By applying these tips, you can craft resin earrings that look polished, durable, and ready to wear or sell. Combining careful technique with creativity ensures your mold-free designs stand out and impress anyone who sees them.
1️⃣1️⃣ FAQs
1️⃣ Can I make earrings without silicone molds at home?
Yes. You can use resin tape, plastic sheets, parchment paper, or wire frames to create shapes. These alternatives are beginner-friendly and budget-conscious.
2️⃣ Which resin is better for small jewelry projects?
UV resin is ideal for small, thin pieces because it cures quickly under a UV lamp. Epoxy resin works better for thicker layers and more durable designs.
3️⃣ How do I prevent air bubbles in resin earrings?
Pour resin slowly and avoid vigorous stirring. Use a toothpick to remove bubbles and a heat gun or lighter to pop any trapped air for a smooth finish.
4️⃣ How can I attach hooks or studs securely?
Insert eye pins into partially cured resin or drill a small hole after curing. For glue-on posts, use a strong jewelry adhesive and let it fully set for durability.
5️⃣ Can I add glitter, dried flowers, or pigments?
Yes. Embed decorations in thin layers to prevent them from floating or sinking. Layering allows precise placement and ensures a professional look.
6️⃣ What surfaces are best for mold-free resin earrings?
Flat, non-stick surfaces like plastic sheets, silicone mats, or parchment paper work best. They prevent sticking and make it easy to remove cured resin pieces.
7️⃣ How do I make my resin earrings look polished?
Sand rough edges with fine-grit sandpaper, polish surfaces, and consider applying a thin topcoat for extra shine. Proper curing and careful layering also improve the overall finish.
8️⃣ Are mold-free methods suitable for small businesses?
Absolutely. Techniques like resin sheets, tape dams, and wire frames allow consistent results for multiple pairs. This is cost-effective and ideal for handmade jewelry businesses.