
Introduction
If you want to learn how to make resin art, it is a creative process using epoxy resin art to design glossy and durable artwork. Resin art is popular because it creates a glass-like finish and allows unique styles such as abstract designs, ocean wave effects, and modern resin art ideas for home decor. It is also beginner-friendly, making it a great choice for DIY resin art and handmade crafts.
You do not need expensive tools basic epoxy resin, pigments, and a mixing cup are enough. With proper resin pouring techniques, anyone can start creating beautiful resin artwork for beginners and explore artistic expression. Resin art is also widely used in decor and personalized gifts, making it a trending skill in the creative and handmade market.
2. Materials Required for Resin Art
To create resin artwork, you need a few basic materials. The most important is epoxy resin and hardener, which mix together to form a strong, glossy finish. You also need pigments or resin dyes to add color and design effects. Popular options include mica powders and alcohol inks for vibrant and smooth results.
A mixing cup and stirring sticks are required for proper measurement and blending. Use separate cups to measure resin and hardener so the ratio remains accurate. Nitrile gloves protect your skin because resin can irritate if touched directly. For pouring, a canvas, wooden board, or silicone mold works well depending on the type of artwork. A heat gun or small torch helps remove air bubbles after pouring, giving a clear and professional finish.
Finally, always work in a well-ventilated space and use protective coverings on your workspace to avoid spills. These basic materials are enough to start resin art and create beautiful, durable designs.
3.Choosing the Right Resin for Art
Selecting the correct resin is important for smooth and durable artwork. Epoxy resin is the best choice for art projects because it creates a glossy, glass-like finish and works well on different surfaces. It is available in various types some are designed for deep pours, while others are better for thin layers and coatings.
For artwork, use art-grade epoxy resin instead of industrial resin. Art-grade resin is clearer, yellow-resistant, and formulated for creative projects. It also cures smoothly, reducing bubbles and imperfections.
If you want quick results, UV resin is another option. It hardens under UV light within minutes and is useful for small designs and jewelry. However, it is not ideal for large artwork because it requires direct UV exposure to cure.
Always check the curing time and mixing ratio before purchasing resin. Some products require a 1:1 ratio, while others need different proportions. Following the correct ratio ensures proper hardening and a strong finish. By choosing high-quality resin and the right type for your project, you can create professional-looking artwork with long-lasting results.
4. Preparing Your Workspace
A clean and safe workspace is important for resin art because epoxy resin can spill and release fumes during the curing process. Start by choosing a well-ventilated area, such as a room with open windows or a space with proper airflow. This helps reduce exposure to resin fumes and keeps the environment comfortable.
Cover your working surface with plastic sheets, silicone mats, or old newspapers to protect it from spills. Resin can stick to surfaces and is difficult to remove once hardened, so protective coverings make cleanup easier. If you are using a canvas or wooden board, place it on a level surface to prevent resin from flowing unevenly.
Keep all materials organized before starting. Arrange resin, hardener, pigments, mixing cups, and gloves within reach. This saves time and prevents mistakes during the mixing process. Use separate measuring cups for resin and hardener to maintain accurate proportions. Safety is also important. Wear nitrile gloves to protect your skin and consider a mask if you are sensitive to fumes. Although art-grade resin is safer than industrial options, direct contact should still be avoided.
By preparing a clean, ventilated, and organized workspace, you can create resin artwork more efficiently and achieve better results. A proper setup reduces mistakes and helps the resin cure smoothly for professional-looking designs.
5. Step-by-Step Process of Making Resin Art
Creating resin artwork is simple when you follow the correct process. Start by measuring epoxy resin and hardener according to the manufacturer’s instructions. The mixing ratio must be accurate because incorrect proportions can prevent proper curing.
Pour the resin and hardener into a mixing cup and stir slowly for several minutes. Stirring too fast creates air bubbles, which can affect the final finish. Use a flat-bottom cup and mix until the liquid becomes clear and well combined.
Next, add pigments or dyes to the mixed resin. Small amounts of color work best because resin pigments are highly concentrated. Mix gently until the color spreads evenly. You can use different colors to create abstract patterns, ocean effects, or layered designs.
Once the resin is ready, pour it onto your canvas or chosen surface. Spread it evenly using a spatula or stick to cover the entire area. If you want creative effects, you can tilt the surface or use tools to guide the resin into patterns. After pouring, remove air bubbles with a heat gun or small torch. Move the heat source quickly over the surface do not keep it in one place for too long. This step improves clarity and gives a smooth, professional finish.
Let the resin cure in a dust-free area. Curing time varies depending on the product, but most epoxy resins take 24 to 48 hours to harden completely. Avoid touching the surface while it is curing to prevent marks or imperfections. Once fully cured, your resin artwork will have a glossy and durable finish. With practice, you can experiment with different techniques and designs to create unique pieces of art.
6. Creative Resin Art Ideas
Resin art allows endless creativity, and you can experiment with different styles to make unique designs. One popular idea is abstract resin art, where colors are poured and blended randomly to create modern and artistic patterns. This style works well for wall decor and canvas artwork.
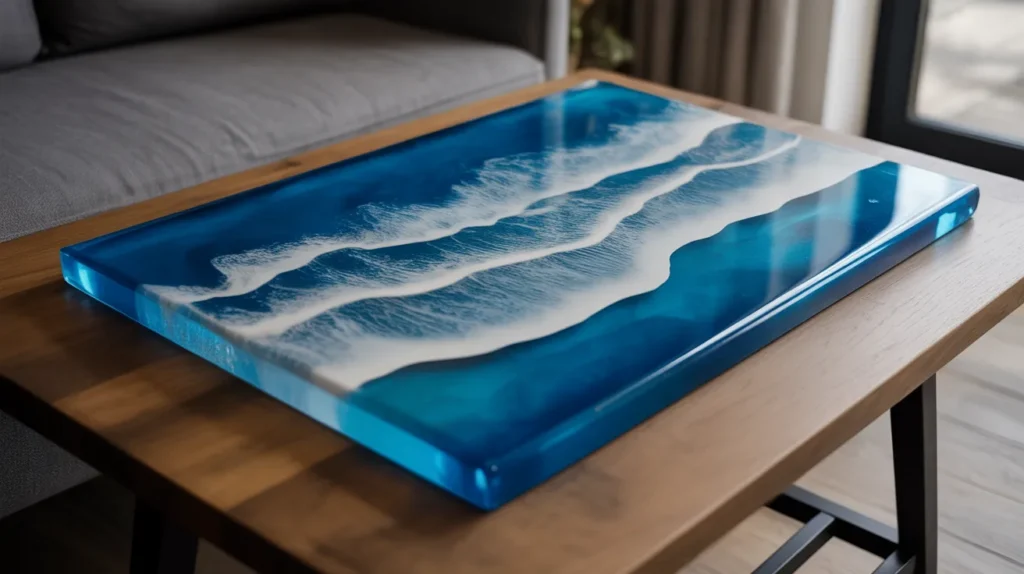
Ocean-inspired designs are also widely loved. By using shades of blue and white, you can create wave-like effects that resemble the sea. Adding small details like sand or seashell pieces enhances the ocean theme and gives a realistic look.
Geode-style resin art is another creative option. This design mimics natural crystals by combining metallic pigments and sharp color contrasts. It is commonly used for tabletops, decorative trays, and artistic panels. If you prefer functional art, resin can be used on wooden furniture. Resin-coated tables and countertops have a glossy, durable finish that protects the surface while adding a decorative touch. This makes furniture both stylish and long-lasting.
Jewelry and small decorative items are also great resin projects. You can create pendants, keychains, and custom accessories using silicone molds. These items are easy to make and can be personalized with colors and small embellishments.
By experimenting with different ideas and techniques, you can develop your own artistic style. Resin art is versatile, allowing beginners and professionals to create beautiful and unique designs.
7. Common Mistakes and How to Avoid Them
One common mistake in resin art is incorrect mixing of epoxy resin and hardener. If the ratio is not accurate, the resin may remain sticky or fail to cure properly. Always follow the manufacturer’s instructions and measure the components carefully.
Air bubbles are another frequent problem. They can appear when resin is mixed too quickly or poured from a height. To prevent bubbles, stir slowly and use a heat gun or small torch after pouring to release trapped air.
Uneven surfaces often occur when the working area is not level. Resin flows toward one side if the surface is tilted, creating an uneven finish. Always place your artwork on a flat surface and check alignment before pouring. Dust and debris can ruin the smooth finish of resin art. Small particles may settle on the surface while it cures, leaving imperfections. Work in a clean, dust-free space and cover the artwork while it is curing.
Using too much pigment is another mistake. Excess color can affect curing and reduce transparency. Add pigments in small amounts and mix gradually until you achieve the desired shade.
Rushing the curing process can also cause problems. Resin needs sufficient time to harden completely. Avoid touching or moving the artwork until it has fully cured. By understanding these common mistakes and following proper techniques, you can create smooth and professional resin artwork with better results.
8. Resin Art Curing and Finishing
Curing is the process where epoxy resin hardens and becomes fully durable. Most resins require 24 to 48 hours to cure, but some products may take longer. During this time, keep the artwork in a dust-free area and avoid touching the surface so the finish remains smooth.
Temperature affects curing. Resin cures best in a warm environment, usually between 20°C and 25°C (68°F to 77°F). If the room is too cold, curing may slow down or result in a sticky surface. Keeping the workspace at a stable temperature helps achieve better results.
Once the resin is fully cured, you can inspect the surface for imperfections. Small dust particles or tiny bumps can sometimes appear. Light sanding with fine-grit sandpaper can smooth these areas. After sanding, wipe the surface with a clean cloth before applying a finishing layer if needed.
For extra shine and protection, some artists apply a thin topcoat of resin. This enhances gloss and creates a professional finish. If you choose to do this, ensure the first layer is completely cured before adding another coat. Proper curing and finishing improve durability and appearance. By following the right process, resin artwork becomes glossy, long-lasting, and visually appealing.
9. Resin Art for Beginners: Tips and Tricks
Starting with simple projects helps beginners learn resin art more effectively. Begin with small designs instead of large pieces so you can practice mixing, pouring, and finishing without wasting materials.
Accurate measurement is essential. Always follow the correct ratio of epoxy resin and hardener. Using improper proportions can cause curing problems and leave the surface sticky. Measuring cups with clear markings help ensure accuracy.
Work in a well-ventilated area to reduce exposure to fumes. Although art-grade resin is safer than industrial options, proper airflow improves comfort and safety during the process. To avoid air bubbles, stir resin slowly and pour it gently onto the surface. If bubbles appear, a heat gun or small torch can help remove them. Move the heat source quickly to prevent overheating the resin. Choose pigments in small amounts. Too much color can affect curing and reduce transparency. Start with a little pigment and add more gradually until you reach the desired shade.
Patience is important during curing. Resin needs time to harden completely, usually 24 to 48 hours. Avoid touching or moving the artwork while it cures to prevent marks or imperfections. Practicing these tips and tricks will help beginners improve their skills and create smoother, professional-looking resin artwork over time.
10. FAQs
1. What materials are required for epoxy resin art?
You need epoxy resin and hardener, pigments or dyes, mixing cups, nitrile gloves, and a flat surface such as a canvas or wooden board. These basic materials are enough to start DIY resin art and create beautiful designs.
2. How long does resin take to cure?
Most epoxy resin cures within 24 to 48 hours, but curing time may vary depending on the product and room temperature. Keeping the artwork in a warm, dust-free space helps achieve a smooth and durable finish.
3. Why does resin sometimes remain sticky after curing?
Sticky resin usually happens due to incorrect mixing ratios or insufficient curing time. Always measure resin and hardener accurately and allow enough time for the surface to harden completely.
4. How can I remove air bubbles from resin artwork?
Air bubbles can be reduced by stirring slowly and using a heat gun or small torch after pouring. The heat helps release trapped air and creates a clear, professional finish.
5. Is epoxy resin art safe for beginners?
Yes, epoxy resin art is safe when proper precautions are followed. Work in a well-ventilated area, wear gloves, and avoid direct skin contact with resin. Using art-grade resin also improves safety and ease of use.
6. Can resin art be used for home decor?
Yes, resin art is widely used for home decor. Resin-coated tabletops, wall art, and decorative pieces add a modern and glossy aesthetic to interior spaces.
7. What are common mistakes in DIY resin art?
Common mistakes include incorrect mixing ratios, air bubbles, and uneven surfaces. Following proper techniques and preparing a level workspace helps prevent these issues.
8. How do I clean tools after working with resin?
Use isopropyl alcohol or disposable paper towels to clean tools before the resin hardens. Once resin cures, it is difficult to remove, so cleaning immediately is recommended.
11 .Final Thoughts
Learning how to make resin art is a creative and rewarding skill that allows you to design unique and glossy artwork. With basic materials and proper techniques, beginners can create professional-looking resin pieces at home. Resin art is versatile, making it suitable for wall decor, tabletops, and handmade crafts.
Success in resin art depends on preparation and practice. Using the right epoxy resin, following correct mixing ratios, and avoiding common mistakes will improve results over time. Patience is also important because curing takes time, but the final finish is durable and visually appealing.
Whether you want to explore art as a hobby or create decorative pieces, mastering how to make resin art opens up endless creative possibilities. With consistent practice, you can develop your skills and produce beautiful artwork that reflects your style.