
1. Introduction
If you’re searching for how to cure UV resin without UV light, you’re probably just starting out or don’t own a UV lamp yet. Many beginners in the USA face this exact problem.
The good news is—you can cure UV resin without a lamp, but it requires the right methods and realistic expectations. Understanding sunlight, alternative UV sources, resin thickness, and curing times is essential for successful DIY resin projects.
In this guide, you’ll learn how to cure UV resin without UV light at home USA, what works, what doesn’t, and how to avoid common mistakes.
2. How UV Resin Actually Cures
UV resin doesn’t dry like glue or paint. It only hardens when exposed to ultraviolet (UV) rays.
UV resin cures through a process called photopolymerization, where ultraviolet light triggers molecules to harden into a solid.
That means:
- No UV = No proper curing
- Air alone will NOT cure it
- Time alone will NOT fix it
So when learning how to cure resin without UV lamp, your goal is simple:
👉 Find another source of UV light.
Tip: Most household lights emit very little UV, so sunlight or specialized UV lamps remain more effective.
3. Can You Cure UV Resin Without a UV Lamp?
Yes, but it depends on your project and resin type.
Best options:
- Sunlight: Natural UV is strongest and most consistent for thin layers.
- UV nail lamps: Good for small jewelry pieces or charms.
- UV LED flashlights: Limited effectiveness, works for thin layers.
Things to keep in mind:
- Curing time is longer than using a dedicated lamp.
- Thick resin pours may remain soft in the center.
- DIY methods work best for small, decorative projects rather than professional pieces.
Extra Tips:
- Always monitor your resin carefully.
- Rotate pieces to expose all sides.
- Apply thin layers to prevent sticky surfaces.
4. Sunlight The Best Natural Alternative
Wondering, “can I cure UV resin with sunlight in the US?” the answer is yes. Sunlight naturally contains UV rays that trigger curing.
Why sunlight works:
- Free and widely available
- Strong UV intensity during midday
- Effective for thin layers and small projects
How to use sunlight effectively:
- Place resin outdoors in direct sunlight
- Avoid shade or indirect light
- Rotate pieces every 15–20 minutes for even curing
Curing times:
- Thin layers: 30–90 minutes
- Medium layers: 2–4 hours
- Thick layers: May not fully cure
Pro Tips for USA climates:
- UV intensity varies by state and season. Summer in California or Florida provides strong UV rays, while winter sunlight in northern states may be weaker.
- On cloudy days, extend curing time and rotate pieces frequently.
- Reflective surfaces like foil or white trays can improve light penetration and speed up curing.
This is the most effective method for how to cure UV resin without UV light at home USA.
5. Indoor Sunlight vs Outdoor Sunlight
Many beginners make this mistake:
👉 Putting resin behind a window
The problem: Most glass blocks a significant amount of UV rays.
Result:
- Slow curing
- Sticky surface
- Uneven finish
Recommendations:
- ✔ Best: Direct outdoor sunlight
- ✔ Okay: Near an open window
- ❌ Avoid: Behind closed glass
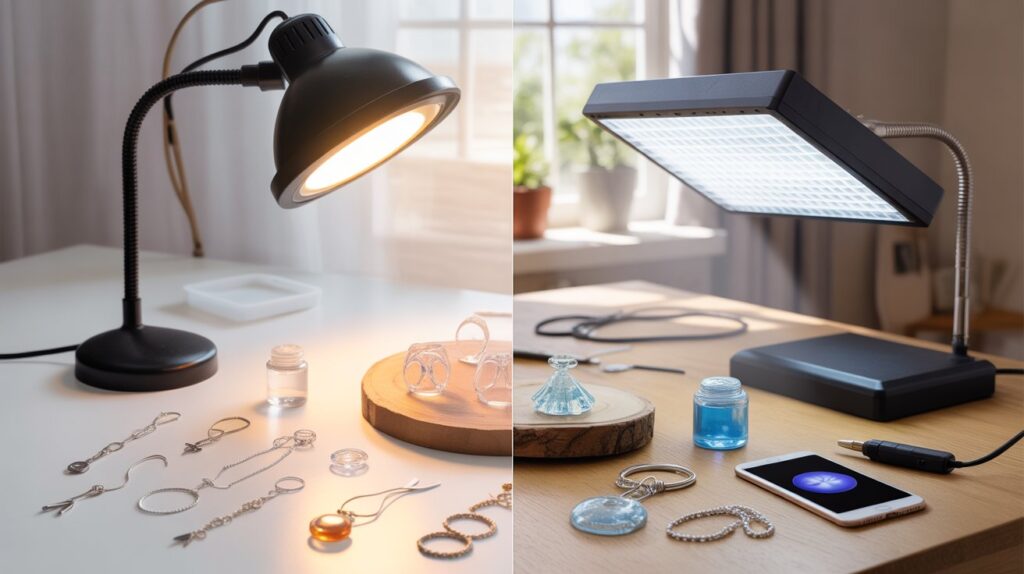
6. Can LED Lights Cure UV Resin?
Short answer: Mostly no.
Most household lights:
- Don’t emit UV
- Are too weak to cure resin
What can work:
- UV nail lamps
- UV LED flashlights
What doesn’t work:
- Regular bulbs
- Room lights
- Desk lamps
So if you’re asking how to cure UV resin without lamp fast, don’t rely solely on normal lights.
Pro Tip: Some high-output UV nail lamps or portable UV LEDs can partially cure thin layers, but they are slower than sunlight. Always check the wavelength compatibility with your resin.
7. Why Resin Thickness Matters
Resin thickness dramatically affects curing:
Thin layers:
✔ Cure faster
✔ Cure completely
Thick layers:
✖ Stay soft inside
✖ Look cured on top but bend or deform later
Best practice:
Apply resin in multiple thin layers instead of one thick pour. This improves all UV resin hardening techniques and reduces sticky surfaces.
8. How to Cure UV Resin Without Lamp Fast
Want faster results? Follow these steps:
- Use very thin layers
- Work in strong midday sunlight
- Place resin on reflective surfaces (foil, white trays)
- Rotate frequently
- Avoid cloudy weather
These strategies help speed up DIY UV resin curing without a lamp.
9. Common Problems and Simple Fixes
Sticky Surface:
- Cause: Oxygen blocking curing
- Fix: Cover resin with plastic during curing; add thin extra layer if needed
Soft Inside:
- Cause: Thick resin
- Fix: Cure longer, or use thinner layers next time
Uneven Hardening:
- Cause: Poor light exposure
- Fix: Rotate piece regularly; ensure sunlight or UV source is strong
10. Weather Matters (Especially in the USA)
Your location and weather affect curing:
Best conditions:
- Sunny states like California, Texas, Florida
- Warm and dry weather
Bad conditions:
- Cloudy days
- Winter season
- High humidity
Adjust curing time according to UV strength, temperature, and humidity to improve results when learning how to cure UV resin without UV light USA.
11. Safety Tips You Shouldn’t Ignore
Even without a UV lamp:
- Wear gloves
- Avoid skin contact
- Don’t look at bright reflections
- Keep resin away from dust and bugs
12. When These Methods Don’t Work
Avoid DIY methods for:
- Thick molds
- Professional jewelry
- Products for sale
In these cases, a UV lamp is necessary for consistent, durable results.
13. Best Practices for Success
- Always use thin layers
- Use direct sunlight when possible
- Be patient
- Cover resin while curing
- Work in a clean environment
These are proven UV resin hardening techniques without UV light.
14. Who Should Use These Methods
Best for:
✔ Beginners
✔ Hobbyists
✔ Small DIY crafts
Not ideal for:
✖ Professionals
✖ Bulk production
✖ Thick resin projects
15. FAQs
How to cure UV resin without UV light at home USA?
Use direct sunlight outdoors with thin layers for best results. Rotate for even curing.
Can I cure UV resin with sunlight in the US?
Yes, especially during sunny, clear days. Adjust time based on UV strength and resin thickness.
What is the best alternative to UV lamp for resin crafts?
Sunlight is free and effective. UV nail lamps or LED flashlights can work for thin layers.
How to cure UV resin without lamp fast?
Use thin layers, strong sunlight, reflective surfaces, and rotate frequently.
Why is my resin still sticky?
Oxygen exposure or weak UV light can prevent full curing. Apply thin layers and ensure strong UV source.
Can regular LED lights cure UV resin?
No, only UV-specific lights are effective.
What are the best UV resin hardening techniques?
Thin layers, proper timing, strong UV exposure, and surface rotation.
Can I cure thick resin layers without a UV lamp?
Thick layers are difficult to cure fully without a lamp. Use multiple thin layers for best results.
Are these methods safe for beginners in the USA?
Yes, with proper gloves, ventilation, and UV precautions.
Can reflective surfaces improve curing speed?
Yes, white or foil surfaces bounce UV light, helping resin cure faster.
16. Conclusion
Now you know how to cure UV resin without UV light. Sunlight is the best natural option, and with proper technique, you can achieve solid results at home. However, for faster and more reliable curing, a UV lamp is still the best choice. Until then, you can confidently try DIY UV resin curing and create beautiful projects without expensive tools.