
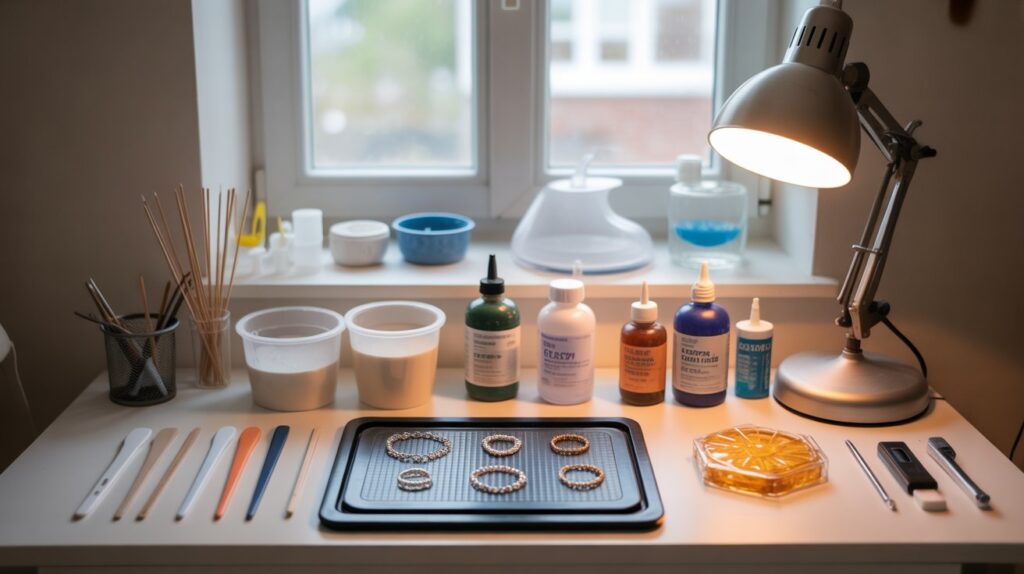
1 Introduction
How to cure resin without UV light is a common question for crafters who don’t have specialized lamps but still want strong, smooth results. Whether you’re making jewelry, small crafts, or larger epoxy projects, resin can harden effectively with the right techniques. In this guide, we’ll explore safe, practical methods, tips, and alternatives that help your resin projects cure properly without relying on UV light.
Table of Contents
2 Understanding Resin Curing Without UV Light
Turning liquid resin into a solid, durable material is called curing. Many people assume resin always needs a UV lamp to harden, but that’s not true. Most resins cure through chemical reactions, not light exposure.
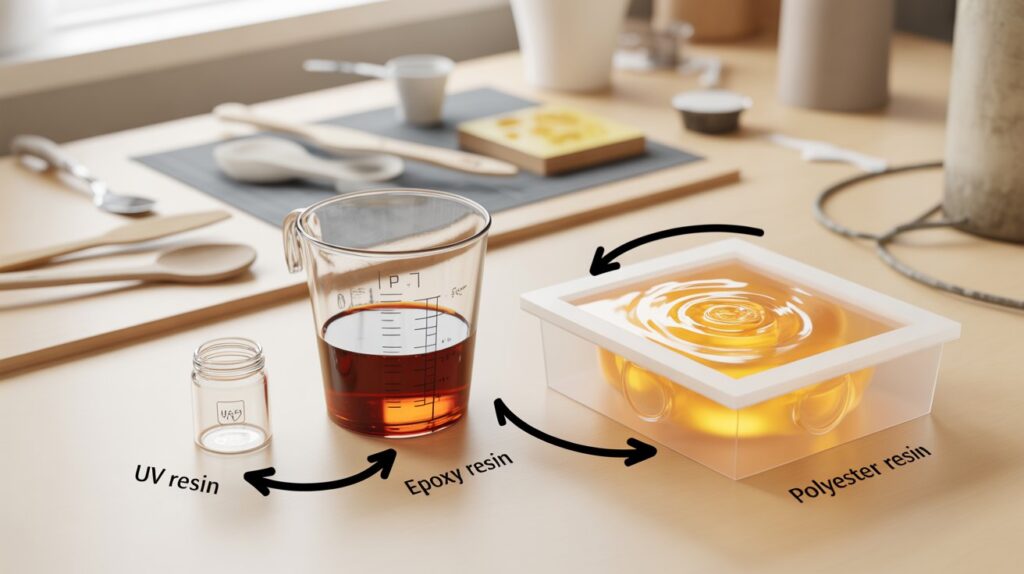
Common Types of Resin
- UV Resin – cures almost instantly under UV exposure, making it suitable for small crafts and detailed decorative pieces.
- Epoxy Resin – cures chemically when mixed with a hardener
- Polyester Resin – requires a catalyst to start the chemical reaction
Only UV resin depends entirely on light. Epoxy and polyester resins will harden on their own if mixed correctly, even at room temperature.
What Makes Resin Harden?
Resin cures effectively when:
- The resin-to-hardener ratio is accurate
- The temperature is suitable (usually above 20°C / 68°F)
- It is allowed enough time to fully set
For UV resin, light can speed up the process. For other types, time, warmth, and proper mixing are more important.
When Curing Without UV Is a Good Choice
Non-UV curing is ideal when:
- You don’t have a UV lamp
- You’re using epoxy or polyester resin
- You want a deeper, stronger cure for thick projects
- You prefer safer, low-heat methods
Many professional resin artists use these methods because they often produce more durable results, especially for molds, jewelry bases, or large epoxy surfaces.
Key Takeaway
Resin doesn’t always need light to harden. Most curing happens naturally through chemistry, temperature, and time. Understanding this allows you to pick the best method and avoid mistakes like rushing or overheating.
3 Resin Curing Time Without UV Exposure
The curing time depends on resin type, temperature, and mixing quality. Unlike UV resin, which hardens in minutes, chemical-based resins cure gradually but often produce stronger results.
Typical Curing Times
Epoxy Resin
- Surface dry: 6–12 hours
- Firm set: 24–48 hours
- Full strength: 3–7 days
- Surface dry: 2–6 hours
- Firm set: 12–24 hours
- Full strength: 1–3 days
These times can vary depending on room temperature and layer thickness.
Factors Affecting Curing Speed
- Temperature – Warmer rooms (20–25°C / 68–77°F) speed up curing; colder rooms slow it down.
- Humidity – High moisture can delay curing and make the surface sticky.
- Mixing ratio – Too much or too little hardener causes uneven or soft spots.
- Layer thickness – Thin layers cure faster than thick pours.
- Airflow – Gentle ventilation can improve surface hardening.
How to Speed Up Curing Safely
- Place your project in a warm, dry area
- Use a low-heat mat for gentle warmth
- Cover the resin to keep out dust
Avoid strong heat sources like ovens, flames, or high-powered hair dryers. Too much heat can create cracks, bubbles, or yellowing.
When Is Resin Fully Cured?
Even if the surface feels hard after a day, resin may not be fully cured. Full strength is usually reached after several days. For sanding, polishing, or functional use, always wait until the manufacturer-recommended cure time is complete.
Key Takeaway
Resin cures more slowly without light, but this method often produces stronger, more reliable results. With proper temperature, time, and mixing, you can achieve a smooth, durable finish every time.
4 Best Natural Ways to Cure Resin Without UV Light
If you don’t have special equipment, don’t worry. Resin can still harden properly using simple, natural methods. These techniques rely on time, warmth, and good conditions instead of artificial light.
1. Let it cure at room temperature
The easiest method is patience. Place your project in a clean, dry area with a steady temperature.
- Best temperature: 20–25°C (68–77°F)
- Keep it away from cold floors and open windows
- Cover lightly to protect from dust
This method works best for epoxy and polyester resin and gives very strong results.
2. Use natural sunlight (indirect)
Sunlight can help warm the resin and speed up curing.
- Place the project near a bright window, not in harsh direct sun
- Too much heat can cause bubbles or yellowing
- Rotate the piece so all sides cure evenly
This method helps with surface curing and gentle heat activation.
3. Choose a warm indoor spot
Warm environments help resin cure faster. Good places include:
- Near (not on) a heater
- In a warm kitchen corner
- Inside a closed room that stays warm
Avoid placing resin directly on heat sources. Slow, even warmth is better than strong heat.
4. Use a low-heat mat or warm surface
A heat mat on a low setting works well for speeding up curing.
- Place cardboard or wood between the mat and the project
- Check often to prevent overheating
- Works great for small crafts and jewelry
This keeps the temperature steady without damaging the resin.
5. Pour in thin layers
Thinner layers cure faster and more evenly than thick pours.
- Pour in layers of 5–10 mm
- Let each layer partially set before adding the next
- Reduces bubbles and soft spots
This is one of the safest natural ways to get a smooth, solid finish.
What to avoid
Some methods can damage your project:
- Direct flame or stove heat – can burn resin
- Ovens or microwaves – unsafe and unpredictable
- Strong hair dryer heat – causes bubbles and warping
Key takeaway
Natural curing works best when resin is given the right temperature, time, and environment. Simple steps like keeping your project warm, using thin layers, and avoiding extreme heat can give professional-quality results—no special tools needed.
5 Can You Cure Resin With a Flashlight?
The short answer is: sometimes, but not reliably. A regular flashlight is not designed to cure resin, and in most cases, it won’t give consistent results.
When a flashlight can work
A flashlight may help only if:
- You are using UV resin, and
- The flashlight is a true UV flashlight (not a normal LED light)
Some UV flashlights emit enough ultraviolet light to harden small resin projects like charms or thin jewelry layers. Even then, curing is usually slow and uneven compared to a proper UV lamp.
When it doesn’t work
A normal phone flashlight or desk torch will not cure resin. These lights produce visible light, not the ultraviolet rays needed to activate UV resin. For epoxy or polyester resin, a flashlight makes no difference at all, since these types cure through chemical reactions, not light.
Common problems with flashlight curing
Using a flashlight can lead to:
- Sticky surfaces because the light isn’t strong enough
- Uneven hardening, especially on thicker pieces
- Long curing times with uncertain results
- Overheating in spots, which can cause bubbles or warping
This makes flashlights unreliable for anything beyond quick fixes.
Better alternatives
If you don’t have a UV lamp, better options include:
- Natural sunlight near a window
- A nail lamp designed for gel polish
- Warm room conditions for epoxy-based projects
These methods give more even and predictable results.
Key takeaway
A flashlight is not a dependable tool for curing resin. Only a real UV flashlight may work for very small UV resin projects, and even then, results are limited. For better quality and durability, using proper light sources or natural curing methods is a smarter choice.
6 What Can You Use as a Substitute for a UV Light?
If you don’t have a UV lamp, there are still several ways to harden resin depending on the type you’re using. While nothing fully replaces a professional UV light, these options can work well for small projects and home setups.
1. Sunlight
Natural sunlight is the most common alternative.
- Works best for UV resin
- Place the project near a bright window
- Avoid harsh direct sun to prevent yellowing and bubbles
- Curing usually takes 30 minutes to a few hours
Sunlight is free and effective, but results depend on weather and time of day.
2. LED nail lamp
A nail lamp used for gel polish can also help with small resin items.
- Designed to emit light similar to UV lamps
- Great for thin layers and jewelry
- Faster and more consistent than sunlight
- Not ideal for thick or large pieces
This is one of the best low-cost substitutes.
3. UV flashlight
A real UV flashlight can work in a pinch.
- Useful for spot curing small areas
- Takes longer than a lamp
- May cure unevenly if the light is weak
It’s better than nothing, but not a long-term solution
4. Warm room conditions
For epoxy-based projects, light isn’t required at all.
- A warm, dry space helps the chemical curing process
- Best temperature: 20–25°C (68–77°F)
- Keep dust away while it hardens
This method is simple and gives strong, durable results.
5. Heat mat on low setting
Gentle heat speeds up curing safely.
- Place a board between the mat and the project
- Use low heat only
- Ideal for crafts and small molds
This works well for resins that cure through chemical reaction rather than light.
What to avoid
Some “substitutes” can ruin your project:
- Ovens or microwaves – unsafe and unpredictable
- Open flames or stoves – serious fire risk
- High heat from hair dryers – causes bubbles and warping
Key takeaway
You don’t always need a UV lamp to get good results. Sunlight, nail lamps, gentle heat, and warm room conditions can all work as practical alternatives, depending on the resin you’re using and the size of your project.
7 Can You Dry Resin With a Hair Dryer?
A hair dryer can help in some situations, but it is not a proper curing tool. It doesn’t harden resin the way UV light or chemical curing does. Instead, it only provides surface heat and airflow.
What a hair dryer can do
Using a hair dryer on low heat can:
- Help remove surface bubbles
- Slightly warm the resin, which may speed up curing for epoxy
- Dry the top layer faster so dust doesn’t stick
This makes it useful as a support tool, not a main curing method.
What it cannot do
A hair dryer cannot:
- Fully cure UV resin
- Replace a UV lamp
- Properly harden thick resin layers
- Ensure even curing throughout the piece
It only affects the surface, not the inside.
Risks of using a hair dryer
Using too much heat can cause problems like:
- Bubbles forming inside the resin
- Warping or uneven surfaces
- Cracks from rapid temperature change
- Sticky or soft spots that never fully harden
High heat can actually ruin a project instead of helping it.
If you choose to use one
Follow these safety tips:
- Use the lowest heat setting
- Keep the dryer 20–30 cm (8–12 inches) away
- Move it constantly — don’t focus on one spot
- Use it only for short bursts
This keeps the resin safe while giving light surface warmth.
Better options
Instead of a hair dryer, try:
- Letting the piece cure in a warm room
- Using a heat mat on low
- Placing it near a sunlit window for gentle warmth
These methods are safer and more reliable.
Key takeaway
A hair dryer can help remove bubbles and gently warm resin, but it cannot replace proper curing methods. Use it carefully and only as a helper tool — not as the main way to harden your project.
8 Comparing Heat vs Light for Resin Curing
Resin can harden through either light exposure or heat activation, depending on the type. Understanding the difference helps you choose the right method for your project.
How light works for curing
UV resin relies on ultraviolet light to trigger a chemical reaction. Key points:
- Works quickly — usually within minutes for thin layers
- Requires UV wavelength to activate the resin
- Best for small crafts, jewelry, or decorative items
- Uneven light can lead to soft spots or sticky surfaces
Light curing is fast and convenient but mainly limited to UV-based resins.
How heat works for curing
Heat helps chemical-curing resins like epoxy and polyester. Key points:
- Works more slowly. can take hours to days
- Optimal temperature range is 20–25°C (68–77°F) for normal curing
- Can speed up curing slightly with low, steady heat
- Effective for thicker pours and larger projects
- Produces stronger, more durable results than light for non-UV resins
Heat curing relies on time and proper temperature rather than light intensity.
Comparing the two methods
| Feature | Light Curing (UV Resin) | Heat Curing (Epoxy/Polyester) |
| Speed | Fast (minutes for thin layers) | Slow (hours to days) |
| Equipment needed | UV lamp or sunlight | Warm room, heat mat |
| Best for | Small, thin projects | Thick layers or large projects |
| Consistency | Can be uneven if light is weak | More even and reliable |
| Durability | Moderate for UV resin | Stronger for chemical-cured resin |
When to use each method
- Light: Quick, decorative pieces, thin layers, UV resin only
- Heat: Thick pours, epoxy tabletops, professional-quality crafts
Some artists combine both: light for surface finishing, heat for full-depth curing.
Key takeaway
Light is ideal for speed and small UV resin projects, while heat offers more reliable, durable results for epoxy and polyester. Choosing the right method depends on resin type, project size, and the level of control you want.
9 Fastest Methods to Cure Resin Without UV Light
For those working on projects without a UV lamp, there are ways to speed up curing safely. While chemical-based resins cure naturally over time, the right techniques can reduce waiting periods significantly.
1. Use a warm environment
Temperature plays a major role in curing speed. A slightly warmer room helps the chemical reaction occur faster.
- Ideal temperature: 20–25°C (68–77°F)
- Avoid direct heat that can create bubbles or cracks
- Ensure the space is dust-free for a smooth surface
Even a small increase in temperature can noticeably speed up hardening.
2. Pour in thin layers
Thinner resin layers harden more quickly than thick pours.
- Aim for layers of 5–10 mm (0.2–0.4 inches)
- Allow each layer to partially set before adding the next
- Reduces soft spots and bubbles
This method is especially useful for jewelry, coasters, and small decorative pieces.
3. Gentle heat application
Using low, steady heat can accelerate curing.
- Heat mats or warm surfaces work best
- Keep resin indirectly heated to avoid warping
- Small molds respond faster to this method
Avoid high heat sources like ovens or hair dryers on high settings, which can damage the resin.
4. Ensure proper mixing
Curing speed depends on how well the resin and hardener are combined.
- Mix thoroughly but gently to avoid air bubbles
- Follow the manufacturer’s mixing ratio exactly
- Improper mixing can slow down or prevent curing
A well-mixed batch cures faster and produces a stronger final product
5. Optimize airflow
Good airflow helps resin release heat naturally and cure more evenly.
Key takeaway
The fastest way to harden resin without UV involves a combination of warm temperature, thin layers, gentle heat, proper mixing, and good airflow. These simple steps can reduce curing time while maintaining a smooth, durable finish for your projects.
10 Safest Ways to Cure Resin at Home
Working with resin at home can be safe and effective if you follow a few simple guidelines. Safety isn’t just about avoiding burns or spills—it also ensures the resin cures properly and produces a strong, smooth finish.
1. Work in a well-ventilated area
Resin can release fumes during curing, which may irritate your eyes, nose, or skin.
- Open windows or use fans for airflow
- Avoid confined spaces
- For sensitive projects, consider a small respirator mask
Good ventilation also helps resin cure more evenly.
2. Keep the workspace clean
Dust, hair, and debris can stick to the resin surface while it’s curing.
- Wipe tables before starting
- Cover your project with a protective dome or box
- Avoid moving the resin until it’s fully hardened
A clean environment ensures a professional-looking finish.
3. Maintain a stable temperature
Extreme temperatures can cause uneven curing or bubbles.
- Ideal room temperature: 20–25°C (68–77°F)
- Avoid direct heat sources that can warp resin
- For cooler rooms, use a low heat mat for gentle warmth
Steady temperature keeps the resin curing consistently from top to bottom.
4. Use proper mixing techniques
Incorrect mixing is a common cause of sticky or soft spots.
- Follow the resin-to-hardener ratio exactly
- Mix slowly to avoid introducing air bubbles
- Scrape the sides and bottom of the mixing cup to ensure full blending
Well-mixed resin cures reliably and safely.
5. Protect yourself
Even though many resins are safe to handle, wearing basic protective gear reduces risk.
- Gloves to prevent skin contact
- Long sleeves to avoid splashes
- Eye protection if working with larger pours
6. Let resin cure undisturbed
Patience is key. Moving or touching resin too early can create dents, fingerprints, or uneven surfaces.
- Cover lightly to keep dust off
- Avoid touching until fully hardened
- Follow the manufacturer’s recommended full cure time
Key takeaway
The safest way to cure resin at home is by maintaining good ventilation, a clean workspace, proper temperature, correct mixing, and protective measures. Following these steps ensures strong, smooth, and professional-quality results while keeping you safe.
11 Common Mistakes When Curing Resin Without UV
Even experienced crafters can run into problems when hardening resin without specialized light. Avoiding these common mistakes helps achieve a smooth, strong, and professional finish.
1. Incorrect mixing ratio
Using too much or too little hardener is one of the most frequent issues.
- Can result in sticky or soft spots
- May prevent full curing, leaving weak or brittle areas
- Always measure carefully and follow the manufacturer’s instructions
2. Pouring thick layers all at once
Thick pours take much longer to harden and are prone to internal problems.
- May develop bubbles or cracks inside
- Surface can cure faster than the interior, leading to uneven hardness
- Best practice: pour in thin layers and allow each layer to set
3. Rushing the curing process
Touching, moving, or trying to speed up curing with unsafe methods can ruin the project.
- Applying heat directly from hair dryers or ovens can cause warping
- Disturbing resin too early leaves dents or fingerprints
- Patience is essential for a smooth, durable finish
4. Ignoring temperature and humidity
Environmental conditions greatly affect curing speed and quality.
- Cold temperatures slow down the chemical reaction
- High humidity may cause cloudy or sticky surfaces
- Keep resin in a stable, warm, and dry area
5. Not protecting the surface from dust or debris
Tiny particles sticking to the resin make sanding or finishing necessary later.
- Cover the project with a dust shield or box
- Work in a clean area away from fans or open windows
- Even small fibers can affect the final appearance
6. Using inappropriate tools or methods
Trying shortcuts can create lasting problems.
- Open flames, microwaves, or strong direct heat can damage resin
- Non-UV lights (like regular flashlights) may not cure UV resin at all
- Stick to safe, proven curing methods
Key takeaway
The main reasons resin fails to cure properly are wrong mixing, thick layers, rushing, poor environmental conditions, and unsafe practices. Paying attention to these common pitfalls ensures strong, smooth, and professional results.
12 Which Types of Resin Cure Without UV Light
Not all resin types rely on UV light to harden. Understanding which ones cure naturally helps you choose the right material for your project.
1. Epoxy Resin
Epoxy resin is one of the most popular options for crafts, jewelry, and tabletops.
- Cures through a chemical reaction between resin and hardener
- Works well at room temperature without any light
- Can be poured in thick or thin layers
- Produces a strong, durable finish ideal for large projects
Epoxy is versatile and often preferred when you don’t want to rely on a lamp.
2. Polyester Resin
Polyester resin is commonly used for fiberglass projects, molds, and coatings.
- Requires a catalyst (hardener) to trigger curing
- Hardens naturally over time, without light
- Usually cures faster than epoxy but may produce strong odors
- Best used in well-ventilated spaces
It’s a cost-effective option for larger-scale or industrial-style projects.
3. Polyurethane Resin
Polyurethane resin is often used for casting, sculptures, and prototypes.
- Cures through a chemical reaction rather than light
- Can be colored, painted, or molded easily
- Usually faster curing than epoxy, depending on formulation
- Produces a durable, flexible finish
Polyurethane is ideal when you need strong, slightly flexible pieces.
4. UV Resin (for comparison)
While UV resin hardens quickly under light, it cannot cure properly without UV exposure.
- Only suitable for thin layers or small projects
- Requires a UV lamp or sunlight for complete curing
This highlights why other resins are better when no specialized light is available.
Key takeaway
Resins such as epoxy, polyester, and polyurethane cure naturally through chemical reactions and do not require light. Choosing the right type ensures smooth, strong results and makes home or studio projects much easier to manage.
13 Final Verdict: Best Way to Cure Resin Without UV Light
Curing resin without specialized lamps is entirely possible, but the best approach depends on the type of resin, the project size, and the desired finish. Understanding the options allows you to achieve professional-quality results at home.
1. Choose the right resin type
For projects without UV exposure, select epoxy, polyester, or polyurethane resin. These resins cure through chemical reactions rather than light, making them more reliable for home use.
- Epoxy: Best for jewelry, tabletops, and coatings
- Polyester: Ideal for molds and larger projects
- Polyurethane: Great for casting and flexible pieces
Avoid UV resin unless you have access to a UV lamp or sunlight.
2. Optimize environmental conditions
Temperature and airflow are key to speeding up curing safely:
- Keep the workspace at 20–25°C (68–77°F)
- Ensure good ventilation to reduce fumes
- Cover projects lightly to prevent dust or debris
These simple steps improve both curing speed and final quality.
3. Use safe techniques to accelerate curing
While patience is important, you can apply gentle methods to reduce waiting time:
- Pour thin layers instead of one thick layer
- Apply low, steady heat using a heat mat or warm surface
- Ensure proper mixing of resin and hardener
Avoid direct flames, high heat, or unsafe shortcuts, which can damage the project
4. Allow full curing time
Even with optimal conditions, resin takes time to reach maximum strength.
- Surface may feel hard after a few hours, but interior layers often need days to fully set
- Don’t rush sanding, polishing, or handling until the resin has completely hardened
Full curing ensures durability and a smooth, professional finish
Key takeaway
The best approach combines the right resin type, stable environmental conditions, proper mixing, and patience. By following these practices, you can safely and effectively achieve strong, beautiful results without relying on specialized lamps.
14 Conclusion
Mastering the process of how to cure resin without UV light opens up a world of possibilities for crafters, artists, and hobbyists. By choosing the right type of resin, maintaining proper environmental conditions, and following safe curing techniques, you can achieve professional-quality results without relying on a UV lamp.
Whether you’re working on jewelry, decorative pieces, or large epoxy projects, patience, proper mixing, and careful layer management are key. With these strategies, your resin creations will harden smoothly, remain durable, and look polished—no special equipment required.
Remember, understanding the curing process and applying these methods ensures consistent success, making resin crafting at home both safe and rewarding.
FAQs
How long does resin take to cure without UV light?
The curing time depends on the type of resin and temperature. Epoxy usually takes 24–48 hours for a hard set, while polyester may take 12–24 hours. Full strength can take several days. Thin layers and warm conditions speed up the process.
Can you cure resin with a flashlight?
A regular flashlight cannot harden resin. Only a UV flashlight can work on UV resin, but it’s slow and best for very small projects. For epoxy or polyester, light isn’t needed at all.
What can you use as a substitute for a UV light?
If you don’t have a UV lamp, you can use:
Indirect sunlight for UV resin
LED nail lamps for small jewelry pieces
Warm room conditions or a heat mat for epoxy and polyester
These alternatives help the resin harden safely and evenly.
Can you dry resin with a hair dryer?
A hair dryer can remove surface bubbles or slightly warm epoxy resin, but it won’t cure it fully. Too much heat can cause cracks, bubbles, or warping, so use low heat and keep it moving.
Why is my resin sticky after curing without UV light?
Sticky resin usually happens because of:
Incorrect resin-to-hardener ratio
Cold or humid room conditions
Thick layers that haven’t fully cured
Fix it by giving the resin more time, ensuring proper mixing, and using a warm, dry space.
Can epoxy resin cure without UV light?
Yes! Epoxy resin cures chemically with hardener and does not require UV light. Proper mixing, temperature, and layer management are key to achieving a smooth, strong finish.
How can I speed up resin curing safely?
To speed up curing:
Pour thin layers
Keep the resin in a warm, dry room
Use a low heat mat if needed
Avoid ovens, direct flames, or high heat from hair dryers.