
1. Introduction
When working with UV resin, one of the most important things to understand is how long to cure UV resin for the best results. Curing time is what turns liquid resin into a hard, durable finish. If you cure it for too little time, the surface may stay sticky or soft. If you cure it properly, you get a smooth, clear, and long-lasting result.
Many beginners think UV resin dries instantly, but that’s not always true. While it cures faster than epoxy resin, the exact curing time depends on factors like layer thickness, light strength, and the type of project you’re making. Knowing the right curing time helps you avoid common problems such as cloudy surfaces, weak edges, or resin that never fully hardens.
Whether you’re making jewelry, keychains, or small crafts, understanding how long to cure UV resin will save you time, reduce waste, and improve the overall quality of your work. In this guide, you’ll learn why curing time matters and how to get perfect results every time.
Table of Contents
2. What Does “Curing” Really Mean in UV Resin?
Curing is the process that changes UV resin from a liquid into a solid material. It happens when the resin is exposed to ultraviolet light, which activates special chemicals inside the resin. These chemicals react and create strong bonds, turning the soft resin into a hard, durable surface.
Many people confuse curing with drying, but they are not the same thing. Drying simply means moisture is leaving a surface, like with paint. Curing, on the other hand, is a chemical reaction that permanently changes the structure of the resin. This is why UV resin becomes tough, glossy, and long-lasting once it is properly cured.
If the curing process is incomplete, the resin may look solid on top but still stay soft underneath. This can cause problems like fingerprints, dents, or a sticky feel. Understanding what curing really means helps you get better results and ensures your finished projects are strong, clear, and professional-looking.
3. How Long to Cure UV Resin on Average?
On average, UV resin usually hardens within 1 to 5 minutes when exposed to a proper UV lamp. Thin layers often cure faster, sometimes in as little as 30 to 60 seconds, while thicker layers may need several rounds under the light to fully harden.
For small projects like jewelry charms, pendants, or surface coatings, a single curing session of about 2–3 minutes is often enough. However, deeper molds or layered designs usually need extra time, with each layer cured separately to make sure the resin becomes solid all the way through.
It’s important to remember that curing time is not the same for every project. The type of lamp you use, the thickness of the resin, and even the colour or additives mixed into it can change how quickly the resin hardens. Giving the resin enough time to fully cure ensures a smooth finish, stronger results, and fewer problems like stickiness or soft spots.
4. Factors That Change UV Resin Curing Time
Not all UV resin projects cure at the same speed. Several key factors can affect how quickly the resin hardens, and understanding them helps you get better, more reliable results.
Light strength is one of the biggest influences. Strong UV lamps cure resin much faster than weak or low-quality lights. Nail lamps usually work well, but professional resin lamps often give more consistent results.
Layer thickness also plays a major role. Thin layers harden quickly, while thick pours need more time and often require curing in stages. Trying to cure a deep layer all at once can leave the inside soft.
Color and additives can slow things down too. Clear resin cures faster than pigmented or glitter-filled resin because light passes through it more easily. Dark colors and heavy decorations block UV light, so they need extra exposure.
Room temperature matters as well. Resin cures best in a warm environment. Cold air can slow the chemical reaction, making the surface stay tacky longer. By paying attention to these factors, you can adjust your process and make sure every project cures evenly, strongly, and with a smooth finish.
5. UV Lamp vs Sunlight – Which Cures Faster?
Both UV lamps and sunlight can harden UV resin, but they don’t work at the same speed or with the same reliability.
A UV lamp is the faster and more dependable option. It gives off a steady amount of ultraviolet light, which helps the resin harden evenly and quickly. With a good lamp, most small projects become solid in just a few minutes, making it ideal for jewelry, charms, and layered designs.
Sunlight, on the other hand, is slower and less predictable. While natural UV rays can harden resin, the process depends on weather, time of day, and how strong the sunlight is. On a bright, sunny day it may take 10–30 minutes, but on cloudy days it can take much longer—or may not work well at all. In short, a UV lamp is the best choice for consistent and fast results, while sunlight is a useful backup option when a lamp isn’t available.
6. Step-by-Step: How to Use UV Resin Properly
Using UV resin the right way helps you get smooth, clear, and long-lasting results. Follow these simple steps to avoid common mistakes and improve the quality of your projects.
1. Prepare your workspace
Work on a flat surface in a well-ventilated area. Wear gloves to protect your hands and keep wipes nearby in case of spills.
2. Get your mold or surface ready
Prepare the surface by cleaning it thoroughly and making sure it is dry before use. Dust or moisture can affect how the resin sets and looks once hardened.
3. Apply the resin in thin layers
Pour a small amount of resin at a time. Thin layers allow light to pass through easily, helping the resin harden evenly.
4. Add decorations carefully
If you’re using glitter, dried flowers, or charms, place them gently into the resin and press them down slightly so they stay in position.
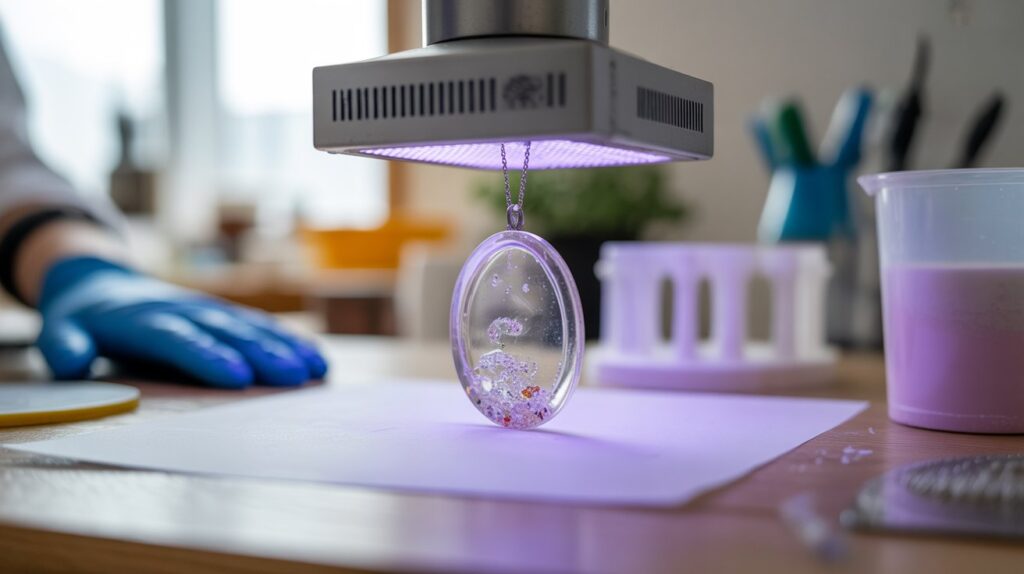
5. Expose to UV light
Place the piece under a UV lamp and let it harden. Turn the piece if needed so all sides get equal light.
6. Repeat for extra layers
For thicker designs, add resin in stages.Make sure one layer is fully hardened before adding the following layer.
7. Final check and finish
Once the piece feels solid, touch it lightly to make sure it’s no longer sticky. If needed, give it one last short exposure for a perfect finish. By following these steps, you’ll get clean, professional-looking results every time you work with UV resin.
7. How to Cure UV Resin Without UV Light
Even without a UV lamp, it’s still possible to harden UV resin though it takes more time and patience.These are the most effective methods you can try.
1. Use direct sunlight
Place your project in bright, direct sun. Natural UV rays can activate the resin, but results depend on weather and time of day. On a sunny day, it may harden within 10–30 minutes. Rotate the piece so all sides get equal exposure.
2. Try a clear window spot
If outdoor sunlight isn’t an option, set your piece near a window where strong light comes in. This works best with thin layers and clear resin. It will take longer than direct sun but can still be effective.
3. Keep layers very thin
Without a lamp, thick pours are harder to harden fully. Apply the resin in shallow layers so light can reach through and activate the material more evenly.
4. Be realistic about results
While these methods can work in a pinch, they are not as reliable as a proper lamp. The surface may feel firm, but the inside can remain soft if light exposure is uneven.
For best long-term results, a UV lamp is still the most dependable option but sunlight and bright window light can help when you don’t have one available.
8. Signs Your UV Resin Is Fully Cured
Knowing when your UV resin is completely hardened is important for getting strong, professional-looking results. Here are the clear signs to look for—and how to make sure resin is fully cured before using or wearing your project.
1. The surface feels dry and smooth
Touch the resin lightly. If it feels firm and glossy instead of sticky or rubbery, that’s a good sign it has hardened properly.
2. No fingerprints or dents
Press gently with your fingernail. Fully cured resin will not leave marks or impressions. If the surface dents easily, it needs more exposure.
3. Edges are solid, not soft
Check the corners and sides of your piece. These areas often cure last. If they feel just as hard as the center, the resin is ready.
4. Clear and even appearance
Properly hardened resin looks clear and consistent. Cloudy patches or uneven texture usually mean the resin hasn’t finished setting.
5. No strong odor
Fresh resin often has a noticeable smell. Once fully cured, the odor should be very faint or gone.
If you ever feel unsure, give the piece a little extra light exposure. A short final session can help ensure everything is solid and long-lasting. This simple habit is one of the best ways to make sure your resin projects turn out perfect every time.
9. Common Curing Problems & How to Fix Them
Even experienced crafters sometimes face issues when working with UV resin. Understanding common problems and how to fix them can save time, reduce waste, and improve the final result.
1. Sticky or soft surface
Cause: Insufficient exposure to UV light, thick layers, or low-quality resin.
Fix: Give the piece additional time under the lamp or sunlight. For thick pours, cure in thin layers to ensure the resin hardens all the way through.
2. Bubbles in the resin
Cause: Shaking the bottle too much, pouring too quickly, or trapped air in decorations.
Fix: Pour slowly and carefully, use a toothpick to release trapped air, or gently heat the surface with a heat gun or torch before curing.
3. Cloudy or hazy finish
Cause: Moisture in the resin, incorrect mixing, or too much pigment/glitter.
Fix: Work in a dry environment, avoid over-mixing, and use pigments sparingly. Thin layers also help prevent cloudiness.
4. Resin peeling or lifting from molds
Cause: Dirty or poorly prepared molds.
Fix: Clean the mold thoroughly, apply a mold release if necessary, and ensure the surface is completely dry before pouring.
5. Warping or uneven surface. Cause: Uneven curing or using too much resin in one layer.
Fix: Cure evenly under a consistent light source and pour in stages for thicker pieces. Rotate the piece if needed to expose all angles. By recognizing these problems early and applying these fixes, your resin projects will come out smooth, strong, and professional every time.
10. Best Practices to Get Faster & Better Curing Results
To achieve smooth, strong, and professional-looking resin projects, following some key practices can make a big difference. These tips help speed up the process while improving overall results.
1. Use thin layers
Thin pours allow UV light to penetrate fully, curing the resin more evenly. For thicker designs, apply multiple layers and cure each one separately to avoid soft spots.
2. Choose the right lamp
A high-quality UV lamp with consistent light output cures resin faster and more reliably than weaker or low-quality lamps. Make sure the lamp matches the type of resin you’re using.
3. Work in a warm environment
Slightly warmer temperatures help the chemical reaction that hardens resin. Avoid working in very cold rooms, as this can slow curing and create tacky surfaces.
4. Keep resin clear or lightly colored when possible
Clear resin cures faster because light passes through it easily. Dark pigments, heavy glitter, or other additives can block light, so consider using them sparingly or in thin layers.
5. Prepare surfaces and molds properly
Clean, dry molds and work surfaces prevent defects and ensure even curing. Removing dust, moisture, or grease leads to smoother finishes and stronger pieces.
6. Rotate pieces if needed
For layered or complex projects, rotate your work under the lamp to make sure all angles receive enough light. This prevents uneven curing or soft spots. Following these best practices will help you get faster results and stronger, more beautiful resin projects every time.
11. Safety Tips When Working with UV Resin
Working with UV resin is generally safe if you follow a few important precautions. Protecting yourself and your workspace ensures a smooth crafting experience without health risks.
1. Wear gloves
Resin can irritate the skin, so always use disposable or nitrile gloves when handling it. Avoid direct contact to prevent rashes or allergic reactions.
2. Use a mask in poorly ventilated areas
Although UV resin emits minimal fumes compared to other chemicals, wearing a mask is wise if you’re working in a small or enclosed space. This helps reduce inhalation of any vapors.
3. Protect your eyes
UV light can harm your eyes. Avoid looking directly at lamps and consider using UV-protective glasses, especially when using professional resin curing lights.
4. Keep your workspace clean
Cover surfaces with paper or silicone mats to prevent spills and make cleanup easier. Dispose of resin waste safely and avoid letting it contact furniture or fabrics.
5. Store resin safely
Keep bottles sealed, in a cool, dark place, and out of reach of children or pets. Proper storage prevents degradation and accidental exposure.
Following these safety measures ensures your crafting sessions remain safe, enjoyable, and worry-free, allowing you to focus on creating beautiful, high-quality resin projects.
12. Final Verdict – What’s the Best Way to Cure UV Resin?
The most effective way to achieve strong, clear, and professional-looking results is by combining proper technique, the right tools, and attention to detail. Using a high-quality UV lamp remains the fastest and most reliable method, especially for layered designs and thicker pours. It ensures even curing and reduces the risk of sticky or soft spots.
For beginners or when a lamp isn’t available, sunlight can be a useful alternative, though it’s slower and less consistent. Regardless of the light source, following best practices—like applying thin layers, rotating pieces for even exposure, and working in a clean, warm environment—will significantly improve your results.
Paying attention to signs of full hardening, preparing surfaces carefully, and addressing common curing problems can help every project turn out exactly as intended. By combining these tips, you can confidently create durable, smooth, and beautiful resin crafts every time.
In short, patience, proper layering, and consistent light exposure are the keys to mastering the curing process and achieving flawless finishes in every project.
13. Conclusion
Understanding how long to cure UV resin is essential for anyone looking to create durable, clear, and professional-quality crafts. Proper curing ensures that your resin pieces are strong, smooth, and free from sticky spots, cloudiness, or weak edges.
By paying attention to factors such as layer thickness, light strength, color, and temperature, you can control the curing process and get consistent results every time. Whether you use a UV lamp or natural sunlight, following best practices—like applying thin layers, checking for full hardening, and addressing common problems—will make your resin projects look polished and last longer.
Knowing the right timing and techniques not only saves time and materials but also boosts your confidence in creating beautiful resin jewelry, decorations, and art. With this knowledge, you’ll be able to craft stunning pieces while avoiding common mistakes, ensuring every project is a success.
FAQs
1. How do you know when UV resin is cured?
The surface feels hard, smooth, and glossy. There are no sticky spots, dents, or fingerprints.
2. How long does UV resin take to harden?
Thin layers usually harden in 1–5 minutes under a UV lamp. Thicker layers take longer and may need multiple sessions.
3. How to properly cure UV resin?
Apply thin layers, use a consistent UV light source, and rotate the piece if needed. Ensure each layer is fully hardened before adding the next.
4. How long does sunlight take to cure UV resin?
In bright sunlight, thin layers take 10–30 minutes. Thicker layers or cloudy weather can increase the time.
5. Can UV resin cure without a UV lamp?
Yes, sunlight or a bright window can cure resin, but it takes longer and may be less consistent.
6. Why is my resin sticky after curing?
This happens if the layer was too thick, light exposure was insufficient, or the lamp is weak. Cure longer or in thinner layers.
7. Can I add decorations before the resin is cured?
Yes, but place them carefully. Ensure the resin layer is not too thick to allow proper curing.
8. Does resin cure faster with thinner layers?
Yes. Thin layers allow light to pass through easily, speeding up the curing process.
9. Can dark colors or glitter affect curing time?
Yes. Dark pigments and dense glitter block light, making the resin take longer to harden.
10. How do I make sure resin is fully cured?
Check that it feels hard, smooth, and glossy. No soft spots or stickiness should remain, and edges should be solid.