
Table of Contents
Introduction
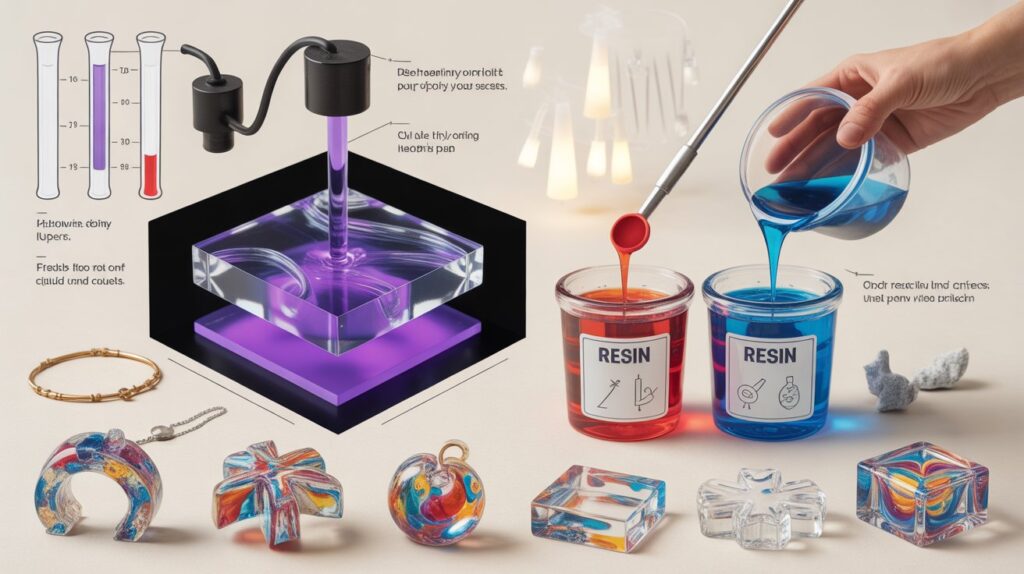
Resin is a popular material for crafts, jewelry, and art, but turning it from liquid to solid requires the curing process. Unlike paint or glue, resin doesn’t harden by drying; it sets through a chemical reaction that forms a strong, durable structure.
There are two main types: UV resin, which hardens with ultraviolet light, and non-UV (two-part) resin, which begins curing as soon as the resin and hardener are mixed. Factors like temperature, humidity, and airflow all affect how well and how fast the resin sets, with warmer, stable conditions producing the best results.
If you’re wondering how long does resin take to cure without UV light, it typically varies depending on the type of resin and the environment. By understanding these basics, you can ensure your resin cures evenly, becomes clear, and achieves the intended strength. This guide will cover curing times, resin types, and practical tips to help you get reliable results every time.
How Long Resin Takes to Cure Without UV Light
When resin is left to harden naturally, the curing process happens gradually and requires patience. Most non-UV resins begin to thicken within a few hours, but this does not mean they are fully hardened. At this stage, the surface may feel dry while the inside is still soft.
In general, resin needs 24 to 72 hours to become firm enough to handle under normal room conditions. Full hardness usually takes several days, depending on the resin type and the surrounding environment. During this time, the resin continues to strengthen even if it appears solid on the outside.
Temperature has a major impact on curing speed. A warm room helps the resin harden more evenly, while cooler conditions can extend the process by many hours or even days. Consistent warmth is more effective than short bursts of heat.
Humidity also affects curing time. High moisture levels can slow surface hardening and may cause a tacky finish. Keeping the workspace dry and well-ventilated helps ensure smoother results.
It’s important not to rush the process. Touching or moving the piece too early can leave fingerprints or dents that are difficult to fix. Allowing enough time for natural curing leads to stronger, clearer, and longer-lasting resin results.
Will Resin Cure Without UV Light?
Yes, certain types of resin can harden without any exposure to UV light. These resins are formulated to cure through a chemical reaction that starts once their components are properly mixed. As long as the correct ratio is used, the curing process will continue on its own.
Two-part resins are the most common examples. After mixing the resin and hardener, the material slowly transitions from liquid to solid over time. This process does not rely on sunlight or artificial lighting, making it suitable for indoor projects and thicker pours.
However, not all resin behaves the same way. Some products are specifically designed to react only when exposed to ultraviolet rays. Without that exposure, they remain sticky or partially cured. This is why identifying the resin type before starting a project is essential.
Environmental conditions still matter even when light is not required. Warm temperatures, low humidity, and proper airflow help the resin cure more evenly and reduce surface defects.
In short, resin can harden without special lighting, but only if it is the right kind and is used under suitable conditions. Choosing the correct resin ensures reliable results and prevents curing problems.
Resin Types and Their Non-UV Curing Time
Different resin types harden at different speeds when no UV light is involved. Epoxy resin is the most commonly used option for crafts and jewelry. It usually becomes firm within 24 hours and reaches full strength in 3 to 7 days, depending on room temperature and mix accuracy.
Polyester resin cures faster than epoxy and often hardens within 12 to 24 hours. However, it releases strong fumes and is more sensitive to environmental conditions, making it less suitable for small indoor projects. Casting resin, designed for deep pours, cures slowly to prevent overheating and may take several days to fully harden.
Choosing the right resin depends on the project size and patience level. Faster-curing resins allow quicker handling, while slower-curing formulas provide better clarity and fewer bubbles when given enough time.
Environmental Factors That Affect Curing Time
The surrounding environment plays a major role in how quickly resin hardens. Temperature is the most important factor. Warm conditions allow the chemical reaction to move forward smoothly, while cold rooms slow it down and can leave the resin soft for longer than expected.
Humidity also affects the final result. High moisture levels can interfere with surface curing, sometimes causing cloudiness or a sticky finish. Working in a dry space helps the resin set evenly and improves clarity.
Airflow and stability matter as well. Gentle ventilation helps maintain consistent conditions, but strong air movement or sudden temperature changes can cause uneven curing. A calm, warm, and dry environment produces the best results.
Will Resin Cure Through a Window?
Resin placed near a window may receive natural light, but this does not guarantee proper curing. Most window glass blocks a large portion of ultraviolet rays, which limits the light energy that reaches the resin surface. As a result, the hardening process can be very slow or uneven.
Indirect sunlight can help slightly warm the resin, and that warmth may support the curing reaction for certain resin types. However, relying on window exposure alone often leads to a partially hardened surface while the inner layers remain soft.
For consistent results, resin should be cured in a stable indoor environment with controlled temperature rather than depending on sunlight filtered through glass. This approach reduces the risk of tackiness and incomplete curing.
Will Resin Cure on a Cloudy Day?
Resin that relies on light for hardening may struggle on cloudy days because UV intensity is greatly reduced. Even though some sunlight still reaches the surface, it is usually not strong enough to fully trigger the chemical reaction in light-sensitive resins. This can result in a sticky or partially cured finish.
For resins that cure chemically without light, cloudy weather has little impact. The main factors remain temperature, humidity, and proper mixing. Warm and stable indoor conditions ensure the material hardens evenly, regardless of outdoor light.
Relying solely on outdoor light on overcast days is not recommended for light-sensitive formulas. Using controlled indoor conditions provides more predictable and consistent results.
How to Dry Resin Art Fast Without UV Light
Speeding up the hardening process without using UV light requires controlling the environment and handling the resin correctly. Temperature is the most effective factor placing resin in a warm room or using a low-heat source, like a heat lamp, can accelerate the chemical reaction safely. Avoid high heat, as it can cause bubbles or warping.
Proper mixing and layering also helps. Ensure the resin and hardener are measured accurately and mixed thoroughly. Thin layers cure faster than thick pours, so dividing a project into multiple layers can reduce overall curing time.
Maintaining good airflow and low humidity supports faster setting while preventing sticky or uneven surfaces. Small adjustments, like keeping the workspace slightly warmer and well-ventilated, can significantly reduce waiting time without compromising the quality of the finished piece.
Common Mistakes That Slow Resin Curing
Several mistakes can delay the hardening process or cause uneven results. One of the most common is incorrect mixing. Using the wrong ratio of resin to hardener or not stirring thoroughly prevents the chemical reaction from completing properly.
Another frequent issue is pouring resin in thick layers. Excessive thickness traps heat and slows curing, sometimes causing the center to remain soft while the surface hardens.
Environmental factors also play a role. Working in a cold, humid, or poorly ventilated space can significantly extend curing time. Avoid moving or disturbing the resin too soon, as this can leave dents, bubbles, or sticky spots. Correct preparation and careful handling ensure smooth, fast, and reliable results.
Signs Resin Is Curing Properly (or Not)
Properly hardening resin gradually transitions from a liquid to a firm, solid surface. A clear, smooth finish without tackiness or cloudiness indicates the reaction is progressing correctly. The resin should feel slightly firm to the touch after initial thickening and steadily gain strength over time.
If the surface remains sticky, soft, or uneven after the expected curing period, it may not be curing properly. Other warning signs include bubbles that do not settle, a cloudy appearance, or areas that remain liquid while surrounding sections are firm.
Monitoring these indicators helps determine whether the resin is setting as intended. Adjusting environmental conditions or correcting mixing errors early can prevent permanent flaws and ensure a strong, clear final result.
Safety Tips When Curing Resin Without UV
Working with resin requires attention to safety, even when no special lighting is used. Ventilation is essential, as fumes from some resins can irritate the lungs and skin. Always work in a well-ventilated space or use a small fan to circulate air.
Wearing protective gear such as gloves and a mask helps prevent skin contact and inhalation of harmful chemicals. Long sleeves and eye protection are recommended, especially when mixing or pouring larger quantities.
Avoid excessive heat to speed curing. Using controlled warmth, like a low-heat lamp, is safer than direct heat sources, which can cause resin to bubble, warp, or release toxic fumes. Following these precautions ensures a safe and successful curing process.
Best Alternatives to UV Light for Faster Results
There are several ways to speed up resin hardening without relying on special lighting. Heat sources like a low-wattage heat lamp or placing the resin in a slightly warm room can accelerate the chemical reaction safely. Avoid excessive heat, which can cause bubbles or distort the piece.
Thin layers and proper mixing also help. Pouring resin in smaller amounts allows it to cure faster and more evenly. Ensuring the resin and hardener are measured accurately and stirred thoroughly prevents delays caused by incomplete reactions.
Controlled environments can make a significant difference. A dry, ventilated space with consistent temperature promotes faster curing while reducing surface defects. These simple adjustments provide reliable results without UV exposure.
Resin Curing Time Comparison Table
To understand how different resins harden under various conditions, here’s a simple comparison:
| Resin Type | Typical Handling Time | Full Hardening Time | Notes on Environment |
| Epoxy Resin | 6–12 hours | 3–7 days | Works best in warm, dry rooms |
| Polyester Resin | 4–8 hours | 12–24 hours | Sensitive to humidity and fumes |
| Casting Resin | 8–12 hours | 2–5 days | Thicker pours require longer curing |
| UV Resin | 1–5 minutes (with light) | N/A | Needs UV exposure; slow without it |
This table highlights how curing times vary based on resin type and environmental conditions. Using the right resin and providing optimal conditions ensures faster and more reliable results for every project.
Conclusion
Understanding how resin hardens without special lighting is key to achieving strong, clear, and professional-looking results. Factors such as resin type, temperature, humidity, layer thickness, and proper mixing all play a critical role in the process. By controlling these variables and avoiding common mistakes, you can ensure your projects cure evenly and look flawless.
If you’ve been wondering how long does resin take to cure without UV light, remember that patience is essential. While some resins may firm up in a few hours, full curing often takes several days. Providing the right environment and handling your resin carefully will help you achieve the best results without relying on UV exposure.
Proper preparation, attention to detail, and understanding the curing process are the keys to successful resin art and crafts every time.
FAQs
1. Will resin cure without direct sunlight?
Yes, resins that cure chemically can harden without sunlight. As long as the resin and hardener are mixed correctly and placed in a stable, warm environment, the reaction will continue naturally.
2. Can resin cure on a cloudy day?
For chemical-based resins, cloudy weather does not affect curing. However, light-sensitive formulas may not harden properly without sufficient UV exposure. Temperature and humidity are more important for indoor curing.
3. Will resin cure through a window?
Indirect sunlight through glass may provide some warmth, but most windows block UV rays, so light-dependent resins often remain sticky. Chemically curing resins are unaffected by window glass.
4. How can I speed up the curing process?
Using thin layers, proper mixing, and a slightly warm, well-ventilated space can accelerate setting. Low-heat lamps or controlled indoor warmth can also help without causing bubbles or damage.
5. What are common mistakes that slow resin curing?
Incorrect mixing ratios, thick pours, cold or humid conditions, and moving the resin too early can all delay hardening or cause uneven results.
6. How do I know if resin is curing properly?
Properly curing resin will gradually firm up, forming a smooth, clear surface. Sticky, cloudy, or soft areas indicate incomplete curing or environmental issues. These answers address common concerns and provide practical tips for reliable results when working with resins that don’t require UV light.
Final Thoughts: Choosing the Right Curing Method
Selecting the appropriate hardening method is essential for achieving strong, clear, and professional results in any resin project. For chemically curing resins, patience, proper mixing, and a stable environment are key, while light-sensitive resins require adequate UV exposure to set correctly.
Consider factors such as project size, resin type, layer thickness, and workspace conditions before deciding on a method. Smaller or thin-layer projects often benefit from natural curing indoors, whereas larger or complex pieces may need controlled warmth or specialized equipment to avoid bubbles and uneven surfaces.
Ultimately, understanding how each resin reacts and providing optimal conditions will save time, prevent mistakes, and ensure a flawless finish. Choosing the right approach makes the difference between a successful project and one that needs costly corrections.