
1. Introduction:
Many beginners ask, can I use a UV light on regular resin? The simple and clear answer is no. A UV light will not properly cure regular resin (epoxy resin).
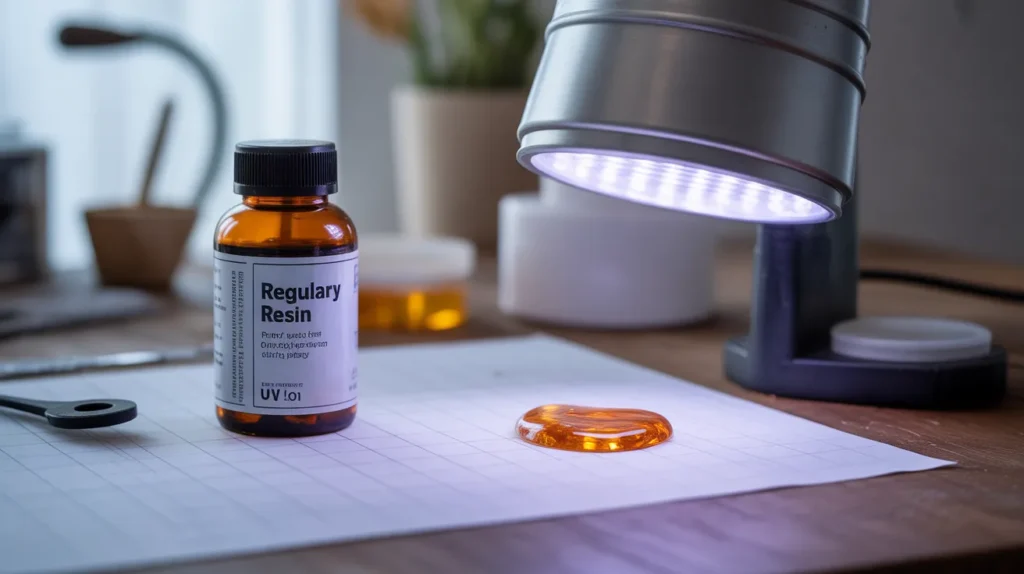
Regular resin is a two-part epoxy that hardens through a chemical reaction between the resin and hardener. This process is called polymerization, and it happens when both parts are mixed in the correct ratio. It does not rely on light to cure.
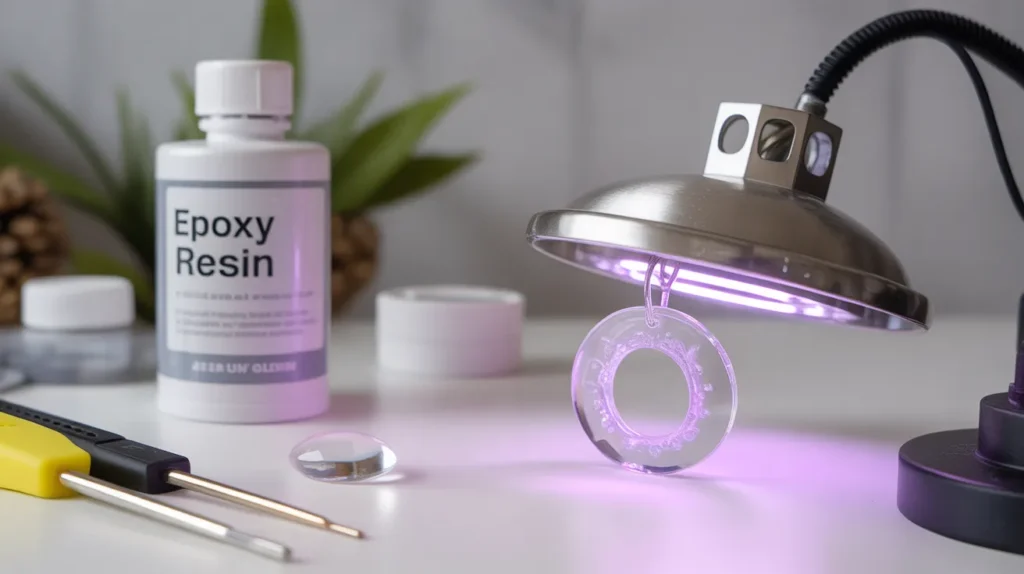
On the other hand, UV resin is specially made for UV curing. It contains light-sensitive ingredients that react when exposed to a UV lamp for resin, allowing it to harden within minutes. Regular epoxy resin does not contain these ingredients, so shining a UV light on it will not start the curing process.
If you try using UV light on regular resin, you may end up with:
- Sticky resin surface
- Soft or uncured resin
- Uneven hardening
- A failed resin project
To avoid common resin curing problems, it’s important to understand the difference between epoxy resin vs UV resin. If you are working on deep pours, tabletops, or large molds, regular epoxy resin is the right choice. If you need fast curing for thin layers or small jewelry pieces, UV resin is better.
In short, if you’re wondering, can I use a UV light on regular resin, remember this: regular resin cures by mixing, not by light. Always use the correct curing method to ensure a strong, fully hardened finish.
2. Understanding Different Types of Resin
Before starting any resin project, it’s important to understand that not all resins work the same way. The two most common types used in crafts and DIY projects are UV resin and epoxy resin (regular resin). Each has a different curing process, working time, and best use case.
What Is UV Resin?
UV resin is a single-component resin that cures when exposed to ultraviolet light. It contains special light-sensitive ingredients that activate under a UV lamp for resin, allowing it to harden in just a few minutes.
Key Features of UV Resin:
- No mixing required
- Fast curing time (usually 1–5 minutes)
- Best for thin layers
- Ideal for small projects like resin jewelry and charms
- Short working time
Because of its quick UV curing process, UV resin is popular among beginners who want instant results. However, it does have limitations. It cannot cure properly in thick pours, and it tends to be more expensive per ounce compared to epoxy resin.
What Is Epoxy Resin (Regular Resin)?
Epoxy resin is a two-part system made of resin and hardener. To start the curing process, both parts must be mixed in the correct ratio. Once combined, a chemical reaction begins, gradually turning the liquid mixture into a solid material.
Key Features of Epoxy Resin:
- Requires accurate resin and hardener ratio
- Longer curing time (usually 12–48 hours)
- Suitable for deep pours and large molds
- Strong and durable finish
- Longer working time (pot life)
This type of resin cures through polymerization, not light exposure. The reaction also produces a mild exothermic reaction, meaning it generates heat as it hardens.
Epoxy resin is commonly used for:
- Tabletop coatings
- Coasters
- Art pieces
- River tables
- Deep casting projects
Which Resin Should You Choose?
The right resin depends on your project.
- Choose UV resin for small, detailed crafts that require quick curing.
- Choose epoxy resin for larger projects, deep pours, and stronger structural pieces.
Understanding these differences helps prevent common resin curing problems like sticky surfaces, soft spots, or uneven hardening. Selecting the correct type from the beginning ensures better results and a smoother crafting experience.
3. How Resin Curing Actually Works
To get strong, long-lasting results in any resin project, it’s important to understand how the resin curing process works. Curing is the stage where liquid resin transforms into a hard, solid material. This happens through either a chemical reaction or a light-activated reaction, depending on the type of resin you’re using.
1. Chemical Curing (Epoxy Resin)
Epoxy resin cures through a process called polymerization. When you mix the resin and hardener in the correct resin and hardener ratio, a chemical reaction begins. The molecules link together and form long, strong chains. As this reaction continues, the liquid gradually thickens and hardens.
During this process:
- Heat is produced (this is called an exothermic reaction)
- The mixture slowly changes from liquid to gel
- It fully hardens over 12–48 hours, depending on the formula
Temperature plays a big role in curing. Warmer environments speed up the reaction, while cold temperatures slow it down. Poor mixing or incorrect measurements can lead to uncured resin, sticky surfaces, or soft spots.
2. Light-Activated Curing (UV Resin)
UV resin works differently. Instead of relying on a hardener, it contains special light-sensitive ingredients. When exposed to ultraviolet light, these ingredients activate instantly and trigger hardening.
This type of UV curing process:
- Requires a UV lamp
- Works best in thin layers
- Hardens within minutes
- Does not need mixing
However, if the light cannot penetrate the resin fully (for example, in thick pours), curing may be incomplete.
Why Understanding Curing Matters
Knowing how resin cures helps you avoid common resin curing problems such as:
- Tacky epoxy
- Uneven hardening
- Overheating
- Weak final results
Each resin type has its own curing method, working time, and thickness limits. Following the correct process ensures proper resin hardening time, stronger durability, and a smooth finish for your project. When you understand what happens during curing, you can control the outcome and achieve professional-quality results every time.
4. Can I Use a UV Light on Regular Resin?
Many crafters assume that shining a UV lamp on any type of resin will speed up the curing process. However, this is not how epoxy works.
Regular epoxy resin is designed to cure through a chemical reaction between the resin and hardener. Once mixed in the correct ratio, the process of polymerization begins automatically. Light exposure does not activate or speed up this reaction.
UV resin, on the other hand, contains special light-sensitive ingredients called photoinitiators. These ingredients respond to ultraviolet light and trigger rapid hardening. Standard epoxy resin does not contain these components, which means a UV lamp for resin will not properly cure it.
What Happens If You Try?
If you expose mixed epoxy resin to ultraviolet light:
- The surface may feel slightly warm.
- The resin may appear to thicken temporarily.
- It will not fully harden from light alone.
The curing will still depend entirely on the chemical reaction between the two parts. If the mixture ratio is incorrect or not blended properly, you may end up with sticky resin, soft spots, or completely uncured resin.
Can UV Light Speed Up Epoxy Curing?
In normal conditions, UV light does not speed up epoxy curing. Heat can sometimes accelerate the reaction slightly, but ultraviolet light itself does not trigger hardening in two-part epoxy. Proper temperature control, accurate measuring, and thorough mixing are what truly affect resin curing time.
The Bottom Line
Epoxy resin and UV resin are formulated differently. One relies on a chemical process, while the other relies on light activation. Using the wrong curing method can lead to wasted materials and frustrating results. For best performance and durability, always follow the curing instructions designed specifically for the type of resin you are using.
5. What Happens If You Try to Cure Regular Resin with UV Light?
If you attempt to harden two-part epoxy using only ultraviolet light, the results will likely be disappointing. Unlike UV resin, epoxy is not designed for light-activated curing. It depends entirely on a chemical reaction between the resin and hardener.
Here’s what typically happens:
1. The Surface May Feel Warm But Not Cure Properly
Ultraviolet light can produce slight surface heat. This warmth may make the resin appear thicker for a short time. However, this does not mean it is curing from the light. The hardening still depends on the internal polymerization process.
2. You May Get a Sticky or Tacky Surface
If the resin mixture was not measured or mixed correctly, you could end up with sticky resin or a soft, rubbery finish. Light exposure will not fix this issue. Improper mixing remains one of the most common resin curing problems.
3. Uneven Hardening
Since epoxy cures from a chemical reaction, the hardening happens throughout the mixture. Using ultraviolet light may slightly affect the top layer but not the inner portion. This can result in uncured resin underneath a partially firm surface.
4. Wasted Time and Materials
Relying on the wrong curing method can delay your project and potentially ruin your piece. If the resin fails to harden properly, you may need to scrape it off and start again.
5. Possible Surface Yellowing
Extended exposure to strong ultraviolet light can sometimes cause discoloration or surface changes, especially in lower-quality epoxy formulas.
The Right Way to Cure Epoxy Resin
For proper resin hardening time, focus on:
- Accurate resin and hardener ratio
- Thorough mixing
- Correct room temperature
- Adequate curing time
Epoxy resin needs patience and the correct environment—not ultraviolet light—to cure fully and reach maximum strength. Understanding this difference helps prevent failed projects and ensures a smooth, durable finish.
6. Key Differences: UV Resin vs Regular Epoxy Resin
Understanding the differences between UV resin and regular epoxy resin helps you choose the right material for your project. While both create a hard, glossy finish, their curing method, working time, and ideal uses are very different.
Below is a clear comparison to make it easy to understand.
1. Curing Method
- UV Resin: Cures through a light-activated process using a UV lamp. It contains special ingredients that react to ultraviolet light.
- Epoxy Resin: Cures through a chemical reaction between resin and hardener. No light is required.
2. Curing Time
- UV Resin: Hardens within minutes under a UV lamp.
- Epoxy Resin: Takes 12–48 hours depending on the formula and room temperature.
If you need fast results, UV resin offers instant curing. If you can wait, epoxy provides more flexibility.
3. Mixing Requirement
- UV Resin: No mixing needed. It is ready to use straight from the bottle.
- Epoxy Resin: Requires an accurate resin and hardener ratio. Incorrect measuring can lead to sticky or soft results.
4. Thickness Limitations
- UV Resin: Best for thin layers. Thick pours may not cure evenly because light cannot penetrate deeply.
- Epoxy Resin: Suitable for deep pours, large molds, and thick casting projects.
5. Strength and Durability
- UV Resin: Strong for small items but less suitable for heavy-duty projects.
- Epoxy Resin: Creates a durable, long-lasting finish ideal for tabletops, coasters, and structural art pieces.
6. Working Time (Pot Life)
- UV Resin: Very short working time since it hardens quickly once exposed to light.
- Epoxy Resin: Longer working time before it begins the polymerization process, allowing adjustments and bubble removal.
7. Best Use Cases
- UV Resin: Jewelry, small crafts, quick repairs, thin decorative layers.
- Epoxy Resin: River tables, large art projects, deep casting molds, surface coatings.
8. Cost and Equipment
- UV Resin: Requires a UV lamp and is usually more expensive per ounce.
- Epoxy Resin: Does not require special lighting but needs careful measuring tools.
Final Comparison Summary
If you want speed and convenience for small projects, UV resin is a great choice. If you need durability, depth, and strength for larger pieces, epoxy resin is the better option. Choosing the correct resin type helps prevent common resin curing problems, ensures proper resin hardening time, and improves the overall quality of your finished project.
7. When Should You Use UV Resin Instead?
UV resin is the right choice when you need speed, convenience, and precision. Because it cures through a UV curing process, it hardens within minutes under a UV lamp, making it ideal for small and detailed projects.
Here are the situations where UV resin works best:
1. Small Jewelry and Detailed Crafts
UV resin is perfect for earrings, pendants, charms, and other small decorative items. Since it cures quickly, you can complete multiple pieces in a short time. It also works well for adding a glossy top coat to handmade jewelry.
2. Thin Layers and Surface Coating
Because ultraviolet light cannot deeply penetrate thick pours, this resin performs best in thin applications. It is excellent for sealing surfaces, filling shallow bezels, or adding a clear protective layer over artwork.
3. Quick Repairs and Touch-Ups
If you need to fix a small crack, secure embellishments, or repair a minor flaw, UV resin is very convenient. You can apply it precisely and cure it almost instantly using a UV lamp for resin.
4. Fast Production Projects
For crafters who sell handmade products, speed matters. UV resin reduces resin hardening time, allowing you to move quickly from one project to the next without waiting hours for curing.
5. Beginner-Friendly Projects
Since no mixing is required, UV resin removes the risk of incorrect ratios. This helps avoid common resin curing problems such as sticky or soft results caused by poor measuring.
When It’s Not Ideal
UV resin is not suitable for deep molds or thick casting projects. Light cannot cure large volumes evenly, which may lead to uneven hardening.
Final Tip
Choose UV resin when your project is small, detailed, and requires fast results. For larger pours or heavy-duty applications, a two-part epoxy system is the better option. Selecting the right resin type ensures smoother results and a stronger, more professional finish.
8. When Is Regular Resin the Better Choice?
Two-part epoxy is the better option for projects that need strength, depth, and long-lasting durability. Unlike UV resin, it cures through a chemical reaction and can handle thick pours and large surfaces.
Here are the situations where epoxy is the superior choice:
1. Deep Pours and Large Molds
Epoxy works well for river tables, deep casting, and large molds because it cures evenly in thick layers. UV resin cannot cure properly in deep sections since ultraviolet light does not penetrate far enough. Epoxy avoids this problem by hardening through chemical polymerization.
2. Tabletops and High-Use Surfaces
If you are coating a tabletop, countertop, or surface that will experience daily use, epoxy is more durable. It creates a strong protective layer that resists scratches and wear, making it ideal for furniture projects.
3. Structural and Functional Projects
Epoxy provides better strength for functional pieces such as coasters, art panels, and heavy-duty crafts. Its chemical bond creates a tough finish that lasts longer than light-cured alternatives.
4. Larger Art and Craft Projects
When working on big art pieces or molds, epoxy gives you more working time. This allows for proper placement, bubble removal, and adjustments before curing begins. UV resin, by contrast, hardens quickly and leaves little room for changes.
5. Professional and Commercial Applications
If you plan to sell resin products or create high-quality items, epoxy is often the better choice. Its durability and professional finish make it suitable for commercial-grade crafts and art pieces.
Final Thought
Choose epoxy when you need strength, thickness, and long-term durability. It is ideal for deep pours, large surfaces, and heavy-use items. UV resin remains best for small, detailed projects, but epoxy delivers superior results for demanding applications. Selecting the right material ensures better performance and a more professional finish.
9. Common Resin Curing Mistakes to Avoid
Resin projects can look simple, but small mistakes often lead to resin curing problems such as sticky surfaces, soft spots, or uneven hardening. Understanding these errors helps you achieve smooth and durable results.
1. Incorrect Resin and Hardener Ratio
Epoxy resin requires an accurate mixture of resin and hardener. Even small measurement errors can prevent proper curing.
- Always follow the manufacturer’s ratio instructions
- Use measuring cups or scales for precision
- Do not guess or eyeball the amount
Incorrect ratios often result in uncured resin or a sticky finish that never hardens properly.
2. Incomplete Mixing
Mixing is just as important as measuring. If the components are not blended thoroughly, some areas may not cure.
- Stir slowly but consistently
- Scrape the sides and bottom of the container
- Mix until the solution looks uniform
Poor mixing is a leading cause of soft or uneven results.
3. Working in Cold Temperatures
Temperature affects the chemical reaction that drives the resin curing process. Cold environments slow curing and may cause cloudiness or incomplete hardening.
- Work in a room between 20–25°C (68–77°F)
- Avoid cold garages or outdoor spaces
- If needed, use a space heater to maintain temperature
Warm but controlled conditions help resin cure evenly.
4. Ignoring Dust and Debris
Dust, hair, and small particles can ruin a smooth finish.
- Work in a clean, dust-free area
- Cover your project while it cure
- Use a lint-free cloth to clean surfaces before application
A clean environment improves the final appearance.
5. Pouring Layers That Are Too Thick
Epoxy has limits on how thick it can cure in one layer. Deep pours may trap heat and cause bubbling or uneven hardening.
- Follow the manufacturer’s maximum pour depth
- Use multiple thin layers for deep projects
- Allow each layer to cure before adding the next
This prevents overheating and ensures strong results.
6. Not Allowing Enough Curing Time
Epoxy needs time to harden fully. Rushing the process can leave the surface soft or tacky.
- Follow recommended curing times
- Avoid touching or moving the project too early
- Give extra time in cooler environments
Patience leads to a stronger, professional-quality finish.
7. Using Old or Expired Resin
Resin products can degrade over time. Old materials may not cure correctly.
- Check expiration dates
- Store resin in a cool, dry place
- Seal containers tightly after use
Fresh materials perform better and reduce curing issues.
Final Tip
Most curing problems come from measurement errors, poor mixing, or incorrect environmental conditions. By following instructions carefully and avoiding these common mistakes, you can achieve smooth, durable results in every resin project. Proper preparation and attention to detail make all the difference.
10. FAQs
1. Can I use a UV light on regular resin?
No, UV light does not properly cure regular epoxy resin. Epoxy hardens through a chemical reaction between resin and hardener, not light exposure. A UV lamp only works on UV resin, which contains special light-sensitive ingredients.
2. What happens if I try to cure regular resin with UV light?
The resin will not fully harden. It may feel slightly warm or thick on the surface, but the chemical curing process still depends on proper mixing and time. This can result in sticky or uncured areas.
3. Which resin is better for beginners?
UV resin is easier for beginners because it does not require mixing and cures quickly. However, it works best for small projects. For larger or stronger projects, epoxy resin is a better choice despite the longer curing time.
4. Why is my epoxy resin still sticky after curing?
Sticky resin usually happens because of incorrect resin and hardener ratios, poor mixing, or low temperatures. Always measure accurately, mix thoroughly, and work in a warm environment to avoid resin curing problems.
5. How long does epoxy resin take to fully cure?
Most epoxy resins take 12–48 hours to cure, depending on the product and temperature. Even if it feels hard on the surface, full strength develops after complete curing time. Patience ensures a durable and professional finish.
11. Final Verdict:
The simple answer is no UV light cannot properly cure regular resin. Two-part epoxy resin relies on a chemical reaction between resin and hardener, not light exposure. A UV lamp only works on UV resin, which contains special ingredients that respond to ultraviolet light.
If you try to cure epoxy with a UV light, the resin will not fully harden. It may feel slightly warm or thicken on the surface, but the internal chemical curing process will still be incomplete. This often leads to sticky surfaces, soft spots, or other resin curing problems.
For epoxy projects, proper curing depends on:
- Correct resin and hardener ratio
- Thorough mixing
- Suitable room temperature
- Adequate curing time
Light exposure does not replace these requirements.
If your project needs fast curing, UV resin is a better option for small and detailed crafts. However, for deep pours, tabletops, and larger creations, epoxy resin is the right material—even though it takes longer to cure.
Final Thought
Understanding the difference between UV curing and chemical curing helps you choose the right resin for your project. Using the correct method ensures stronger results and a professional finish. While UV light is useful for UV resin, it is not effective for regular epoxy resin.