1.Introduction
Best Epoxy resin kits for beginners are the perfect starting point for anyone looking to explore the world of resin art. Whether you’re interested in making custom jewelry, keychains, or decorative pieces, these kits offer all the essential tools and materials to help you get started with confidence. In this guide, you’ll find everything you need to know—from choosing the right kit to beginner-friendly tips, FAQs, and more.
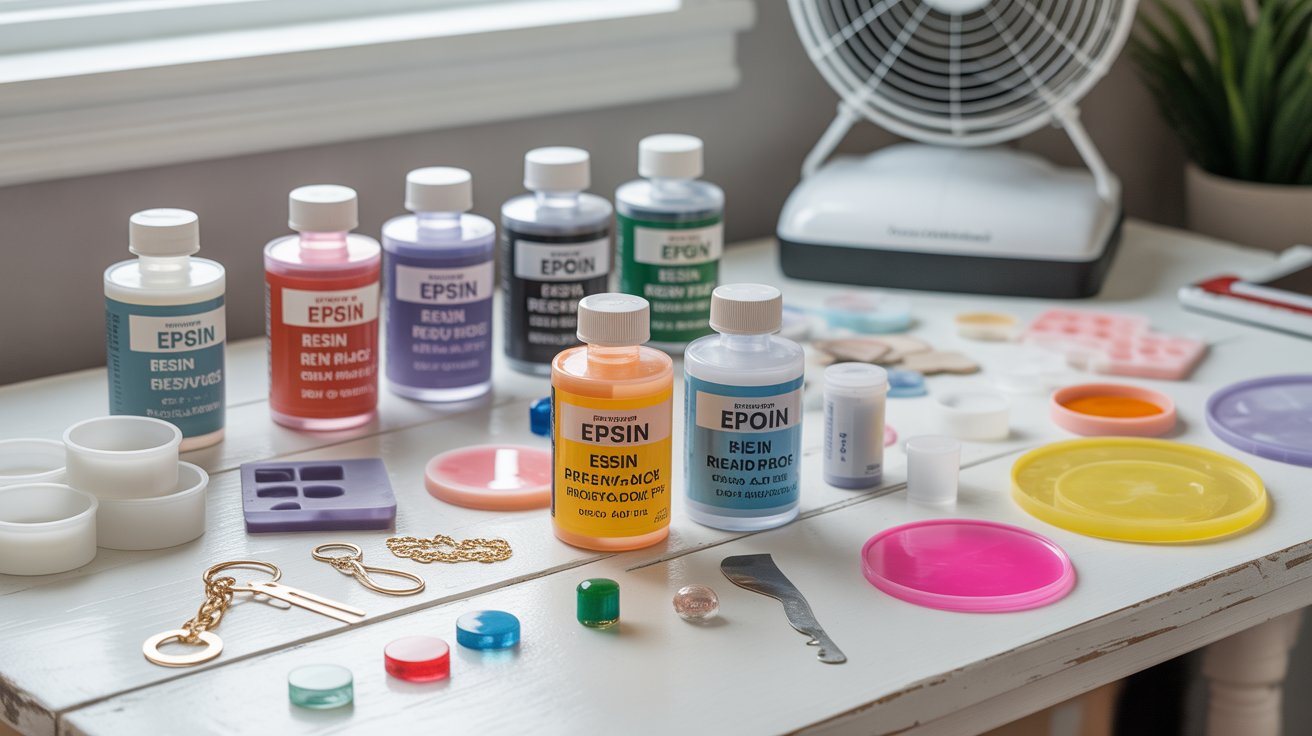
2. What Is an Epoxy Resin Starter Kit?
An epoxy resin starter kit is a complete set of materials and tools designed to help beginners easily create resin art, crafts, and jewelry. Instead of buying each item separately, these kits provide everything you need in one convenient package—making them perfect for anyone new to resin crafting.
A typical epoxy resin starter kit with molds includes:
- Epoxy resin and hardener: The main components that, when mixed, create a strong, glossy, and durable surface.
- Silicone molds: Pre-shaped forms for jewelry, coasters, keychains, and decorative pieces.
- Mixing tools: Measuring cups, stir sticks, and droppers to help you mix the resin correctly.
- Protective gear: Gloves and sometimes a mask to ensure safe handling.
- Pigments and glitters: To add color, sparkle, and personality to your creations.
These all-in-one epoxy resin kits for beginners are designed to make crafting simple and enjoyable. You don’t need prior experience or expensive tools—just follow the instructions, mix the resin, pour it into molds, and watch your creativity come to life.Whether you want to make custom resin jewelry, gift items, or home décor, an epoxy resin starter kit gives you the perfect foundation to explore your artistic side without stress or guesswork
3. Key Features to Look for in a Beginner Resin Kit
When you’re shopping for epoxy resin kits for beginners, there are certain features that really make a difference. These will help you get safe, beautiful results without frustration. Here are the most important things to look for:
What to Prioritize in a Good Beginner Epoxy Resin Kit
| Feature | Why It Matters | What to Look For |
| Mixing Ratio / Simplicity | For beginners, the less complicated the ratio of resin to hardener, the less chance of error. Mistakes here can lead to tackiness, incomplete curing, or weak resin. | Kits with a 1:1 ratio by volume are easiest. Some use 2:1 or 3:1 — these are fine but require more precision. |
| Clarity & UV Resistance | Resin that yellow over time or under light reduces the aesthetic value of your pieces. Clear, UV-stable resin keeps your work looking “fresh” for longer. | Look for terms like crystal clear, UV stabilised, anti-yellowing. |
| Working Time / Pot Life | The “working time” (sometimes called pot life) is how long you have before the resin starts to set. Beginners need enough time to mix properly, pour, smooth, and remove bubbles. | 30–60 minutes working time is good. Also check how long until it’s safe to touch, demold, etc. |
| Curing Time | Full cure is when the resin reaches its maximum hardness and durability. Faster curing is tempting, but too fast and you risk mistakes; too slow and it ties up space. | A kit that cures to a “handleable” state within 24 hours and full cure within 2–3 days is balanced. |
| Accessories & Inclusions | Kits that include molds, pigments, measuring tools, gloves, etc. save you hunting for extras. These also reduce cost. | Check the list. If you’re specifically interested in jewelry, make sure jewelry-molds and suitable pigments are included. |
| Safety & Odor | Epoxy resin can emit strong smells and fumes, or irritate skin. Good ventilation and safety gear are essential. | Kits labelled low-odor, non-toxic, or food-safe (if you’ll use pieces with food) are preferable. Also gloves, safety instructions included. |
| Viscosity / Self-Leveling & Bubble Release | A resin that is too thick (high viscosity) can trap bubbles or be hard to pour; a good resin will flow evenly and release trapped air more easily. | Look for self-leveling features, low viscosity, bubble-free finish, or self-degas terms. |
| Durability & Finish | You want the cured resin to be hard, clear, resistant to scratches and stains, with a glossy-looking finish. Otherwise pieces wear out quickly. | Terms like scratch-resistant, water resistant, high gloss finish, rock hard, durable are good indicators. |
| Thickness / Depth of Pour | If you plan deeper casting projects (e.g. river tables, large molds), you’ll need resin that allows thicker pours without overheating or cracking. | Check max pour depth per layer. Kits with “deep pour” properties are helpful. |
| Price vs. Quantity | Buying enough resin and hardener (and extras) at a fair price is part of value. A small, cheap kit might not go far if you want to experiment a lot. | Price per ml or oz is useful. Also check whether you’ll need to buy extra tools or molds. |
Applying These to “Best Epoxy Resin Kits for Beginners”
- Start by choosing a kit that has a simple mixing ratio and enough working time so you don’t feel rushed.
- If you want to make resin jewelry, pick a kit with jewelry-friendly molds and pigments included.
- If you’ll work in a small space, or indoors, prioritize low odor and safety gear.
For items exposed to light (sun, display), look carefully at UV resistance and how long clarity will last.
4 Comparison Table of the Best Epoxy Resin Kits for Beginners
| Kit / Brand | Resin + Hardener Volume | Mixing Ratio | Working Time | Full Cure Time | Included Molds & Accessories | Odor / Safety Features | Price Range* | Best Use Case / Notes |
|---|---|---|---|---|---|---|---|---|
| Kit A | 500 ml | 1:1 by volume | ~40 minutes | ~24 hours | 4 silicone molds + pigments + gloves + stirrers | Low-odor, non-toxic labeling | Moderate | Good all-round starter kit |
| Kit B | 1 liter | 2:1 by volume | ~30 minutes | 48 hours | Jewelry molds, measuring cups, mica powders | “Food-safe once cured,” moderate fumes | Mid | Better for jewelry, small pours |
| Kit C | 750 ml | 1:1 | ~50 minutes | 24–36 hours | Coaster molds, pigments, stirring tools | Low-VOC, includes gloves | Moderate–High | For mixing small to medium crafts |
| Kit D | 1.2 liters | 1:1 | ~35 minutes | 24 hours | Molds + glitter + dried flowers + droppers | Low odor, non-toxic | Moderate | Good value + extras |
| Kit E | 2 liters | 1:1 | ~45 minutes | 24 hours | Molds, pigments, gloves, stirrers | Low-odor, safe handling | Higher | For more frequent use or multiple projects |
* Price Range is indicative — always check current prices and shipping cost in your region.
How to Use This Table in Your Blog Post Effectively:
- Right before the table, include a short lead-in (“Below is a side-by-side comparison of top epoxy resin kits for beginners so you can quickly spot differences.”).
- After the table, discuss 2–3 key takeaways. For example: “Kit A is perfect for first-time users thanks to its simple 1:1 mix ratio and solid accessory set, while Kit E is better for those planning to make many pieces or larger items.”
- You can also insert product images or thumbnail photos of each resin kit above or beside the table to help visual comparison.
- For mobile readers, make sure the table is responsive (e.g. collapsible or scrollable) so it displays neatly on phones.
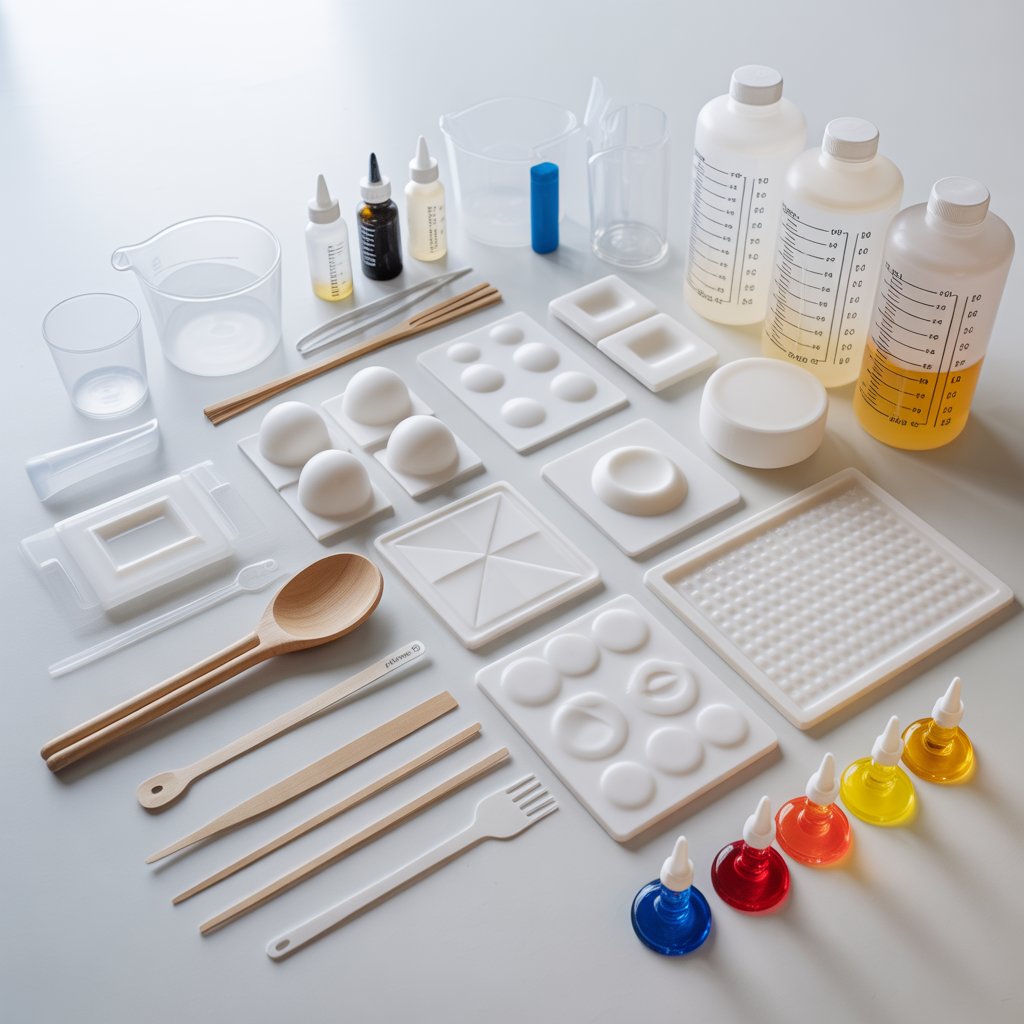
5. Kit Contents / Inclusions
When evaluating epoxy resin kits for beginners, one of the most important aspects is what’s inside the box. A kit with well-chosen inclusions gives you everything you need to start without hunting for extra tools or accessories. Below is a breakdown of the typical contents and what to look for:
Common Components in a Good Epoxy Resin Starter Kit
Here’s what a solid epoxy resin starter kit with molds usually includes:
- Resin & Hardener Bottles
The two main chemical parts you must mix. The kit should clearly label them and usually come in complementary volumes. - Silicone Molds
Pre-shaped molds (for jewelry, coasters, keychains, etc.) that let you pour the mixed resin into forms. - Measuring & Mixing Tools
- Measuring cups (often with graduated markings)
- Stir sticks or mixing rods
- Sometimes extra droppers or pipettes
- Measuring cups (often with graduated markings)
- Pigments, Glitter & Colorants
To tint or add shimmer to your resin creations (mica powders, alcohol inks, etc.). - Protective Gear & Safety Items
- Disposable gloves (often nitrile)
- Possibly a mask or respirator (if fumes are a concern)
- Safety instructions or MSDS (Material Safety Data Sheet)
- Disposable gloves (often nitrile)
- Instructions / Guide Book / Project Ideas
Step-by-step instructions, mixing ratio charts, curing times, and creative project ideas. - Additional Accessories / Extras
- Sandpaper or polishing pads (for finishing)
- Small funnels
- Heat gun or torch (or recommendations to purchase one)
- Stickers, labels, or decorative elements
- Sandpaper or polishing pads (for finishing)
Why These Inclusions Matter
- All-in-one convenience — When a kit includes molds, pigments, gloves, etc., you won’t need to buy many extras before trying it.
- Beginner safety & confidence — Having proper measuring tools and safety gear reduces risk and helps you mix accurately.
- Better results — Pigments and additives included mean you can experiment from day one, and good molds improve surface quality.
- Learning support — Written instructions or guides help beginners avoid common pitfalls and succeed.
Watch for Missing or Low-Quality Items
Even good kits may skimp on a few things. Be aware of:
- Very thin or flimsy molds that warp
- Gloves that tear easily
- Lack of clear measurement markings on tools
- Absence of pigment or colorants (forcing you to buy them separately)
- Missing safety data or precautions
6. Ease of Use
One of the biggest deciding factors for beginner crafters is how easy a kit is to use. Even if a kit promises premium quality, if it’s complicated to mix, pour, or finish, beginners may become frustrated and give up. Below are the aspects of epoxy resin kits for beginners that affect how user-friendly they are, along with tips for recognizing a truly “easy-use” kit.
Factors That Influence Ease of Use
| Ease Factor | Why It Matters for Beginners | What to Look For |
| Simple Mixing Ratio | Beginners often make mistakes with complex proportions, causing improper curing or tackiness. | Look for kits with 1:1 by volume ratios or easy-to-read instructions for other ratios. |
| Clear, Step-by-Step Instructions | If the directions are confusing or missing, even a good kit becomes hard to use. | Diagrams, photos, video links, and a beginner’s guide are big pluses. |
| Long Enough Working / Pot Time | If the resin starts setting too quickly, you don’t have time to stir, pour, or correct mistakes. | A working time (pot life) of 30–60 minutes is ideal for beginners to work comfortably. |
| Self-Leveling / Low Viscosity | Thick or “sticky” resin is harder to manipulate and more prone to trapping bubbles. | Terms like self-leveling, low viscosity, or fluid flow are helpful signs. |
| Bubble Release / Low Bubble Trapping | Resin that traps lots of bubbles or is hard to de-bubble can ruin pieces, especially for jewelry work. | Kits that mention bubble release or include a small heat tool or techniques for removing bubbles. |
| Ease of Demolding | If molds are stiff or the resin sticks, removing pieces safely becomes a struggle. | Flexible silicone molds and non-stick surfaces make it easier to pop out finished items. |
| Tolerance to Mistakes | A beginner-friendly resin “forgives” small errors in mixing or layering, to some extent, letting you fix or recover. | Kits marketed for beginners often emphasize forgiving mixture, error margin, or resin that allows minor corrections. |
| Safety / Low Odor | Strong smell or harmful fumes make the process uncomfortable in small spaces, which can discourage use. | Kits labeled low odor, non-toxic, low-VOC improve the usability of the kit in home settings. |
What Makes a Kit “Easy for Beginners”?
- One-to-one mixing (or very clear alternative ratio) so you don’t overthink measurements.
- Guided support—good kits include instructions, possibly even video tutorials to walk you through mixing, pouring, and curing steps.
- Adequate working time so you’re not rushed.
- Flexible molds and self-leveling resin reduce frustration when pouring or removing pieces.
- Low odor and safety gear included, so beginners can use the kit indoors without needing a big workshop.
- Extras for simplifying steps—for instance, droppers, pipettes, or bubble tools included in the kit help reduce the learning curve.
Example & Real-User Insight
Many beginner crafters recommend Let’s Resin kits because they are affordable and beginner-friendly, and they come with mixing tools, molds, and safety components. One reviewer noted:
“I like Let’s Resin … they have cups, mixing sticks … no VOCs, excellent bubble release … works well for beginners.”
That kind of feedback often signals a kit that’s forgiving and well-suited for first-time users.
7. Quality of Results
When you invest in one of the epoxy resin kits for beginners, the real test comes down to how good the finished pieces look and last over time. Below are the main factors that determine the quality of results, along with tips and what to watch out for.
Key Quality Metrics
| Metric | Why It Matters | What to Look for / Test |
| Clarity / Transparency | High-quality resin yields a crystal-clear, glass-like finish that lets colors, inclusions, and details show beautifully. | The cured resin should remain clear (no milky or cloudy areas). Look for terms like crystal clear, optically clear, no haze. |
| UV / Yellowing Resistance | Over time, exposure to sunlight or UV rays can cause cheaper resins to yellow or discolor, hurting your piece’s visual appeal. | Kits that include UV stabilizers, anti-yellowing formula, or mention long-term clarity. |
| Hardness / Durability | A harder finish resists scratches, dents, and wear — especially important for jewelry, coasters, or surfaces that get touch or use. | Look for “rock hard”, shatter resistance, scratch-resistant, or information on Shore hardness ratings. |
| Gloss / Shine / Finish Quality | A smooth, glossy surface is desirable; if the resin cures with dim or dull finish, the piece won’t look as professional. | Review photos of finished works. Good kits often advertise high gloss or mirror finish. |
| Bubble Control / Minimal Defects | Air bubbles, inclusions, or defects (like “fish eyes” or pinholes) ruin the visual impact. | Effective resin “bubble release” features or instructions to use heat gun/torch. Also, consistent mixing and degassing protocols. |
| Shrinkage / Warping | Lower-quality resins may shrink slightly or warp during cure, distorting embedded objects or affecting flat surfaces. | Manufacturers sometimes mention low shrinkage or minimal distortion; check reviews for warping complaints. |
| Layer Bonding & Adhesion | If you’re doing multi-layer pours or embedding objects, each layer must bond well (no delamination). | The resin should cure such that additional pours or embedded items fuse seamlessly. |
| Longevity & Color Stability | Over months or years, pieces should maintain clarity, gloss, and resist dust and wear. | Look for real user reviews over time or manufacturer claims about longevity or warranty. |
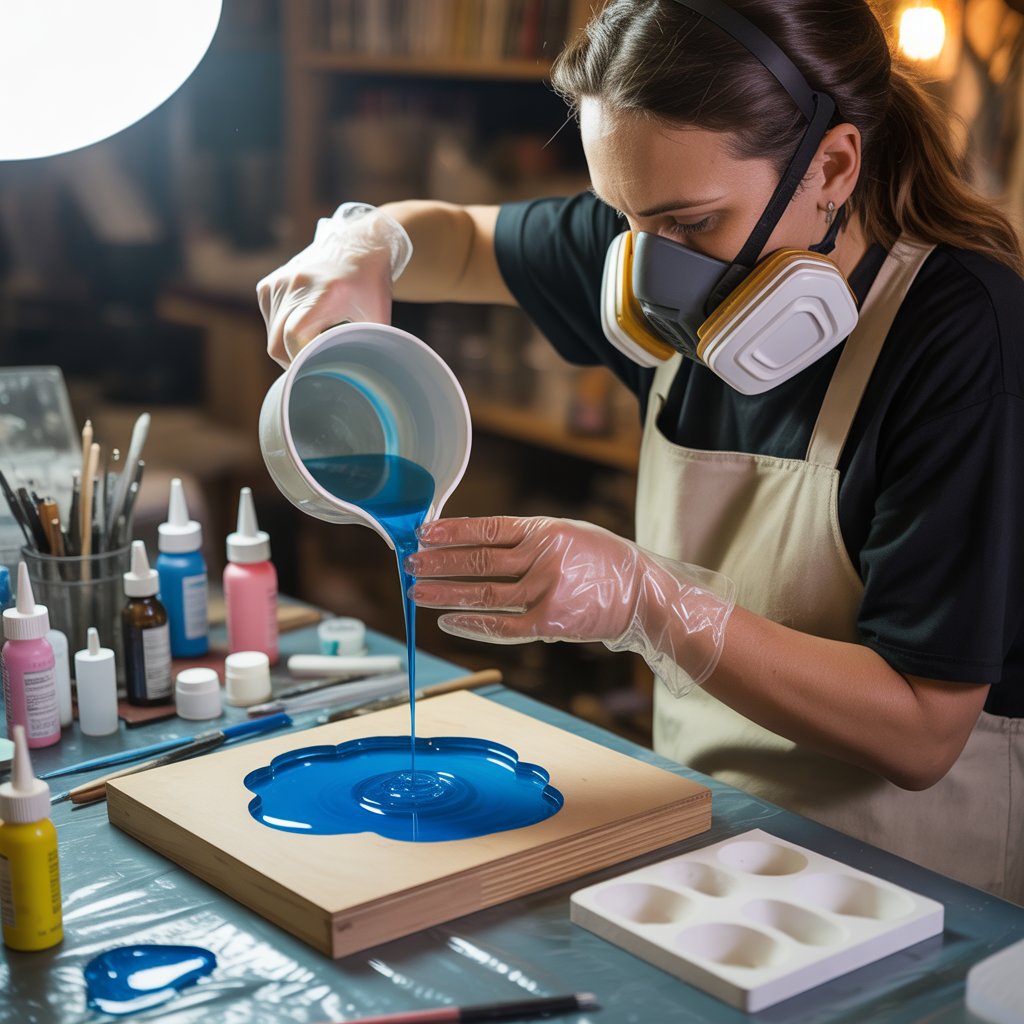
Tips to Help Get High-Quality Results as a Beginner
- Test a small batch first — before working on a full project, pour a small piece to check clarity, cure, and how it handles bubbles.
- Control temperature & humidity — consistent ambient conditions help the resin cure cleanly and reduce defects.
- Use good molds and level surfaces — imperfections in molds or tilted surfaces cause flaws in the final piece.
- Degas or apply gentle heat — use a heat gun, torch, or warm air to help bubbles rise and pop as the resin sets.
- Let each layer cure to the right stage — avoid pouring next layers too early or too late (which can cause bonding issues).
- Polish or sand lightly if needed — some minor surface defects can be fixed by fine sanding and a thin top-coat.
What Makes a Beginner Kit Truly Deliver Good Results
For a kit to be considered among the best epoxy resin kits for beginners, it should allow a new user to achieve near-professional-looking pieces without extensive trial and error. That means:
- The resin should be forgiving (tolerant of small mixing or timing errors).
- It should produce clear, glossy, hard, and bubble-free results reliably.
- It should resist yellowing over time under normal indoor conditions.
- The kit’s included molds, pigments, and additives must be compatible and high quality (to prevent defects or poor integration).
8. Safety and Odor Level
When choosing among the epoxy resin kits for beginners, safety should always come first. While resin crafting is a fun and creative hobby, it involves chemical reactions that can release fumes and cause skin irritation if handled carelessly. That’s why it’s essential to pick a kit designed with beginner safety and low odor in mind.
Why Safety Matters
Epoxy resin consists of two main parts — resin and hardener — which react to create a hard, glossy finish. During this curing process, certain resins can emit volatile organic compounds (VOCs) or mild chemical odors. For beginners working at home, in small or poorly ventilated spaces, this can become uncomfortable or even unhealthy over time.
Using a low-odor, non-toxic epoxy resin starter kit with molds helps ensure a safer and more pleasant crafting experience.
Safety Features to Look For
Here are some key safety features to consider when selecting the best epoxy resin kits for beginners:
- Low Odor or Odorless Formula: Look for kits labeled low VOC, non-toxic, or low odor. These are safer for indoor use.
- Non-Toxic & BPA-Free: Resins that are BPA-free and meet safety standards are safer for skin contact and everyday crafts.
- Protective Gear Included: Many beginner kits come with gloves, mixing tools, and sometimes masks to protect against spills and fumes.
- Clear Safety Instructions: Step-by-step guidance on mixing, handling, and ventilation helps you avoid accidents.
- Proper Packaging: Leak-proof bottles with secure caps prevent spills and exposure when storing the resin.
Odor Level and Indoor Use
For home crafters, odor level makes a big difference. Kits marketed for beginners typically use low-VOC formulations that have little to no smell. These are perfect for crafting in small spaces like a kitchen or hobby corner. However, it’s still recommended to:
- Work in a well-ventilated area (near an open window or with a small fan).
- Avoid using resin near food or pets.
- Wear gloves at all times to prevent skin irritation.
Quick Tips for Safe Resin Crafting
- Always mix resin and hardener according to instructions — never guess the ratio.
- Avoid breathing directly over your mixture.
- Wipe spills immediately using disposable towels.
- Wash hands thoroughly after use.
- Keep the kit away from children and direct sunlight.
In Short
The best epoxy resin kits for beginners prioritize both performance and safety. Look for low-odor, non-toxic, and beginner-friendly options that make crafting enjoyable without the health risks. With the right kit and precautions, you can focus on creativity while staying safe and comfortable.
9. Included Molds and Accessories
One of the advantages of choosing epoxy resin kits for beginners is that many kits come bundled with molds and helpful accessories. These inclusions not only save you from buying extras but also let you start crafting right away. Below is a guide to what kinds of molds and accessories are common — and which ones you should pay attention to when comparing kits.
Types of Molds Commonly Included
- Silicone Molds (Soft, Flexible):
These are the most common molds included in beginner kits. Silicone molds are flexible, non-stick, and easy to demold, which is especially helpful for first-time users. - Jewelry Molds:
Small molds shaped for pendants, earrings, rings, and keychains. Many beginner kits aim specifically at jewelry crafting, so they include multiple jewelry molds. - Coaster & Tray Molds:
Larger, flatter molds for creating resin coasters, serving trays, or decorative pieces. - Novelty / Themed Molds:
Shapes like hearts, stars, animals, geometric forms, or seasonal designs. These let beginners try creative shapes without needing to source molds separately. - Deep or 3D Molds:
For projects that require thickness, some kits include deeper molds or molds with multiple levels (e.g., for embedded objects).
Accessories You’ll Often See in Good Kits
Good beginner kits go beyond just resin and molds. They include various accessories to make the crafting process smoother:
- Measuring Tools & Mixing Aids:
Measuring cups (marked with ml/oz), stir sticks, droppers, pipettes. - Pigments, Glitters & Colorants:
Mica powders, alcohol inks, glitter flakes, metallic pigments — especially in kits focused on jewelry craft. - Inclusions / Decorative Elements:
Items like dried flowers, foil flakes, sequins, small charms, or beads that you can embed inside your resin. - Finishing Tools:
Polishing pads, sandpapers, small hand drills, or files to smooth edges and finish pieces. - Protective Gear & Safety Items:
Disposable gloves, finger cots, mixing gloves, or even masks. - Instructional Material:
Printed guides, QR codes linking to video tutorials, cheat sheets, or step-by-step project ideas. - Storage / Organizational Items:
Small containers, trays, or zip bags to keep accessories and leftover pigments safe and organized.
What Makes Molds and Accessories Truly Useful for Beginners?
- Variety & Versatility:
A good kit includes molds of multiple shapes and sizes (jewelry, coasters, novelty shapes) so beginners can experiment broadly. - Quality of the Molds:
Flexible silicone with smooth interiors helps release the resin cleanly and reduces defects or stuck pieces. - Useful, Not Excessive Accessories:
It’s better to have a few quality pigments or inclusions than a huge set of poorly made extras. - Accessories that Support Learning:
Things like mix guides, measuring tools, degassing tools (e.g. pipettes or small torches), and finishing aids help reduce mistakes. - Durability & Reusability:
Molds and accessories should last through multiple uses without deforming or degrading.
Real-World Example
For instance, one popular kit — the Thrilez 219-piece resin kit for beginners — includes 10 jewelry molds, pigments, glitters, and a full set of accessories like earring hooks, necklace cords, mixing tools, and decorative inclusions. Amazon.
10. Value for Money
When comparing epoxy resin kits for beginners, value for money is about more than just the price tag. It’s about how much you get (resin volume + extras), how good the performance is, and how long your supplies last. Here are pointers to help assess value, along with real-market examples so beginners can judge what constitutes a good deal.
What “Value for Money” Should Include
| What to Compare | Why It Matters | How to Judge It |
| Resin & Hardener Volume | Bigger volumes mean more projects, which lowers cost per mL. But you don’t want leftover resin that goes bad. | Calculate price per 100 mL or per gram. A kit with a large volume but poor hardness or clarity may be worse value than a smaller, high-quality kit. |
| Included Extras & Molds | Having molds, pigments, safety gear etc. included saves you from buying separately, increasing the kit’s utility. | Count what’s inside: how many molds, what quality, number of pigments, gloves, mixing tools etc. The more usable inclusions, the better the value. |
| Performance vs Price | Resin that cures poorly, yellows quickly, or is hard to work with can mean extra cost in materials or tools to fix mistakes. | Check reviews for clarity, finish, durability, and user feedback over time. A higher-priced resin that performs well may be better value overall. |
| Longevity & Reusability | Good molds and tools mean you don’t need replacements soon. Resin quality that resists yellowing or becomes brittle means your pieces last longer. | Look for UV resistance, hardness, quality silicone molds, reusable tools. Also consider whether you’ll use the kit enough to justify its cost. |
| Shipping, Customs, & Local Availability | Sometimes a kit is cheap but shipping or import duties make the total cost much higher. Local kits may offer lower overhead. | Factor in all costs (product + shipping + taxes). Compare local kit prices vs imported ones. |
What Beginners Should Aim For
- If just starting, aim for a mid-range starter kit that includes molds, safety gear, and colorants. Even if it costs more initially, you save by not buying missing items later.
- Check that resin + hardener amount matches your planned projects. If you want to do many jewelry pieces, smaller kits are okay; for coasters, trays, or large pours, you’ll need more volume.
- Examine quality specs: clarity, UV resistance, curing time. Sometimes paying a bit more for clarity or low-yellowing makes your finished work look much better for longer.
- Take shipping and local availability into account: a slightly more expensive local kit with fast delivery and fewer import hassles often ends up being better value than a cheap kit from overseas that takes weeks and has extra costs.
In short: the best epoxy resin kits for beginners are those that balance price, performance, and included extras. A lower-cost kit isn’t always the better deal if it compromises finish or forces you to buy more tools. If you want, I can compare 2-3 specific kits in your region (Pakistan) in terms of “value per use” so you have concrete recommendations.
11. Focus on Resin Jewelry Kit for Beginners
When you’re just getting started, choosing a resin jewelry kit for beginners is one of the most important steps. The right kit makes learning easier, minimizes mistakes, and helps you enjoy crafting from the first project.
What a Good Resin Jewelry Kit for Beginners Should Include
To get started confidently, your beginner kit should offer:
- Clear resin and matching hardener — with good instructions about mixing ratios.
- Simple molds — basic shapes like circles, braids, squares.
- Colorants or pigments — basic set of drops or powders so you can practice color mixing.
- Protective gear — gloves, perhaps safety goggles; resin can be sticky and irritant.
- Mixing tools — cups, stir sticks, dropper or pipette for controlled pouring.
Instructions and troubleshooting tips** — how to prevent bubbles, working in proper temperature, curing times.
Key Qualities for Beginner Kits
Here are qualities that make resin jewelry kits especially good for beginners:
| Quality | Why It Matters |
| Low to medium viscosity | Easier to pour into molds and fills details well. |
| Longer working time / slow‑curing | Gives you more time to mix, remove bubbles, and experiment. |
| UV resistant | Keeps jewelry looking clear and prevents yellowing over time. |
| Non‑toxic or low odor | More comfortable for beginners who may not have specialized ventilation. |
Tips for Using Your Resin Jewelry Kit for Beginners
- Mix resin and hardener exactly as instructed — incorrect ratio = soft results or tacky finish.
- Work in a clean, dust‑free area to avoid particles embedding in resin.
- Use a heat source (like a heat gun or small torch) briefly to pop bubbles after pouring.
- Let the pieces fully cure — patience matters. Touch only after full curing time.
- Practice with small test pieces before working on larger or more detailed projects.
Why “Focus on Resin Jewelry Kit for Beginners” Matters
Putting your attention on a resin jewelry kit for beginners ensures you are not overwhelmed. It helps you build confidence, get clean results, and enjoy the process. Once you’ve mastered basics, you can upgrade to advanced kits with more tools, complex molds, or specialty additives.
12. Tips for Beginners Using Epoxy Resin Kits
Getting started with epoxy resin can be exciting—but it also comes with a learning curve. These tips for beginners using epoxy resin kits will help you avoid common mistakes, stay safe, and get the best results from your projects.
1. Read the Instructions Carefully
Every epoxy resin kit comes with specific mixing ratios and curing times. Always follow the instructions included with your kit—each brand may be slightly different.
2. Measure Accurately
Use separate measuring cups for resin and hardener, and make sure you mix them in the correct ratio (commonly 1:1 or 2:1). Inaccurate measurements can lead to sticky, uncured resin.
3. Mix Thoroughly—but Gently
Stir the mixture slowly for at least 3–5 minutes, scraping the sides and bottom of the cup. Fast or sloppy stirring can introduce air bubbles.
4. Work in a Dust-Free Area
Dust and hair can ruin your resin surface. Work in a clean, covered area and let your pieces cure in a box or under a cover to protect them.
5. Use the Right Tools
Most epoxy resin kits come with basic tools, but make sure you also have:
- Mixing sticks
- Silicone molds
- Gloves
- Disposable cups
- A heat gun or torch (for popping bubbles)
6. Control Temperature and Humidity
Epoxy resin cures best in a warm, dry environment (around 70–75°F or 21–24°C). Cold or humid conditions can delay curing and affect the finish.
7. Don’t Rush the Curing Time
Let your project cure for the full recommended time. Touching or demolding too early can cause fingerprints or dents in the resin.
8. Start Small
Practice with small molds or simple shapes before trying more advanced pieces. This helps build confidence without wasting materials.
9. Use a Heat Source for Bubbles
After pouring, use a small torch, heat gun, or even a hair dryer (on low) to remove surface bubbles. Be careful not to overheat or scorch the resin.
10. Wear Protection
Always wear gloves, and if you’re working in a poorly ventilated area, consider using a mask. Even low-odor resin should be handled with care.
Final Thoughts
Following these tips for beginners using epoxy resin kits will help you create clean, professional-looking projects right from the start. Take your time, follow inst
Conclusion
Getting started with epoxy resin kits is easier than ever, thanks to beginner-friendly options and helpful guides like this one. Whether you’re crafting jewelry, coasters, or decorative items, having the right tools, following key tips, and understanding the basics will set you up for success.
From choosing the best resin kits to learning how to avoid common mistakes, every step helps you build confidence and skill. Don’t be afraid to experiment, practice, and most importantly—enjoy the creative process.
With the right epoxy resin kit, a little patience, and some inspiration, you’ll be creating beautiful, durable resin pieces in no time. Happy crafting!
13. FAQs – Epoxy Resin Kits
If you’re new to resin crafting or considering trying it for the first time, you likely have some questions. Below are some of the most frequently asked questions about epoxy resin kits, with simple, helpful answers.
1. What is an epoxy resin kit?
An epoxy resin kit typically includes two main components—resin and hardener—that must be mixed together to create a hard, durable finish. Most kits also include tools like mixing cups, sticks, gloves, and sometimes color pigments or molds.
2. Are epoxy resin kits safe to use at home?
Yes, epoxy resin kits are safe when used correctly. Always work in a well-ventilated area, wear gloves, and follow the manufacturer’s safety guidelines. Some resins are low-odor and non-toxic, making them more suitable for indoor use.
3. How long does it take for epoxy resin to cure?
Cure times vary by brand and type, but most epoxy resins take between 24 to 72 hours to fully cure. Some fast-curing resins harden in 8 to 12 hours. Always check your kit’s instructions.
4. Can beginners use epoxy resin kits easily?
Absolutely. Many epoxy resin kits are designed specifically for beginners. Look for kits that include simple instructions, starter molds, and basic tools. These are great for learning without feeling overwhelmed.
5. What can I make with an epoxy resin kit?
You can create a wide variety of crafts including:
- Jewelry (earrings, pendants, rings)
- Coasters
- Keychains
- Paperweights
- Decorative art pieces
Some advanced users also make tabletops and home decor items.
6. Why is my resin still sticky after curing?
Sticky or soft resin is usually caused by:
Incorrect mixing ratio
Incomplete mixing
Low temperature during curing
Always measure accurately and mix thoroughly.
7. How do I remove bubbles from the resin?
To remove bubbles, use a heat gun, torch, or a hairdryer (on low heat) right after pouring. You can also mix slowly to prevent bubbles from forming in the first place.
8. Can I add color to my epoxy resin kit projects?
Yes! Most epoxy resin kits are compatible with pigments, mica powders, alcohol inks, and dyes. Just make sure not to add too much, as it may affect curing.
9. How should I store unused resin and hardener?
Store them in tightly sealed containers in a cool, dry place away from sunlight. Proper storage extends shelf life and prevents yellowing.
10. Do epoxy resin kits expire?
Yes. Over time, resin can yellow or thicken, especially if exposed to heat or light. Most kits have a shelf life of 6 months to 1 year when stored properly.