
1. Introduction
Many resin artists feel confused when a shiny resin piece turns dull right after sanding. This is completely normal and happens to almost everyone. To understand how to make resin shiny after sanding, you first need to know what sanding does to the resin surface.
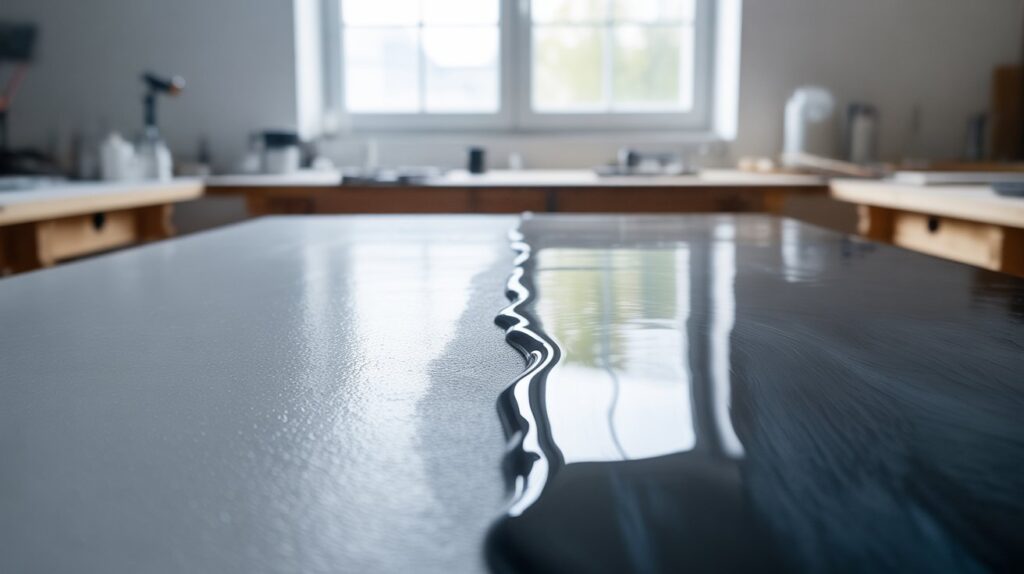
Sanding removes bumps, dust, and imperfections, but it also creates very fine scratches on the surface. These tiny scratches break the way light reflects, which makes the resin look cloudy or matte instead of glossy. Even when you use fine sandpaper, the shine will not return on its own.
In some cases, resin can look even more dull if it is not fully cured or if sanding dust is left on the surface. This often leads people to think the resin is damaged, but that is not true. Sanding is actually an important step toward a smooth and professional finish.
The key is knowing what to do next. With the correct polishing methods and finishing techniques, you can easily restore the shine and achieve a clear, glossy surface. Learning how to make resin shiny after sanding helps you turn a rough, dull piece into a smooth, glass-like result.
Table of Contents
2. Understanding Why Resin Looks Dull After Sanding
After sanding, resin often appears flat, cloudy, or lifeless, even if it was crystal clear before. This happens because sanding changes the surface structure rather than the resin itself. The material is still intact, but the way light interacts with it has been altered.
Sandpaper works by cutting into the surface to remove imperfections. Each pass creates tiny grooves that are too small to see individually but large enough to scatter light in different directions. Instead of reflecting evenly, light bounces off these scratches, which causes the surface to look dull and matte.
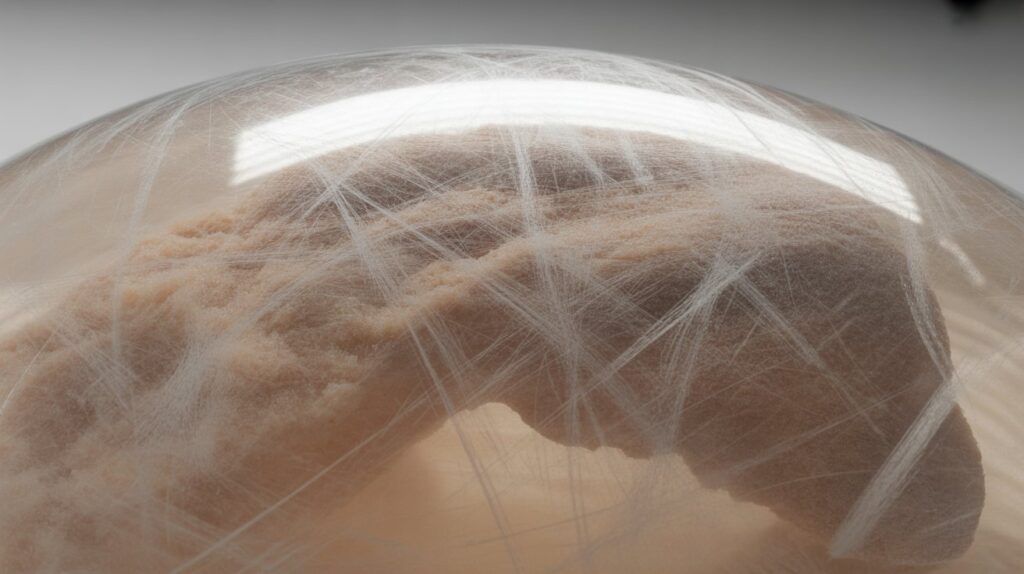
Another common reason for dullness is leftover sanding residue. Fine resin dust can settle into these microscopic scratches, further reducing clarity. If the surface is not cleaned properly between sanding stages, the haze becomes more noticeable. Resin that has not fully cured can also appear less clear after sanding. Soft or under-cured resin absorbs abrasion unevenly, leading to an inconsistent finish. This is why sanding too early often results in a cloudy look that does not improve without proper curing time.
Understanding these causes is important because dullness after sanding is not a mistake it is a normal stage of surface preparation. Once the scratches are gradually refined and the surface is properly finished, clarity and shine can be fully restored.
3. Preparing Resin Properly Before Polishing
Proper preparation is essential before moving on to polishing. Skipping this step often leads to uneven shine, cloudy spots, or wasted effort. A well-prepared surface allows polishing compounds to work effectively and produce consistent results.
Start by making sure the resin is fully cured. Polishing soft or partially cured resin can cause smearing, drag marks, or permanent dull areas. Most epoxy resins need at least 24–72 hours to cure, while thicker pieces may require more time. Always follow the manufacturer’s curing guidelines before continuing.
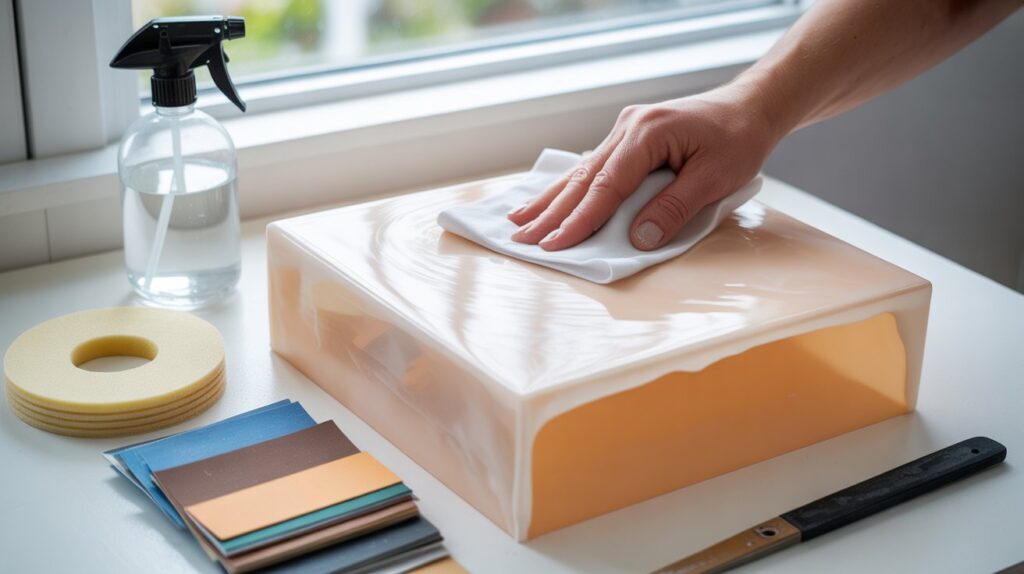
Next, clean the surface thoroughly. Rinse the resin with clean water or wipe it with a damp, lint-free cloth to remove sanding dust. Any leftover particles can scratch the surface again during polishing and reduce clarity. Avoid using rough towels or tissues that may leave fibers behind.
Check the sanding progression before polishing. When touched, the surface should be smooth and clean, not coarse or grainy. If deep scratches are still visible, polishing will not hide them. Instead, they will become more noticeable once the surface starts to shine. Proper sanding refinement is the foundation of a professional-looking finish.
Finally, dry the resin completely and inspect it under good lighting. This helps identify uneven areas that need additional sanding before polishing begins. Taking a few extra minutes to prepare the surface ensures better clarity, a more even gloss, and long-lasting results.
4. How to Fix Cloudy Resin After Sanding
Cloudy resin after sanding is a common issue and usually means the surface has not been refined enough yet. The good news is that this problem can be fixed with the right approach and does not require starting over.
The first step is to check your sanding grit progression. Cloudiness often happens when sanding jumps too quickly from a low grit to a very fine one. Go back to a medium grit and sand evenly, then move gradually through finer grits. This smooth transition helps reduce visible scratch patterns that cause haze.
Next, clean the surface thoroughly. Fine sanding dust can settle into tiny scratches and make the resin appear cloudy. Rinse the piece with water or wipe it with a damp, lint-free cloth between each sanding stage. Make sure the surface is completely clean before moving forward.
If the resin still looks hazy, polishing is required. Use a resin or plastic polishing compound and apply it in small sections using a soft cloth or polishing pad. Gentle, consistent pressure helps remove micro-scratches and restores clarity.
In cases where cloudiness remains, applying a thin, clear resin coat can be an effective solution. This fills in remaining surface scratches and levels the finish. With proper sanding, cleaning, and polishing, cloudy resin can be transformed back into a clear and smooth surface.
5. Best Grit Sanding Sequence for a Glossy Finish
A smooth and glossy resin surface starts with the correct sanding sequence. Using the wrong grit order or skipping steps is one of the main reasons resin fails to regain clarity after sanding.
Choose an initial grit based on how rough or smooth the surface already is. If there are visible bumps, drips, or uneven areas, start with a lower grit such as 220 or 320. This removes major imperfections and levels the surface. For lightly uneven surfaces, starting at 400 grit is often enough.
Once the surface is even, move gradually through finer grits. A consistent progression—such as 400, 600, 800, 1000, 1500, and up to 2000 or higher—helps remove the scratches left by the previous grit. Each step should smooth the surface further without creating new deep marks.
Wet sanding is strongly recommended for higher grits. Using water reduces heat, controls dust, and results in a more even finish. It also helps prevent clogging and minimizes visible scratch lines.
Before moving on to polishing, the surface should feel smooth and look evenly matte with no visible lines or cloudy patches. A proper grit sequence creates the ideal foundation for restoring clarity and achieving a clean, professional-looking gloss.
6. How to Polish Resin That Has Been Sanded
Polishing is the step that restores clarity and shine after sanding. Once the surface has been properly refined, polishing removes the remaining micro-scratches that cause dullness and brings the resin back to a smooth, reflective finish.
Start by choosing the right polishing compound. Products made for resin, plastic, or acrylic work best because they are designed to smooth fine surface scratches without damaging the material. Apply a small amount of compound to a soft, lint-free cloth or a foam polishing pad.
Work in small sections using gentle, even pressure. Move the cloth or pad in slow, circular motions to ensure consistent coverage. Avoid pressing too hard, as excessive pressure can create heat and leave swirl marks on the surface.
For larger pieces or frequent projects, a low-speed polishing machine can be helpful. Keep the speed low and the pad moving at all times to prevent overheating. Whether polishing by hand or with a machine, patience is key—rushing often leads to uneven results.
After polishing, wipe the surface clean with a microfiber cloth and inspect it under good lighting. If minor haze remains, repeat the process with a finer compound. Proper polishing transforms a matte surface into a clear, smooth finish with lasting shine.
7. What to Put on Epoxy Resin to Make It Shine
Once epoxy resin has been sanded smooth, adding the right finishing product can greatly improve its appearance. Several options are available, and the best choice depends on the look you want and how the piece will be used.
Polishing compounds are one of the most effective solutions. These products are designed to remove fine surface scratches and enhance clarity. When applied with a soft cloth or polishing pad, they create a clean, reflective finish without adding extra thickness to the surface.
Another option is applying a thin, clear resin coat. This method fills in tiny scratches left by sanding and creates a smooth, glossy layer on top. It works especially well for decorative items or jewelry where a deep shine is desired. Careful application is important to avoid bubbles or uneven areas.
Clear spray sealers or gloss varnishes can also add shine, but they are best suited for non-wear items. While easy to apply, these coatings may not be as durable as resin or polishing compounds and can wear over time.
For a softer shine, resin wax or finishing cream can be used. These products enhance gloss and provide light protection, but they may require reapplication. Choosing the right product ensures a smooth, bright finish that lasts.
8. How to Give Resin a Glossy Finish Without Re-Casting
You don’t need to pour a new layer of resin to achieve a shiny, glass-like surface. With the right techniques, even a sanded or slightly dull piece can be transformed into a glossy masterpiece.
The first step is thorough sanding using a fine grit progression, which removes imperfections and prepares the surface for polishing. A smooth base ensures that the gloss-enhancing products work effectively.
Next, use a quality polishing compound or a resin-specific polishing paste. Apply it in small, circular motions with a soft cloth or foam pad, gradually buffing the surface to bring out its natural shine. For larger pieces, a low-speed polishing tool can help achieve an even finish more quickly.
For added depth and protection, a thin layer of clear finishing resin or epoxy glaze can be applied on top. This fills minor scratches and creates a reflective surface without the need for a full re-cast. Make sure to work in a clean, dust-free environment to prevent particles from sticking to the wet surface.
Finally, finishing sprays or waxes can enhance the gloss even further. While these are not as durable as a resin coat, they provide a quick and effective shine for display items. Following these steps allows you to achieve a professional-looking, glossy finish without starting over.
9. Can I Use Toothpaste to Polish Epoxy Resin?
Using toothpaste on resin is a popular home remedy, but it comes with limitations. Toothpaste contains mild abrasives that can smooth tiny scratches on the surface, giving a temporary shine. However, it is not as effective as products designed specifically for resin or plastic polishing.
To use this method, apply a small amount of toothpaste to a soft cloth and rub it gently in circular motions over the sanded surface. Focus on small sections at a time, and avoid pressing too hard to prevent new scratches. After polishing, wipe the surface clean with a damp cloth and inspect the results under good lighting.
While toothpaste can improve minor dullness, it does not provide long-lasting clarity or a deep, glass-like shine. For the best results, professional polishing compounds or a clear resin topcoat are recommended. Toothpaste is best suited for small projects or as a quick fix when specialized products are not available.
10. How to Make Resin Shine Like Glass
Achieving a glass-like finish on resin requires careful attention to surface preparation, polishing, and finishing techniques. The key is creating a perfectly smooth base that allows light to reflect evenly.
Start by sanding the resin with progressively finer grits, going from medium to very fine. This removes scratches, bumps, and imperfections that can scatter light. Wet sanding with high-grit sandpaper, such as 1500–2000 grit, is particularly effective for achieving a smooth, even surface.
Next, polish the resin using a specialized compound or polishing paste. Apply it in gentle, circular motions with a soft cloth or foam pad, ensuring full coverage. For larger pieces, a low-speed polishing machine can help achieve a consistent shine without overheating the surface.
For the ultimate glass-like effect, apply a thin, clear epoxy layer or resin glaze on top. This fills micro-scratches and adds depth, enhancing clarity and reflectivity. Allow it to cure completely in a dust-free environment to prevent imperfections.
Finally, finishing wax or a protective spray can enhance the brilliance and provide additional protection. Following these steps carefully results in a smooth, high-gloss finish that mimics the clarity and shine of real glass.
11. How to Fix Dull Epoxy After Polishing
Sometimes, even after polishing, epoxy can appear flat or lackluster. This usually happens because fine scratches remain on the surface or the polishing process was not thorough. Fortunately, it can be corrected without starting over.
Start by inspecting the surface under good lighting to identify uneven areas or haze. If scratches are still visible, lightly sand the affected sections with a very fine grit, such as 1500–2000, or use a micro-mesh sanding pad. This helps remove imperfections that prevent full shine.
Next, apply a high-quality resin or plastic polishing compound. Work in small circular motions with a soft cloth or foam pad, applying gentle pressure. This step smooths out micro-scratches and restores reflectivity. For larger pieces, a low-speed polishing tool can ensure an even finish.
If dullness persists, consider adding a thin layer of clear epoxy or finishing resin. This seals the surface, fills remaining scratches, and gives a glass-like depth. Make sure the resin is applied in a dust-free environment and allowed to cure completely.
Finally, finishing wax or a protective gloss spray can enhance the shine and protect the surface from future wear. With proper sanding, polishing, and finishing, dull epoxy can be restored to a smooth, high-gloss finish that looks professional and long-lasting.
12. Polishing vs Clear Coating: Which Is Better?
When aiming for a glossy resin surface, two common methods are polishing the existing layer or applying a clear coat. Both can achieve a shine, but the best choice depends on the project and desired durability.
Polishing works by smoothing the existing surface. It removes fine scratches left by sanding and enhances clarity without adding extra thickness. Polishing is ideal for items that are already shaped and cured, such as jewelry, tabletops, or decorative pieces. It is cost-effective and allows for a precise finish, but it requires patience and the right tools to achieve a glass-like shine.
Clear coating, on the other hand, involves applying a fresh layer of epoxy or resin over the existing surface. This method fills micro-scratches, levels uneven areas, and creates a deep, reflective finish. Clear coating is particularly useful for large surfaces or when the existing layer is too damaged or dull to polish effectively. It provides long-lasting protection and a uniform glossy appearance.
In summary, polishing is better for minor imperfections and surface refinement, while clear coating is preferred for restoring heavily scratched or uneven surfaces. Combining both methods—sanding, polishing, and then applying a thin clear coat—often produces the most professional, long-lasting results.
13. Common Mistakes That Prevent Resin From Shining
Many resin projects fail to achieve a glossy finish because of simple mistakes during sanding, polishing, or curing. Identifying these issues can save time and ensure a professional-looking result.
1. Skipping Grits While Sanding:
Jumping from coarse to very fine sandpaper leaves deep scratches that polishing alone cannot remove. A proper, gradual grit progression is essential for a smooth surface.
2. Polishing Too Early:
Attempting to polish resin before it is fully cured can smear or damage the surface. Always ensure the resin has hardened completely according to the manufacturer’s instructions.
3. Inadequate Cleaning Between Steps:
Dust and debris left on the surface can create haze or scratches during polishing. Each sanding stage should be followed by thorough cleaning to maintain clarity.
4. Using the Wrong Polishing Tools or Compounds:
Household abrasives like regular toothpaste may provide temporary shine but cannot achieve a long-lasting, glass-like finish. Using compounds designed for resin or plastic ensures better results.
5. Uneven Application of Clear Coats:
When applying a top layer, air bubbles, dust, or uneven spreading can create a cloudy or dull appearance. Working in a clean, controlled environment minimizes these issues.
Avoiding these common mistakes ensures that resin projects reach their full potential, resulting in a smooth, clear, and highly reflective surface.
14. Final Step-by-Step Summary: How to Make Resin Shiny After Sanding
Restoring a resin piece to a glossy, professional finish is a step-by-step process. Following each stage carefully ensures the best results.
Step 1: Ensure Full Curing
Before doing anything else, make sure the resin is completely hardened. Polishing or applying coatings too early can damage the surface and reduce clarity.
Step 2: Sand the Surface Gradually
Start with medium grit sandpaper to remove imperfections, then progress through finer grits, ending with 1500–2000 grit. Wet sanding at higher grits helps reduce scratches and produces a smoother base.
Step 3: Clean Thoroughly Between Steps
After each sanding stage, remove all dust and debris using a damp, lint-free cloth. A clean surface prevents haze and ensures polishing is effective.
Step 4: Polish Carefully
Apply a resin-specific polishing compound using a soft cloth, foam pad, or low-speed polishing tool. Work in small circular motions, applying gentle pressure until the surface reflects light evenly.
Step 5: Optional Clear Coat
For added depth and protection, apply a thin layer of clear resin or epoxy glaze. This fills micro-scratches, enhances shine, and creates a glass-like finish. Make sure the layer cures in a dust-free environment.
Step 6: Final Touches
After curing, a finishing wax or gloss spray can further enhance the brilliance and protect the surface from future scratches or wear.
Following these steps carefully will transform a dull, sanded resin piece into a smooth, reflective surface with a professional-quality shine.
15. FAQs
Q1: Why is my resin not shiny after sanding?
Resin looks dull because sanding creates tiny scratches that scatter light. Dust or incomplete curing can also reduce shine.
Q2: Can I use toothpaste to polish epoxy resin?
Yes, toothpaste can give a temporary shine, but it won’t last as long as a proper polishing compound.
Q3: How to make resin shine like glass?
Sand progressively with fine grits, polish with a resin compound, and optionally add a thin clear resin layer for a smooth, glass-like finish.
Q4: How to fix dull epoxy?
Lightly sand the surface, polish it, or apply a thin clear coat to restore gloss.
Q5: What household items can I use to polish epoxy resin?
Toothpaste or baking soda can help slightly, but soft cloths and microfiber towels are needed for best results.
Q6: Why is my epoxy not shiny?
It may not be fully cured, or the surface has scratches or dust. Uneven pouring can also cause dull spots.
Q7: What happens if you pour epoxy too thick?
Thick layers can trap air bubbles, cause heat buildup, or cure unevenly, resulting in a cloudy or dull finish.
Q8: Can I skip sanding and go straight to polishing?
No, skipping sanding leaves scratches and uneven spots that polishing alone cannot fix. Sanding first creates a smooth surface for a proper shine.
Q9: How often should I polish resin pieces?
For items that are handled frequently, a light polish every few months helps maintain the gloss. Decorative pieces may only need polishing once after sanding.
Q10: Is it better to polish by hand or with a machine?
Hand polishing works well for small pieces and delicate areas, while a low-speed polishing machine is faster and more consistent for larger surfaces.
16. Conclusion
Restoring a glossy finish to resin after sanding is easier than it may seem. The key is following a step-by-step approach: start with proper sanding using a gradual grit progression, clean the surface thoroughly, and then polish using the right compounds or pads. For extra clarity and depth, a thin layer of clear resin or epoxy glaze can be applied.
By understanding how sanding affects the surface and using the correct techniques, even dull or cloudy pieces can be transformed into smooth, reflective works of art. Taking the time to prepare, polish, and finish carefully ensures a professional result every time.
Learning how to make resin shiny after sanding allows you to achieve a clear, glass-like finish that enhances the beauty of your projects and makes your resin pieces look their best.