

Table of Contents
1. Introduction
Resin loses its shine mainly because the surface does not cure smooth and even. Incomplete curing, uneven mixing, dust, high humidity, or low temperature can all stop resin from forming a glossy finish. Even tiny surface imperfections that are hard to see can make resin look dull by scattering light.
Understanding these causes is the first step in learning how to make resin shiny without polish, because fixing the curing and surface issues often restores shine without using any extra products.
2. What Makes Resin Shiny in the First Place?
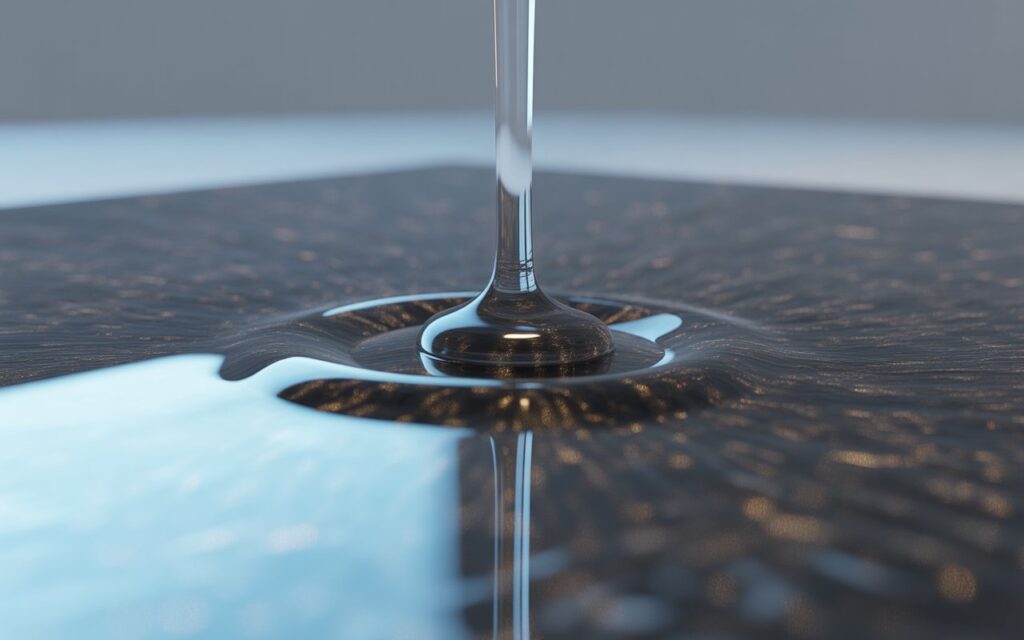
Resin appears shiny when its surface is smooth, fully cured, and able to reflect light evenly. Gloss is not created by products or coatings alone—it comes from how level and uniform the top layer becomes during curing.
Proper mixing plays a key role. When resin and hardener are mixed thoroughly and in the correct ratio, the material cures evenly and forms a clear, glass-like surface. Poor mixing can leave soft spots or texture that reduce shine.
Curing conditions also matter. Stable temperature, low humidity, and a clean workspace allow the resin to self-level as it sets. When the surface levels naturally without dust, bubbles, or ripples, it reflects light more effectively and looks glossy.
In simple terms, shine is the result of smoothness, full curing, and controlled conditions. When these basics are in place, resin naturally develops a clear and polished appearance without extra treatments.
3. Common Reasons Resin Turns Dull or Matte
Resin usually turns dull or matte when something interferes with the curing or surface leveling process. One of the most common causes is incorrect mixing. If the resin and hardener are not measured or stirred properly, the surface may cure unevenly and lose its natural gloss.
Environmental factors also play a major role. High humidity can introduce moisture into the resin, leading to cloudiness or a soft, matte finish. Cold temperatures slow curing, while excessive heat can create surface ripples, both of which reduce shine.
Another frequent issue is surface contamination. Dust, fingerprints, or tiny debris can settle on the resin while it cures, breaking the smooth surface needed for light reflection. Sanding too early or using coarse abrasives can also leave fine scratches that make the resin appear dull.
In most cases, a matte finish is the result of small technical issues rather than poor-quality resin. Identifying these causes makes it easier to prevent dullness and achieve a clean, glossy result.

4. Can You Make Resin Shiny Without Polish?
Yes, it is possible to restore shine without using commercial polishing products. In many cases, improving the surface condition is enough to bring back a glossy appearance. Resin becomes shiny when the top layer is smooth, level, and fully cured, and this can be achieved through proper techniques rather than added compounds.
Controlled heat can help the surface re-level by gently softening the top layer, allowing minor imperfections to smooth out. Fine wet sanding is another effective option, as it removes tiny scratches and uneven areas that dull the finish. For deeper issues, applying a thin, clear resin layer can create a fresh, smooth surface that naturally reflects light.
These methods work because they address the root cause of dullness instead of masking it. When curing, surface smoothness, and working conditions are corrected, resin can regain its shine without relying on polish.
5. Heat Methods: How Heat Can Restore Resin Shine
Heat is one of the quickest ways to improve the appearance of a dull resin surface. When applied correctly, gentle heat slightly softens the top layer, allowing it to level out and smooth minor imperfections. As the surface evens out, light reflects more evenly, creating a glossy look.
A heat gun or small torch works well for this method. The key is to keep the heat source moving and at a safe distance to avoid burning, warping, or creating waves in the resin. Short passes are more effective than holding heat in one spot.
Heat methods are best for light dullness or uneven texture, not deep scratches or severe cloudiness. When used carefully, controlled heat can quickly restore shine without adding extra materials or altering the resin structure.
6. Sanding Techniques That Create a Glossy Finish
Sanding is an effective way to smooth resin surfaces and enhance light reflection. The goal is to remove tiny imperfections and scratches that scatter light, making the surface appear dull.
Start with fine-grit sandpaper, around 800–1000 grit, and use water to wet the surface. Wet sanding prevents dust buildup and reduces the risk of deep scratches. Gradually move to higher grits, such as 1500–3000, for a smoother finish. Each step removes scratches from the previous grit, creating a polished effect without any compounds.
For best results, keep the surface and sandpaper wet, use light pressure, and sand in circular motions. Once the resin is smooth and even, it will naturally reflect light, producing a glossy, professional-looking finish.
7. How to Make Resin Look Glossy Using a Clear Top Coat
Applying a thin layer of clear resin over a cured piece is a simple way to achieve a glossy, smooth surface. The top coat fills in small scratches, uneven areas, and minor imperfections, creating a reflective finish without the need for polishing.
To use this method, mix a small amount of resin according to the manufacturer’s instructions and pour or brush a thin, even layer over the surface. Allow it to self-level naturally and cure fully in a clean, dust-free environment. Avoid overpouring, as thick layers can cause bubbles or uneven curing.
This technique is especially useful for pieces that have minor surface flaws or areas that lost shine during sanding. A clear top coat restores depth and gloss, giving resin projects a professional, glass-like appearance.
8. Household Items That Can Help Restore Resin Shine
Several common household items can help improve the appearance of resin surfaces when professional polishing products aren’t available. These items work by gently smoothing the surface or enhancing light reflection.
Toothpaste:
Non-gel, plain toothpaste contains mild abrasives that can remove tiny scratches. Apply a small amount with a soft cloth and rub in circular motions, then rinse and dry.
Baking Soda:
Mixed with water to form a paste, baking soda can gently buff minor imperfections. Use a soft cloth and light pressure to avoid creating new scratches.
Olive Oil or Mineral Oil:
These can temporarily increase surface shine by filling microscopic scratches, but they do not provide a permanent solution. Clean the surface before applying for the best effect.
Vinegar Solution:
Diluted vinegar can help remove residue or cloudiness from the resin surface, restoring some gloss. Always rinse and dry afterward.
While these methods are effective for minor dullness, they work best when the resin is already smooth and fully cured. For deeper scratches or uneven surfaces, sanding or a clear top coat may still be needed.
9. Can I Use Toothpaste to Polish Resin?
Yes, toothpaste can be used as a mild abrasive to improve the surface of resin. Plain, non-gel toothpaste works best because it contains tiny particles that gently remove minor scratches and imperfections without damaging the material.
To use this method, apply a small amount of toothpaste to a soft, clean cloth and rub it on the resin in circular motions. After buffing for a few minutes, rinse the surface with water and dry it completely.
This technique is most effective for small scratches or lightly dull areas. It is not a permanent solution for deeply scratched or uneven surfaces, but it can quickly restore some shine without needing specialized polishing products.
10. How to Bring Shine Back to Old or Scratched Resin
Restoring a glossy finish to old or scratched resin is possible with simple techniques that focus on smoothing the surface and removing imperfections.
Step 1:
Clean the Surface – Remove dust, dirt, or oils using a soft cloth and mild soap. A clean surface ensures better results with any method.
Step 2:
Light Sanding – Use fine-grit sandpaper (800–1000 grit) and wet sand the affected areas. Gradually move to higher grits (1500–3000) to create a smooth, reflective surface.
Step 3:
Apply Heat (Optional) – Gentle heat from a heat gun or small torch can help the surface level out and regain a subtle gloss. Keep the tool moving and avoid overheating.
Step 4:
Thin Clear Resin Layer – For deeper scratches or severely dull areas, a fresh thin coat of clear resin will restore a smooth, glass-like finish.
These steps allow even old or damaged resin pieces to regain shine naturally, without relying on commercial polish. Proper care and controlled techniques ensure long-lasting results.
11. Mistakes That Prevent Resin from Becoming Glossy
Several common errors can stop resin from achieving a smooth, shiny finish. Recognizing these mistakes helps prevent dull results.
Incorrect Mixing:
Using the wrong resin-to-hardener ratio or failing to stir thoroughly can create uneven curing and a matte surface.
Poor Curing Conditions:
High humidity, low temperatures, or dust in the workspace can lead to cloudiness or surface imperfections that reduce shine.
Rushing the Process:
Touching, sanding, or handling resin before it fully cures can leave scratches and marks that scatter light.
Using Harsh or Coarse Materials:
Overly abrasive sandpaper or cleaning tools can damage the surface, making it appear dull.
By avoiding these mistakes and following proper techniques, resin naturally develops a smooth, reflective surface that looks professional and glass-like.
12. Best Method Comparison: Which Shine Method Works Best?
Different techniques can restore a glossy finish to resin, and each has its strengths depending on the surface condition and desired result.
Heat Method:
Fast and effective for minor dullness or uneven texture. Works best on fully cured resin with small surface imperfections. Avoids adding extra layers but is not suitable for deep scratches.
Wet Sanding:
Removes tiny scratches and creates a smooth surface. Ideal for slightly rough or scratched areas. Requires patience and progressive grits but produces long-lasting shine.
Clear Top Coat:
Perfect for severely dull or damaged surfaces. A thin layer of resin fills imperfections and restores a reflective finish. It’s more permanent than temporary methods but requires additional curing time.
Household Items:
Toothpaste, baking soda, or oils can give quick, temporary shine for minor issues. Best for small spots or light scratches but not a substitute for proper techniques.
Conclusion:
For minor dullness, heat or wet sanding works best. For deeper scratches or older pieces, a clear top coat is the most reliable solution. Household items are only suitable for quick fixes or maintenance.
13. Final Tips for Keeping Resin Glossy Long-Term
Maintaining a glossy resin surface requires simple care and attention.
Clean Gently:
Use a soft, lint-free cloth and mild soap to remove dust and dirt. Do not use harsh cleaning products that could damage the surface.
Avoid Direct Sunlight:
Prolonged exposure to UV rays can yellow resin and reduce its shine. Store pieces away from windows or use UV-protective coatings.
Prevent Scratches:
Handle resin carefully and place soft padding under heavy objects. Avoid sliding sharp items across the surface.
Store Properly:
Keep finished pieces in a dry, dust-free area with stable temperature. Sudden humidity or heat changes can affect the surface.
Regular Maintenance:
Light buffing with a soft cloth or a mild household solution can help maintain gloss without harsh chemicals.
Following these tips ensures resin retains its smooth, reflective finish and looks professional for years.
14. FAQs
1. How to make resin look glossy?
Ensure resin is fully cured and smooth. Use gentle heat, fine wet sanding, or a thin clear resin layer to restore shine.
2. Can I use toothpaste to polish resin?
Yes. Use plain non-gel toothpaste on a soft cloth to rub minor scratches. Rinse and dry afterward.
3. What household items can I use to polish epoxy resin?
Toothpaste, baking soda paste, olive or mineral oil, and diluted vinegar can help improve minor dull spots.
4. How to bring shine back to resin?
Smooth the surface with sanding, apply gentle heat, or use a thin clear resin layer for deeper scratches.
5. Why is my resin not glossy?
Dull resin is caused by uneven curing, high humidity, dust, low temperatures, or surface scratches.
6. How to fix dull epoxy?
Wet sand with fine-grit paper, apply gentle heat, or use a clear epoxy top coat for deeper dullness.
7. Tips for keeping resin shiny long-term
Clean gently, avoid direct sunlight, prevent scratches, and occasionally buff with a soft cloth.
15. Conclusion:
Achieving a glossy resin surface depends on proper technique rather than relying on extra products. Ensuring full curing, a smooth surface, and a clean, controlled workspace sets the foundation for a reflective, professional finish.
For minor dullness, gentle heat or fine wet sanding can quickly restore shine, while a thin layer of clear resin works best for older pieces or deeper scratches. Household methods, like toothpaste or mild abrasives, can also help in small areas but are better for temporary touch-ups.
By following these steps, you can confidently learn how to make resin shiny without polish, giving your pieces a durable, glass-like appearance that stays vibrant and glossy over time.