
1️⃣ Introduction
When people search how to dry resin with UV light, they usually mean the process of curing UV resin. Unlike paint or glue, UV resin does not dry in the air. Instead, it hardens when exposed to ultraviolet (UV) light.
UV resin contains special chemicals called photoinitiators. When a UV lamp or UV LED light shines on the resin, these chemicals start a reaction that turns the liquid resin into a solid, durable material in just a few minutes.
This curing method is much faster than traditional epoxy resin, which can take many hours to harden. That’s why many crafters use UV light for resin jewelry, charms, and small craft projects. In simple terms, how to dry resin with UV light means using a UV lamp to quickly cure and harden UV resin so it becomes strong and fully set.
2️⃣ How UV Light Cures Resin
UV resin hardens through a chemical process called photopolymerization. This process begins when ultraviolet light shines on the liquid resin and activates special ingredients inside it.
These ingredients, known as photoinitiators, react to UV light and start a chain reaction that links the resin molecules together. As this reaction continues, the liquid resin quickly changes into a solid and durable material. Most UV resins cure best under a UV wavelength between 365 nm and 405 nm. This is why many crafters use UV LED lamps or UV nail lamps, because they produce the right type of light needed for proper curing.
The curing time usually depends on a few factors, such as the strength of the UV lamp, the thickness of the resin layer, and the resin quality. Thin layers often cure faster, while thicker layers may require more time or multiple curing cycles. This fast and controlled curing process makes UV resin ideal for jewelry making, small crafts, and decorative projects, where quick results and a clear glossy finish are important.
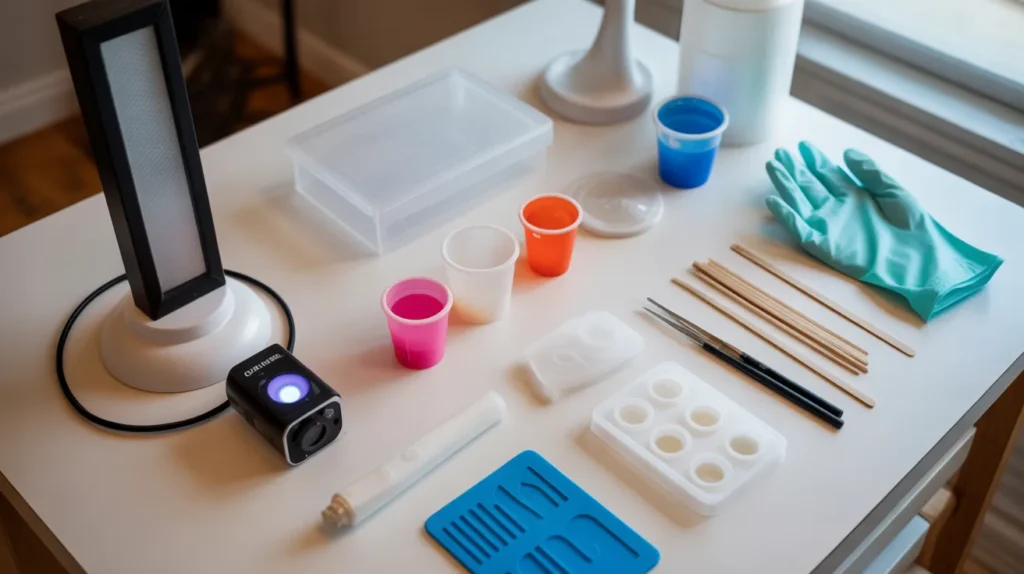
3️⃣ Tools Needed to Dry Resin With UV Light
To cure UV resin properly, you need a few basic tools. These tools help ensure the resin hardens evenly and gives a smooth, professional finish.
UV Lamp or UV LED Lamp
A UV lamp is the most important tool. It produces ultraviolet light that activates the curing process. Many crafters use UV nail lamps or UV LED lamps because they are easy to use and cure resin quickly.
UV Flashlight
A UV flashlight is a small and portable option. It is useful for curing small resin pieces, quick repairs, or detailed areas that need extra light.
Silicone Molds
Silicone molds are used to shape the resin into different designs such as jewelry, charms, and decorative items. They are flexible, which makes it easy to remove the hardened resin.
Mixing and Pouring Tools
Items like mixing sticks, droppers, or small cups help you pour the resin carefully and control the amount used in each mold.
Protective Gear
Safety is important when working with resin. Wearing gloves and protective glasses helps protect your skin and eyes during the crafting process. Using the right tools makes the curing process easier and helps create clear, smooth, and durable resin projects.
4️⃣ Step-by-Step: How to Dry Resin With UV Light
Follow these simple steps to properly cure UV resin and get a smooth, solid finish.
1. Prepare Your Workspace
Start with a clean and flat surface. Place your silicone mold or project on a stable table and make sure your UV lamp is ready to use.
2. Pour the Resin Carefully
Slowly pour the resin into the mold or onto your project. Avoid overfilling and try to pour gently to reduce air bubbles.
3. Remove Air Bubbles
If bubbles appear, use a toothpick or small tool to pop them. This helps create a clear and smooth final result.
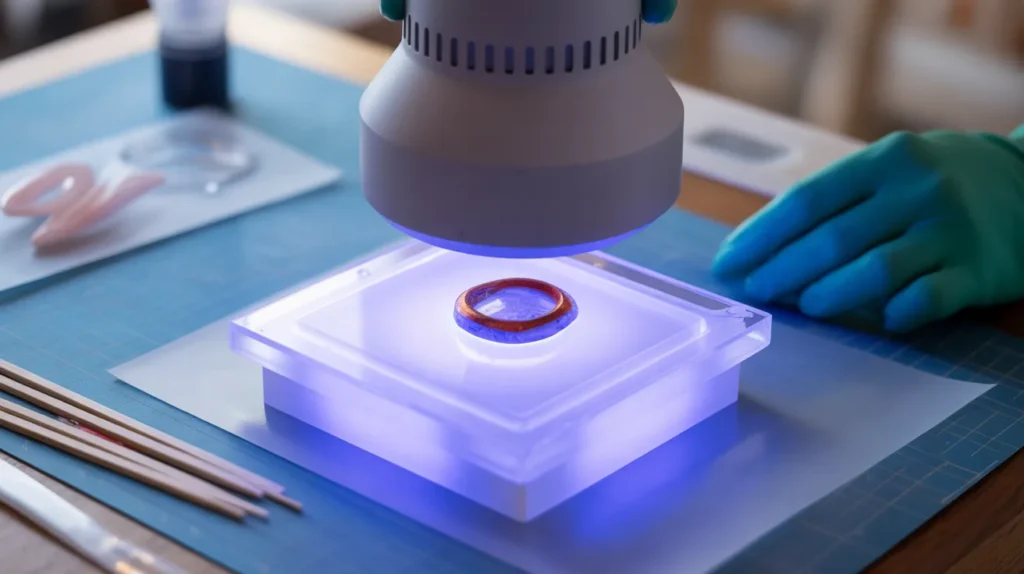
4. Place Under the UV Lamp
Put the piece under a UV lamp or LED curing light. Make sure the light covers the entire surface so the resin cures evenly.
5. Cure for the Recommended Time
Most thin layers harden within 1–3 minutes, depending on the lamp power and resin brand. Thicker layers may take longer.
6. Check and Repeat if Needed
After curing, gently touch the surface. If it still feels soft or sticky, place it under the light again for another short curing cycle.
5️⃣ Factors That Affect UV Resin Drying Time
Several factors can influence how quickly UV resin cures under ultraviolet light. Understanding these factors helps you achieve better and more consistent results.
1. Power of the UV Lamp
The strength of the lamp plays an important role. Higher wattage lamps usually cure resin faster, while weaker lamps may take longer to fully harden the material.
2. Thickness of the Resin Layer
Thin layers cure much faster than thick ones. If the resin layer is too thick, the light may not reach the bottom properly, which can lead to uneven curing.
3. Quality of the Resin
Different brands of UV resin have different formulas. High-quality resin often cures more evenly and quickly compared to lower-quality products.
4. Distance From the Light Source
The closer the resin is to the UV lamp, the stronger the light exposure will be. If the piece is placed too far away, the curing process may take longer.
5. Transparency of the Material
Clear or light-colored resin allows UV light to pass through easily. Dark pigments or heavy decorations can block the light and slow down the curing process.By controlling these factors, you can improve curing speed and create smooth, strong, and well-finished resin projects.
6️⃣ Best UV Lights for Drying Resin
Choosing the right UV light is important for fast and even resin curing. The best lights usually produce wavelengths between 365 nm and 405 nm, because most UV resins react to light in this range.
A lamp with enough power and proper coverage helps the resin harden smoothly without leaving sticky areas.
Here are some common types used by resin crafters:
UV LED Nail Lamps
These are one of the most popular options for small craft projects. They usually have 36W–54W power, built-in timers, and multiple LED bulbs that cure resin quickly and evenly.
They are affordable and easy for beginners to use.
UV Resin Lamps
These lamps are specifically designed for resin crafting. They often provide a large curing area, which allows you to cure multiple pieces at once. Higher power lamps can also speed up the curing process.
UV Flashlights
A UV flashlight is a small and portable tool. It works well for tiny jewelry pieces, detailed areas, or quick repairs. However, because the light coverage is small, it may take longer for larger projects.
What to Look for in a Good UV Light
When choosing a lamp, consider these factors:
- Wattage – Higher wattage can improve curing speed.
- Wavelength range – Ideally between 365–405 nm for most UV resins.
- Coverage area – A wider light area cures larger pieces evenly.
- Timer settings – Helps control curing time for different projects.
Using the right type of UV light makes the curing process faster, more reliable, and easier for beginners working on resin crafts or jewelry.
7️⃣ Common Problems When Drying Resin With UV Light
Even with the right tools, curing UV resin can sometimes present challenges. Knowing the common issues can help you fix them quickly and get smooth, clear results.
1. Resin Remains Sticky
This usually happens when the resin layer is too thick, the UV lamp is too weak, or the curing time is too short. Solution: apply thinner layers and ensure the light fully covers the piece.
2. Air Bubbles
Bubbles often appear if resin is poured too quickly or mixed too vigorously. Solution: pour slowly, tap the mold gently, or use a toothpick to remove bubbles before curing.
3. Uneven Curing
Sometimes parts of the resin cure faster than others, leaving soft spots. This can occur if the light doesn’t reach all areas evenly or if decorations block the light. Solution: reposition the piece or use multiple curing cycles.
4. Discoloration or Yellowing
Prolonged exposure to sunlight or low-quality resin can cause yellowing. Solution: store cured pieces away from direct sunlight and use high-quality UV resin.
5. Cracking or Shrinking
Rapid curing or very thick layers can create stress in the resin, causing cracks. Solution: cure in thin layers and allow each layer to harden completely before adding more. Understanding these issues and following proper techniques ensures your resin projects remain smooth, clear, and durable every time.
8️⃣ Safety Tips When Using UV Light for Resin
Working with UV resin requires care to protect your skin, eyes, and overall health. Following safety tips ensures a safe and enjoyable crafting experience.
1. Wear Protective Gear
Always use nitrile gloves to avoid skin contact with uncured resin. UV-protective glasses help shield your eyes
9️⃣ Beginner Tips for Perfect UV Resin Curing
If you’re new to resin crafting, following a few simple tips can help you achieve smooth, clear, and fully hardened pieces.
1. Work in Thin Layers
Pour resin in thin layers rather than one thick pour. Thin layers cure faster and reduce the risk of sticky or uneven surfaces.
2. Rotate Your Piece
Move or rotate your project under the UV light to ensure even exposure. This helps prevent soft spots or uneven curing.
3. Use High-Quality Resin
Invest in a reliable UV resin brand. High-quality products cure more evenly, have fewer bubbles, and produce a clearer, glossier finish.
4. Avoid Air Bubbles
Pour slowly and carefully. If bubbles appear, gently tap the mold or use a toothpick to remove them before curing.
5. Follow Curing Time Recommendations
Check the instructions for your resin and lamp. Overexposure or underexposure can affect the final hardness and clarity.
By following these tips, beginners can create professional-looking resin jewelry, charms, and craft projects with minimal mistakes.
🔟 Final Thoughts
Learning how to dry resin with UV light makes crafting faster, easier, and more enjoyable. Unlike traditional resins, UV resin hardens quickly when exposed to the right ultraviolet light, allowing you to create clear, durable, and professional-looking pieces in minutes.
Remember to choose the right UV lamp, work in thin layers, and follow safety precautions**. Proper curing ensures your resin projects, whether jewelry, charms, or decorative items, come out smooth, bubble-free, and fully hardened. With practice and the right tools, anyone can master this technique and enjoy creating beautiful resin crafts efficiently and safely.
1️⃣1️⃣FAQs
Q1: How long does UV resin take to cure?
A: Thin layers usually cure in 1–3 minutes under a UV LED lamp. Thicker layers may take longer, depending on lamp strength and resin quality.
Q2: Can I use a UV nail lamp for resin crafts?
A: Yes, UV nail lamps work well for small projects and jewelry, as they provide the correct wavelength for resin curing.
Q3: Why is my resin sticky after curing?
A: Sticky resin can be caused by insufficient light exposure, thick layers, or low-quality resin. Use thinner layers and ensure proper curing time.
Q4: How do I prevent bubbles in UV resin?
A: Pour slowly, tap the mold gently, or use a toothpick to remove bubbles. High-quality resin and proper mixing techniques reduce bubbles.
Q5: Can colored resin affect curing?
A: Dark pigments or heavy decorations can block UV light, slowing curing. Light or transparent resin cures faster under UV LED lamps.
Q6: Is UV resin safe to use?
A: When handled properly with gloves, protective glasses, and good ventilation, UV resin is safe for craft projects.
Q7: Do I need to cure resin in layers?
A: Yes, curing in thin layers ensures even hardening, reduces cracking, and prevents sticky spots.